There are 50 reduced sized photos along with descriptions to view as you scroll down this page. I recommend clicking on any of these photos to see the close up details of the original photos, The larger photos will "pop-up".
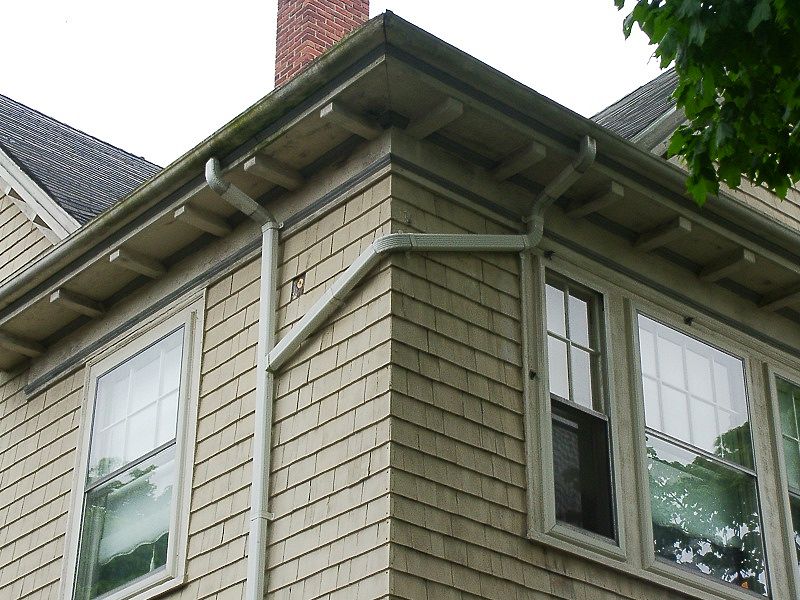
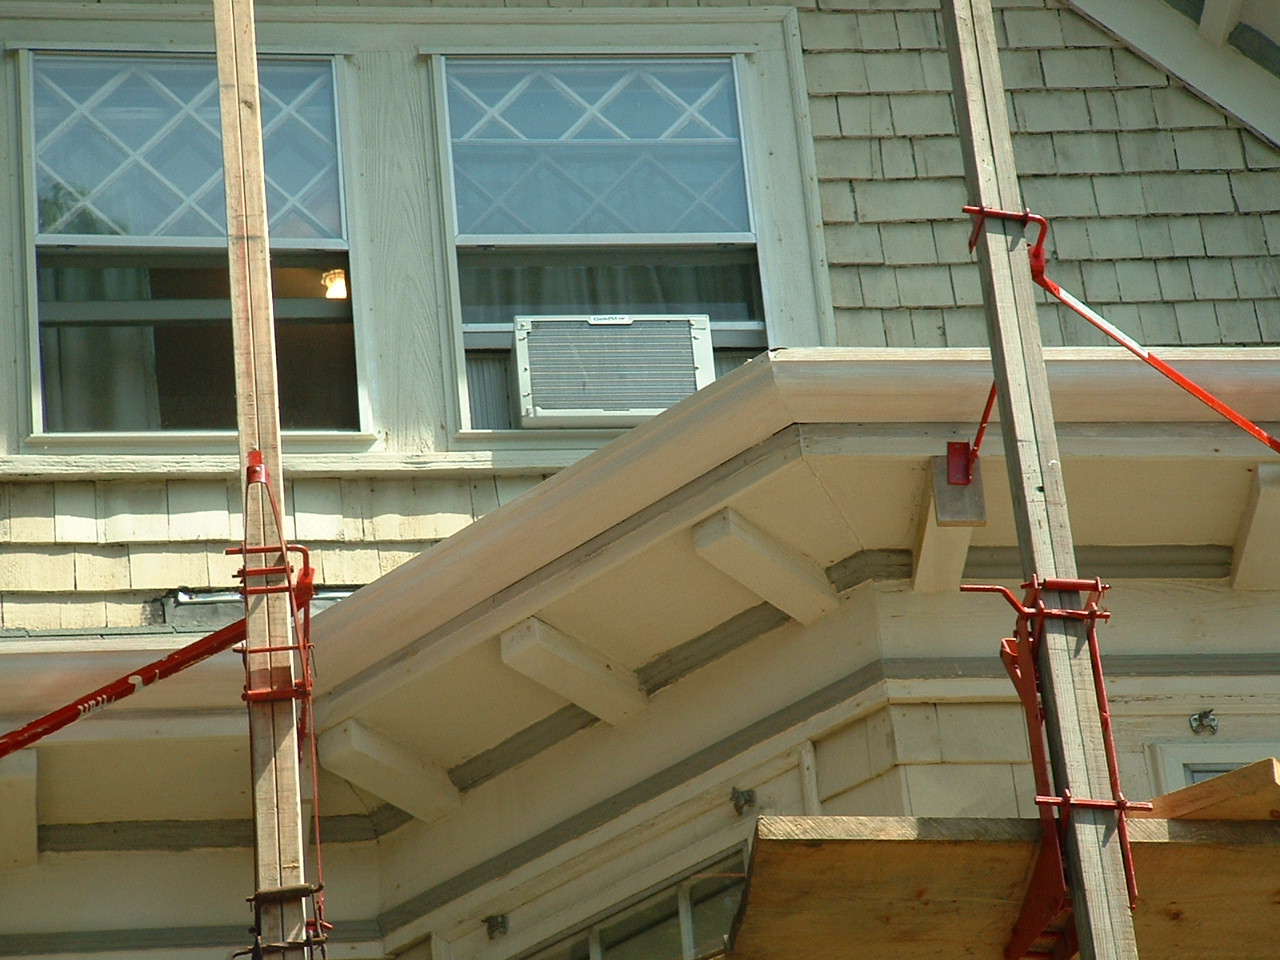
The green algae covered gutter faces indicate often overflows, the result of a combination of clogged gutters, leader outlets, downpiping or underground drainage.
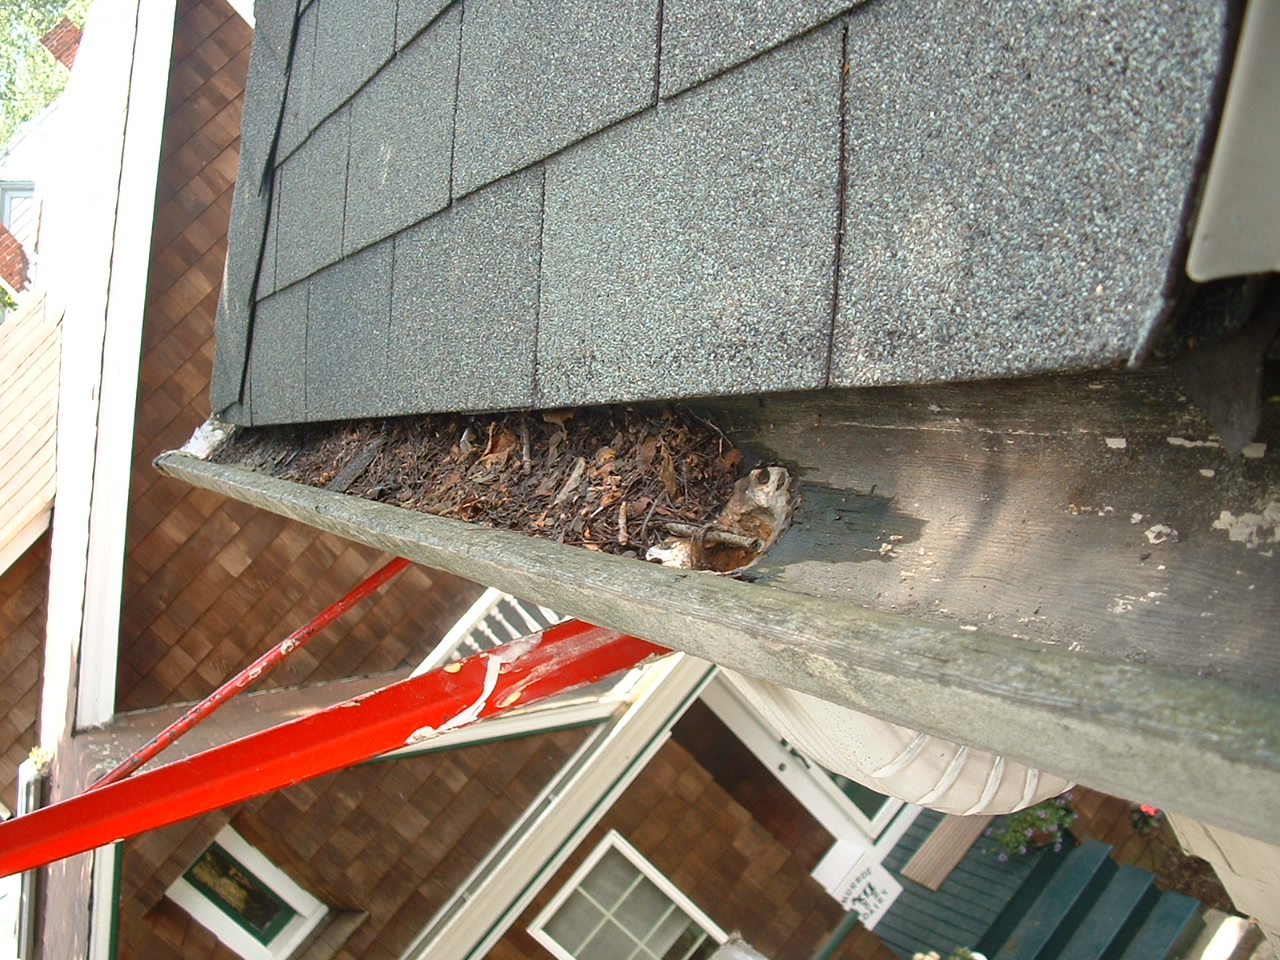
After inspecting all 136' feet of gutter this 3' section was the only area holding debris.
This section is also the only area where the roofing overhung into the gutter apparently preventing the wind from naturally blowing out leaves. Imagine that, self cleaning gutters.
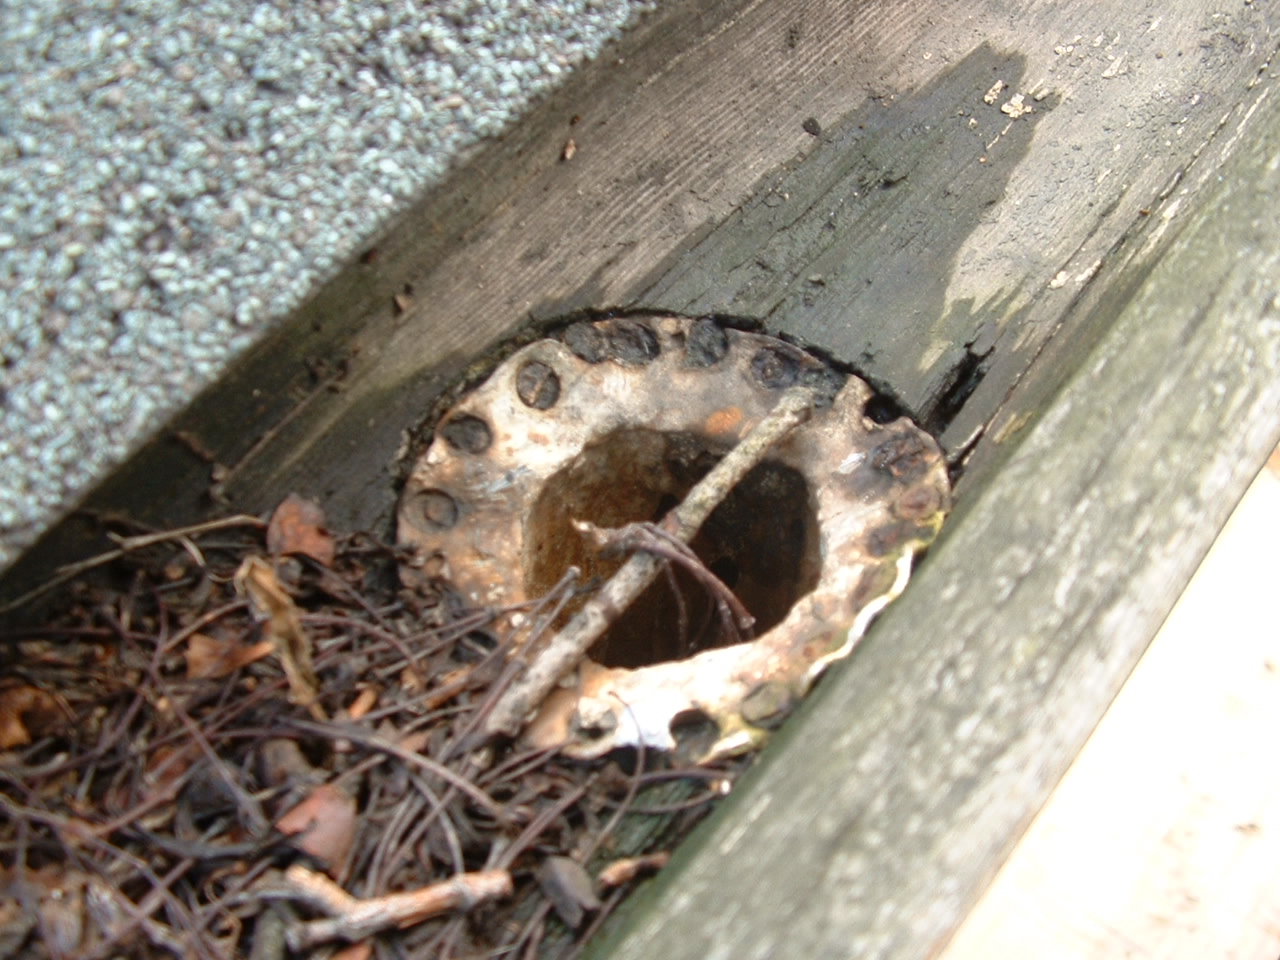
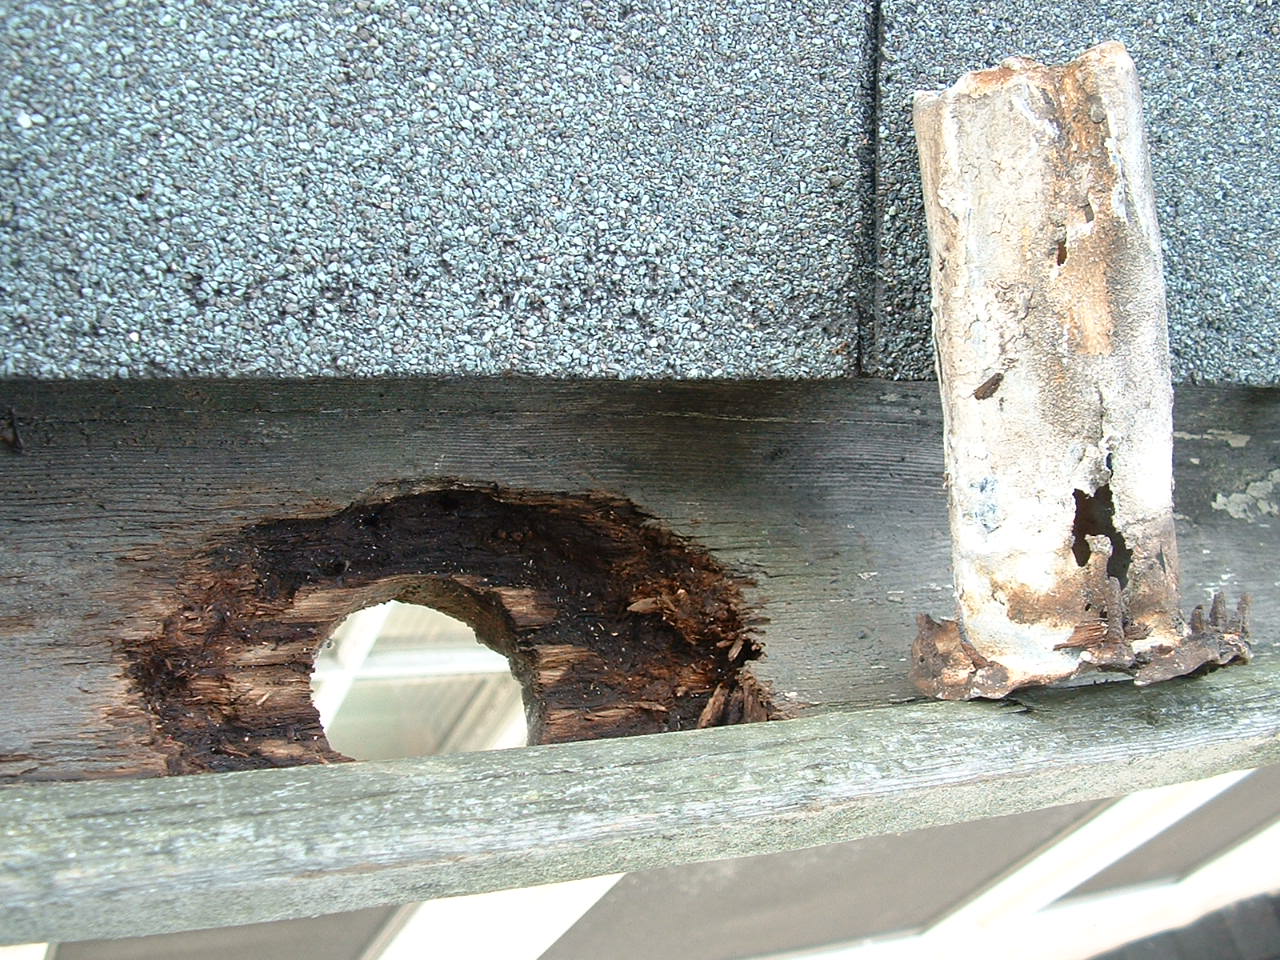
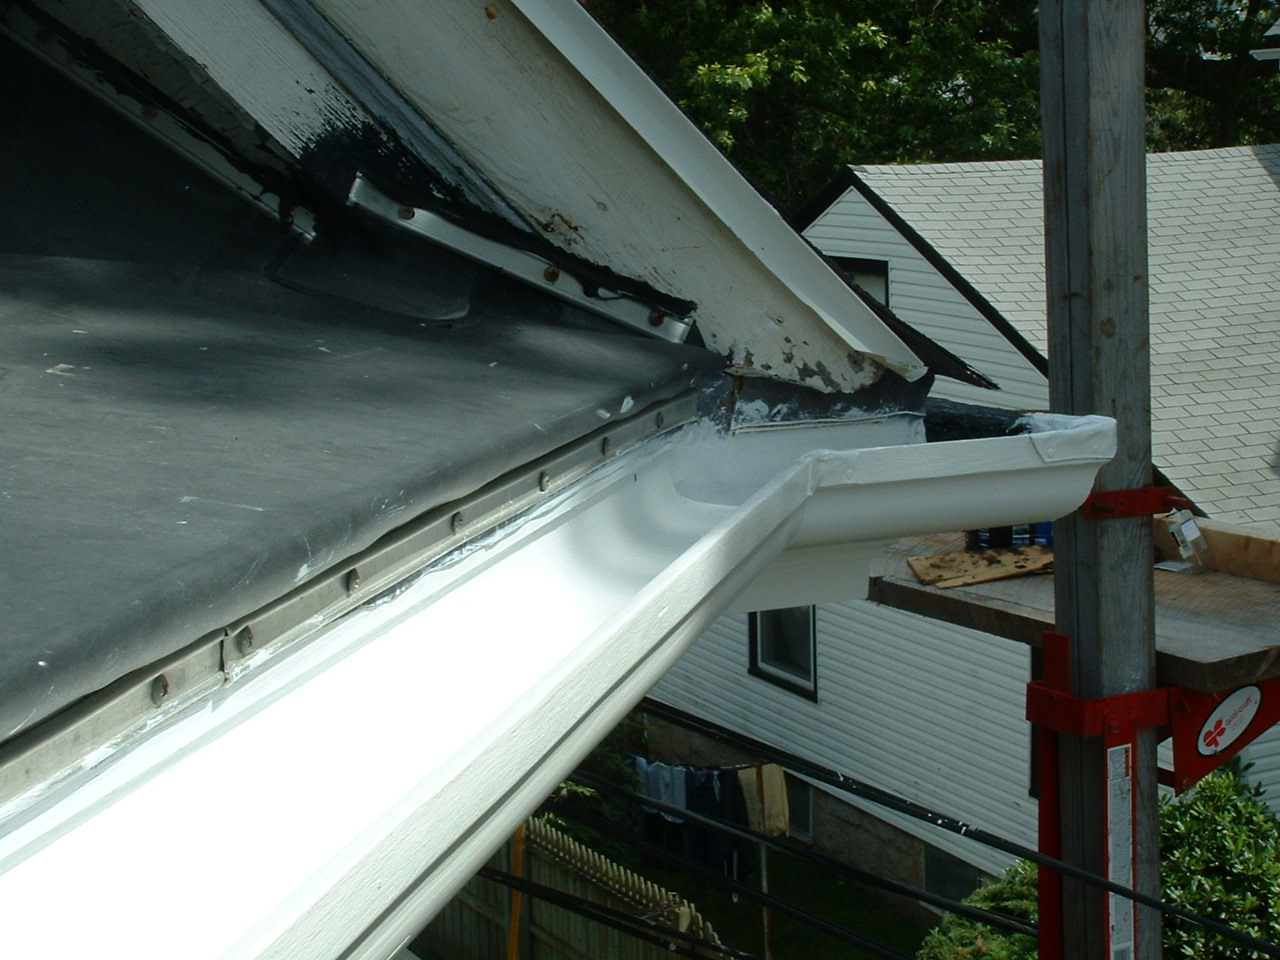
Although this leader outlet was found to be clear, the downpiping was later found to to be plugged solid. The nails/tacks holding in the outlet should have been corrosion resistant copper.
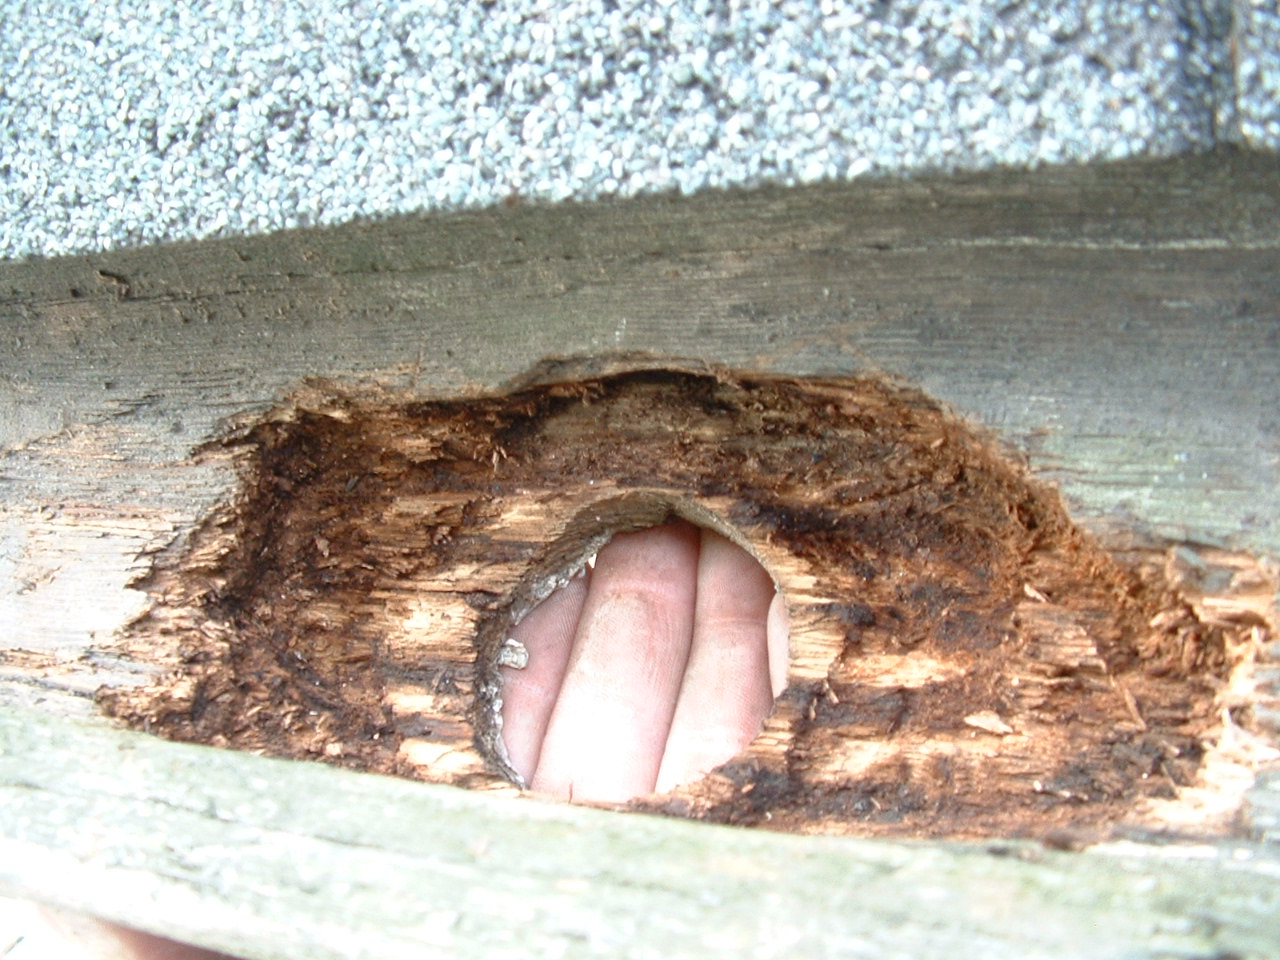
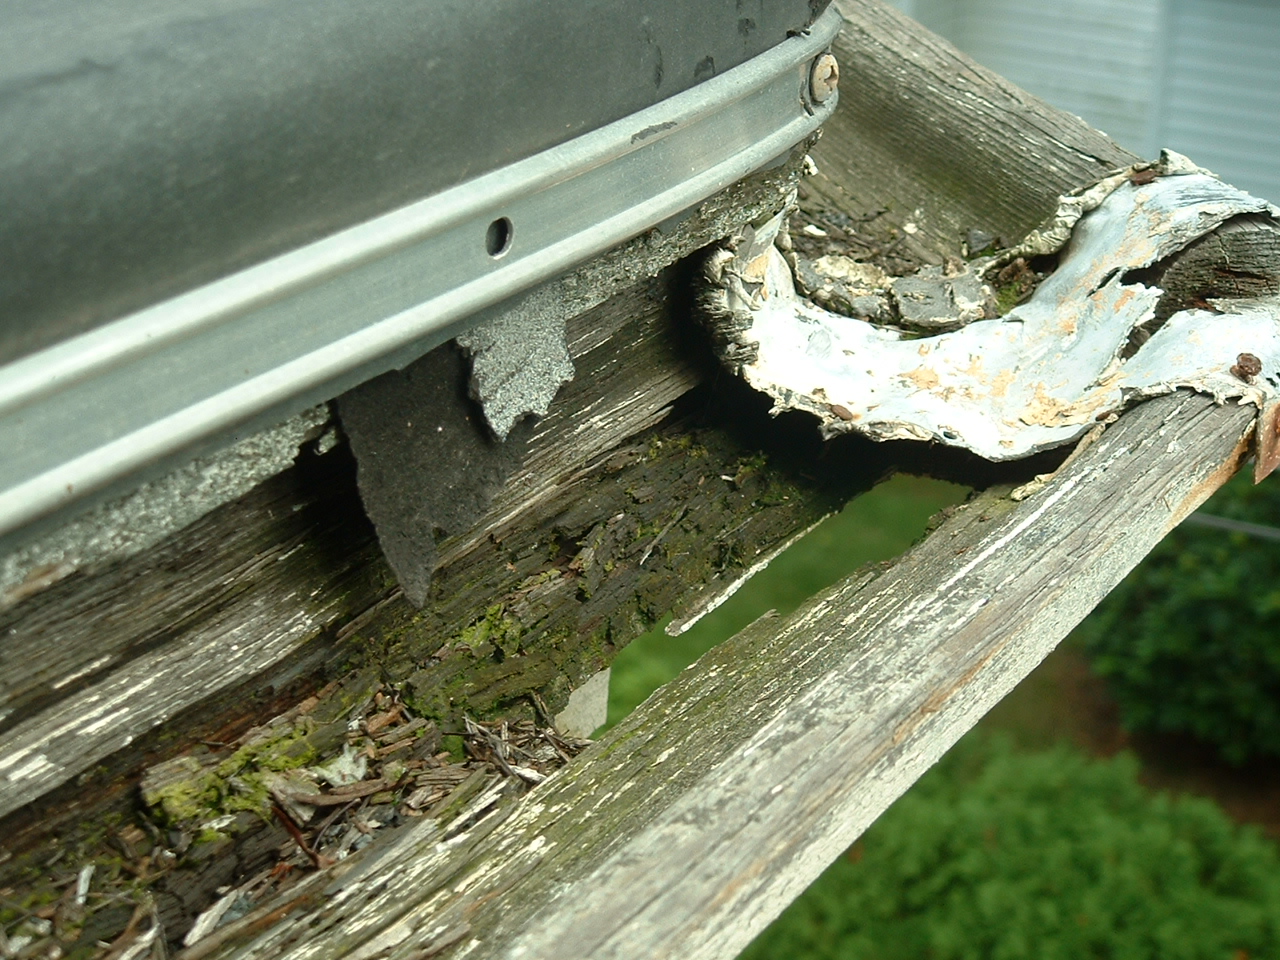
Here is a look after the leader outlet was removed and some of the soft wood scratched out. Notice the lead leader has a corroded whole (acid rain?)
Because the down piping has been plugged solid for years this leader was constantly submerged.
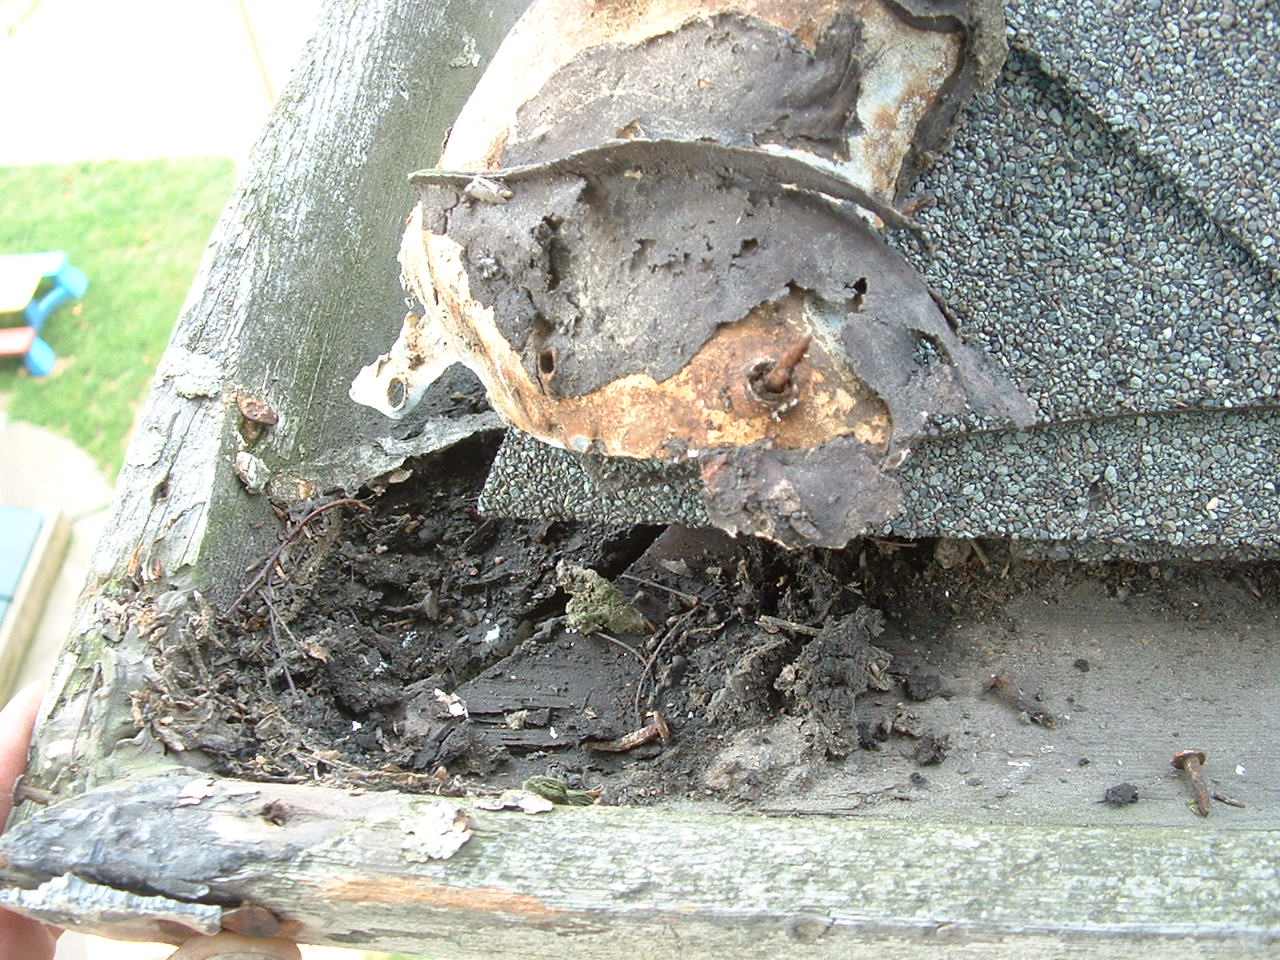
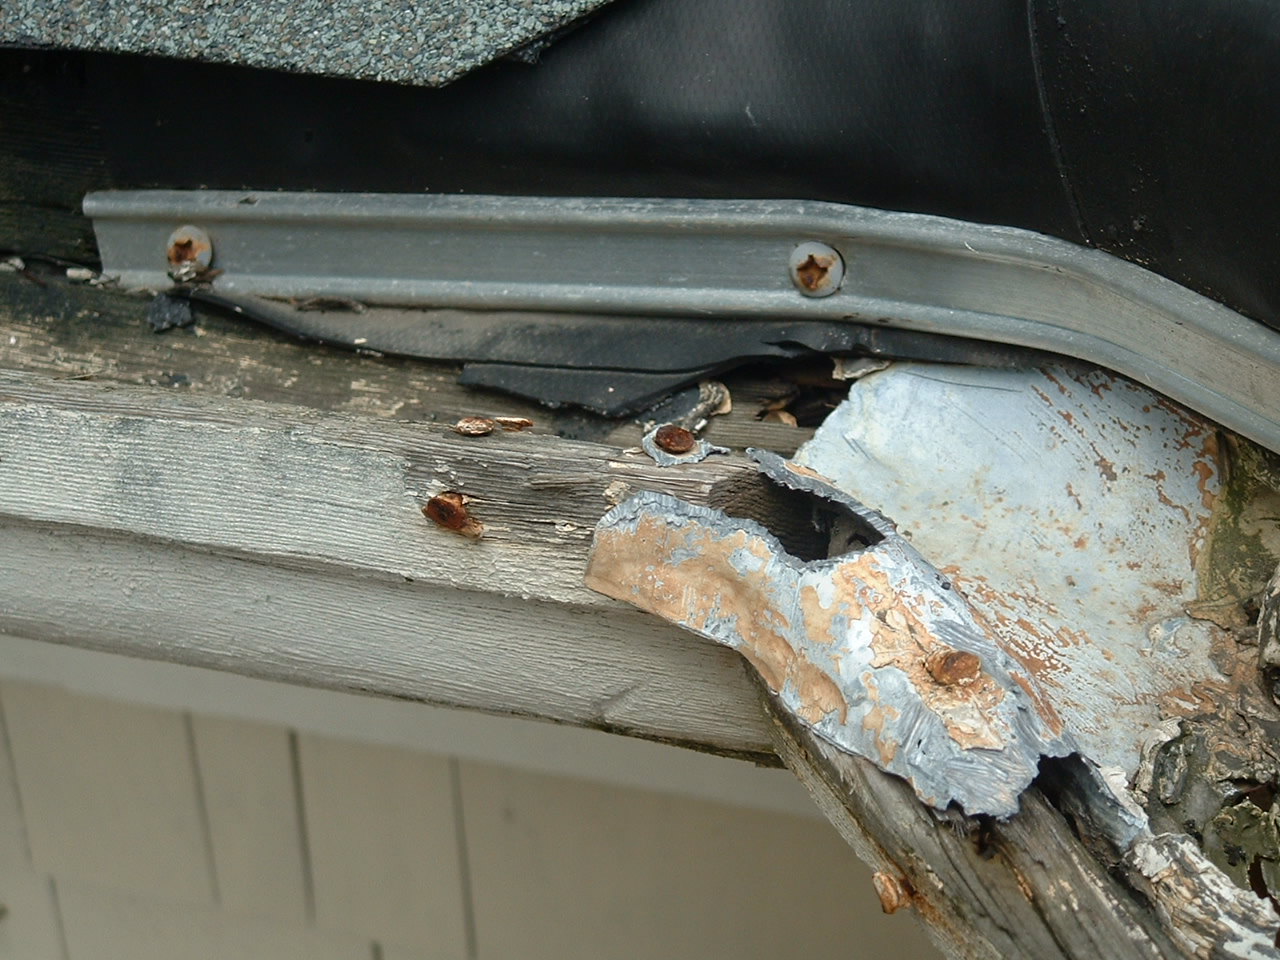
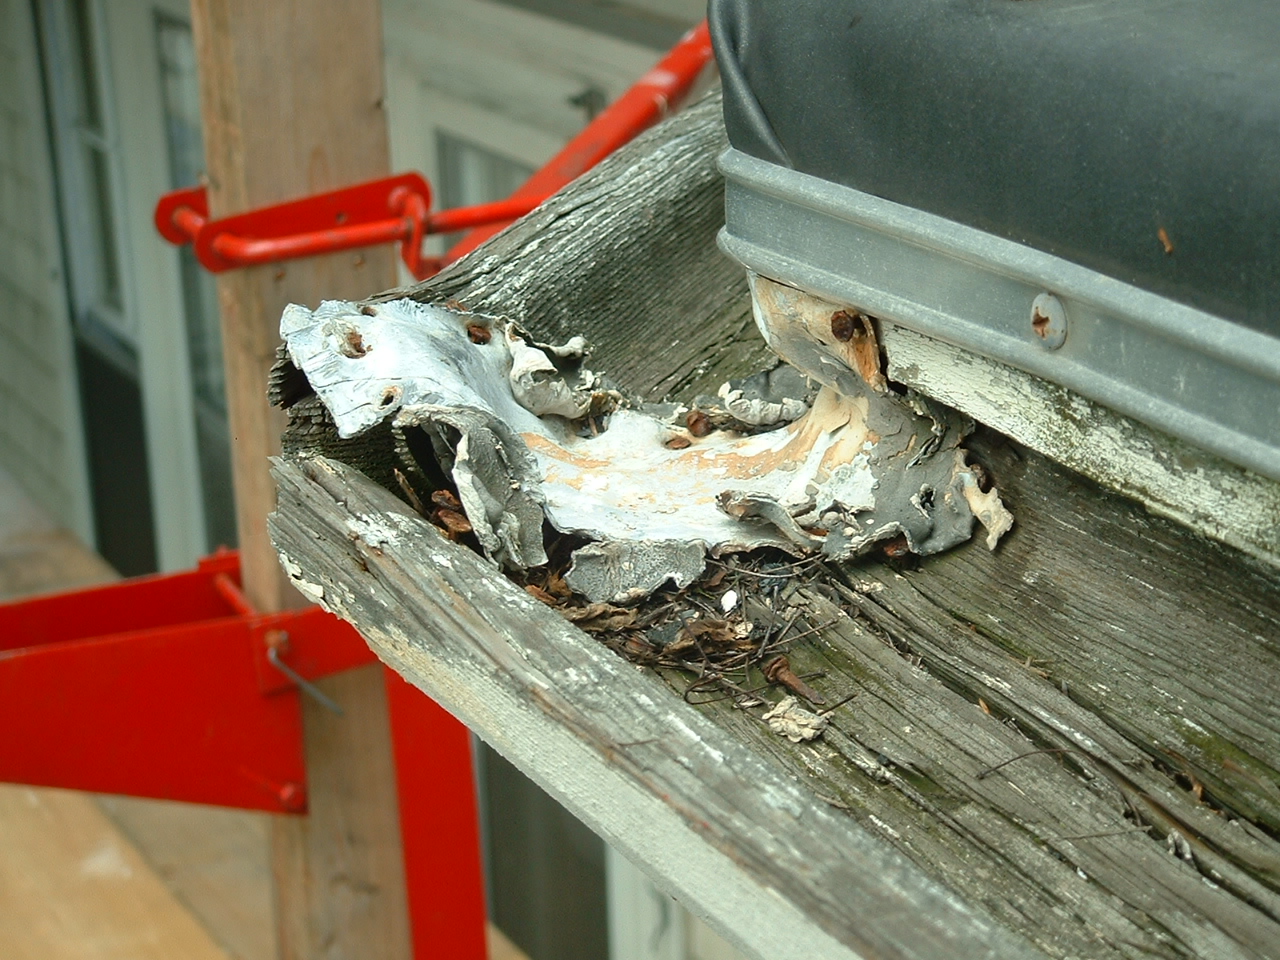
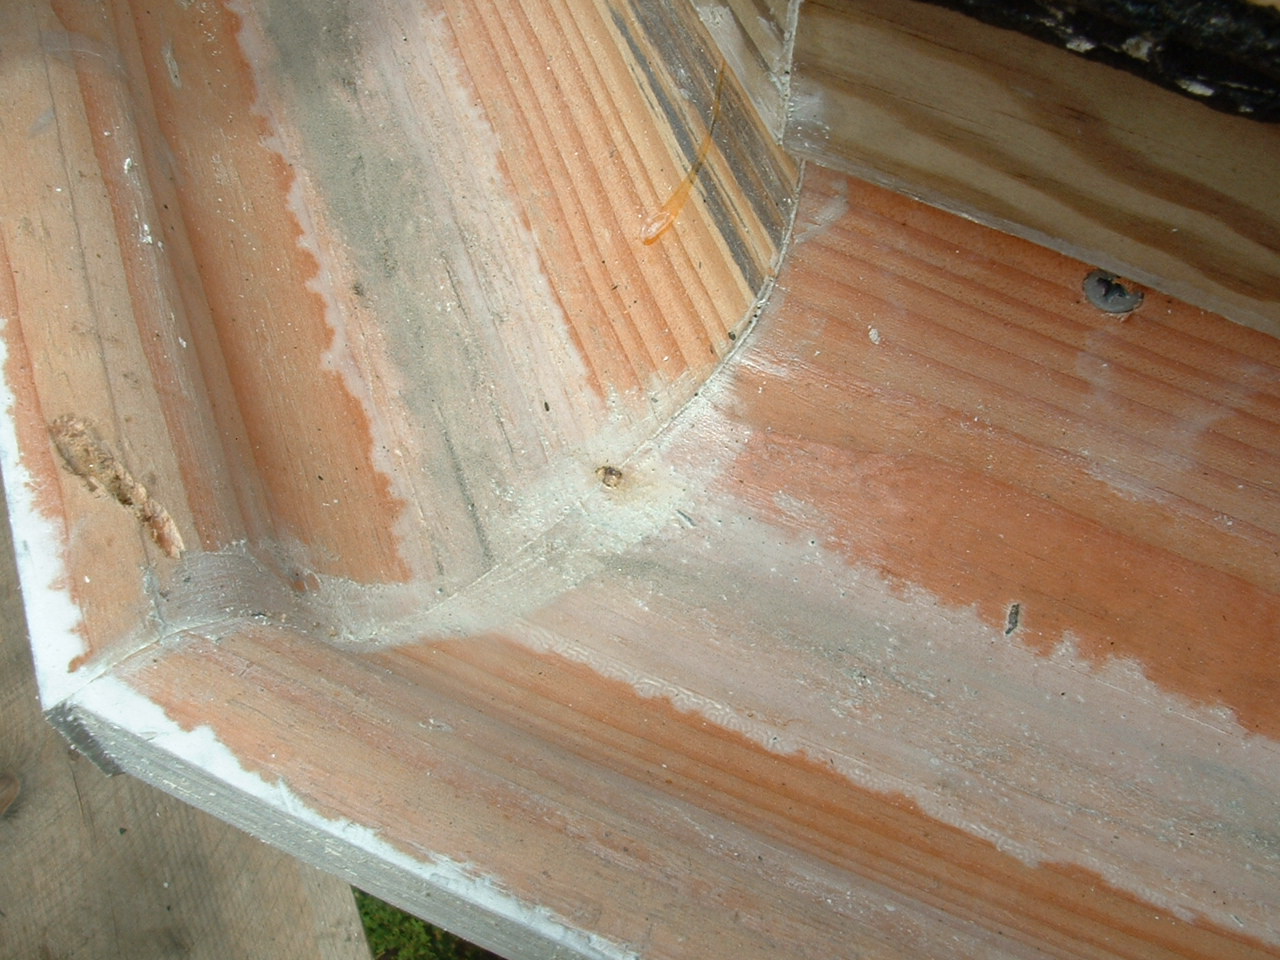
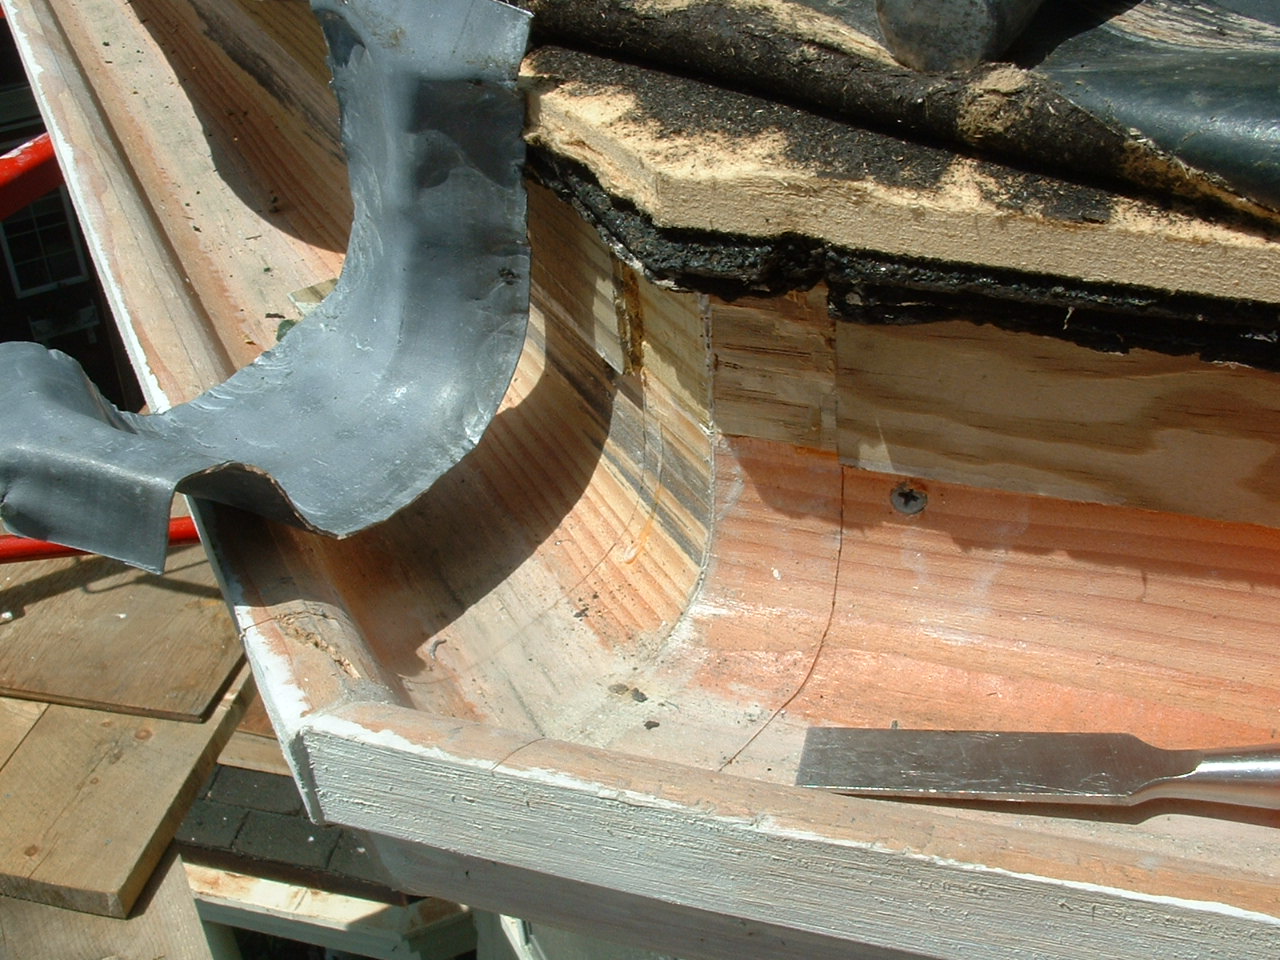
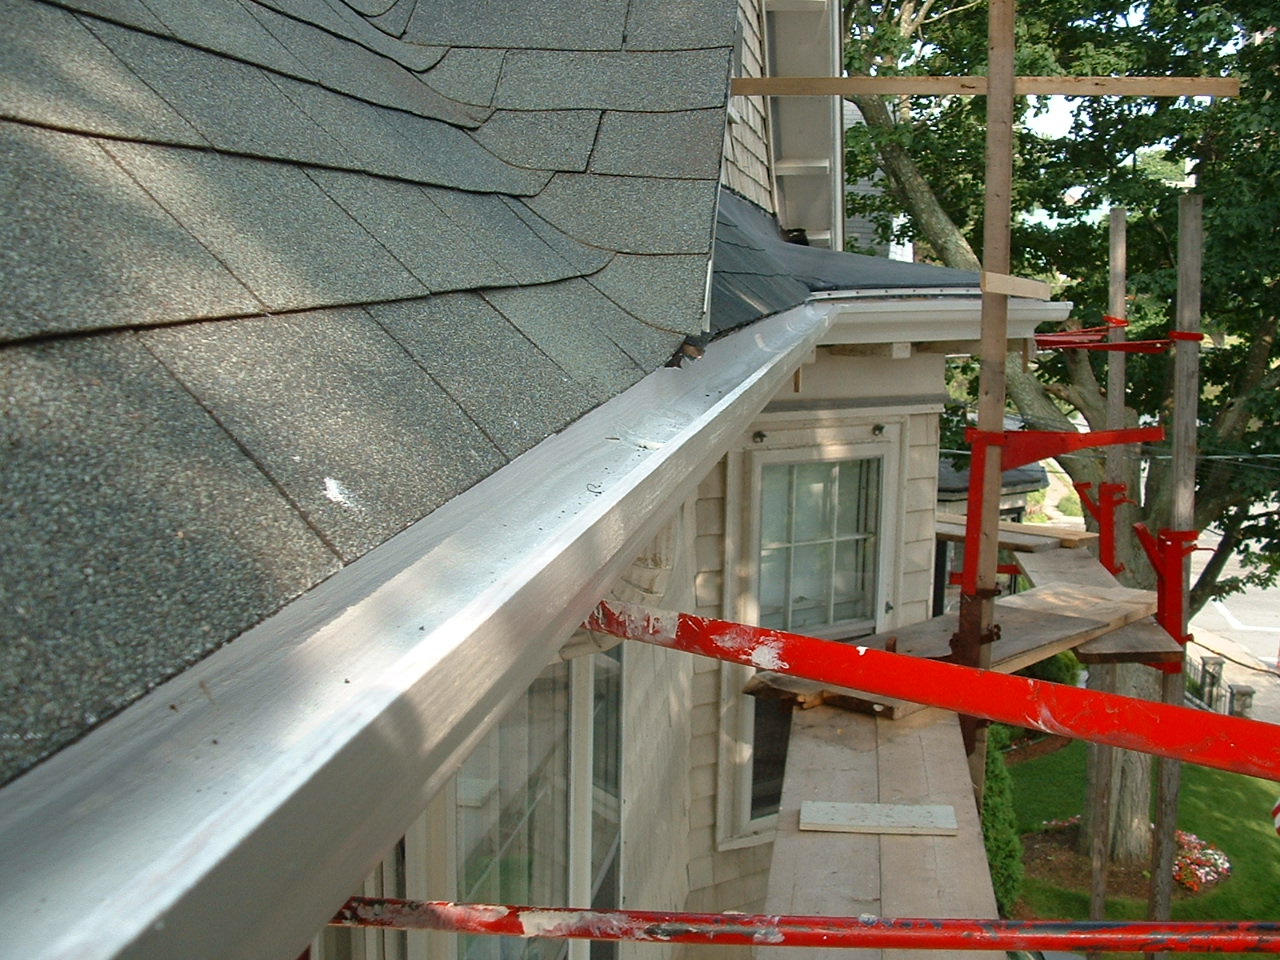
Here's a first look under the lead on the SW corner. Someone set it in a bed of tar but that didn't stop water from seeping in. Tar dries out and looses its adhesion. The lead should have been recessed flush with the bottom of the gutter.
Level gutters drain but the guys that installed these pitched them. The result is that this corner is lower than the leader outlets which are 36" back on either side of this joint. This is is where overflows will occur, at the lowest point.
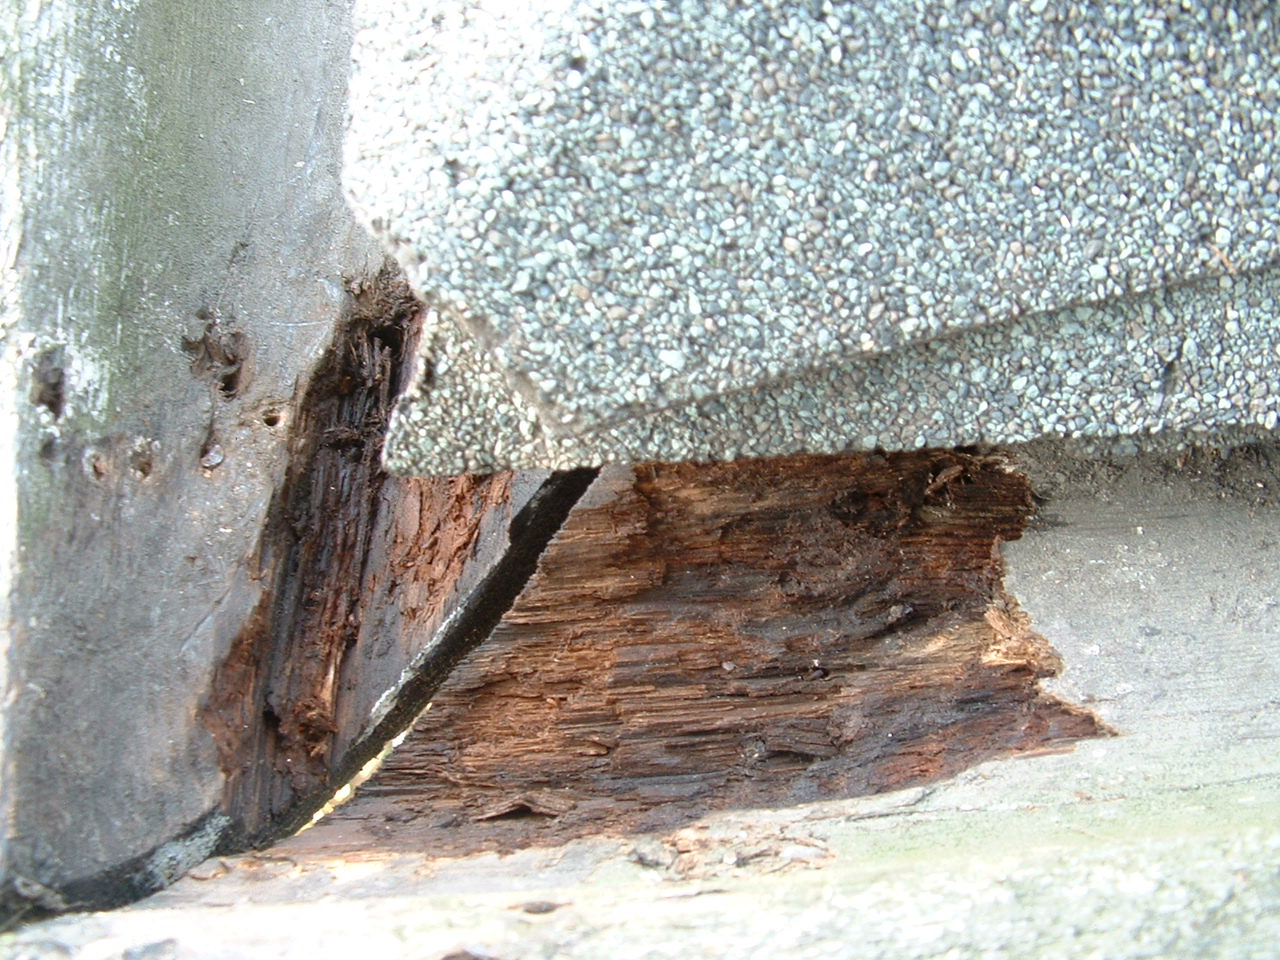
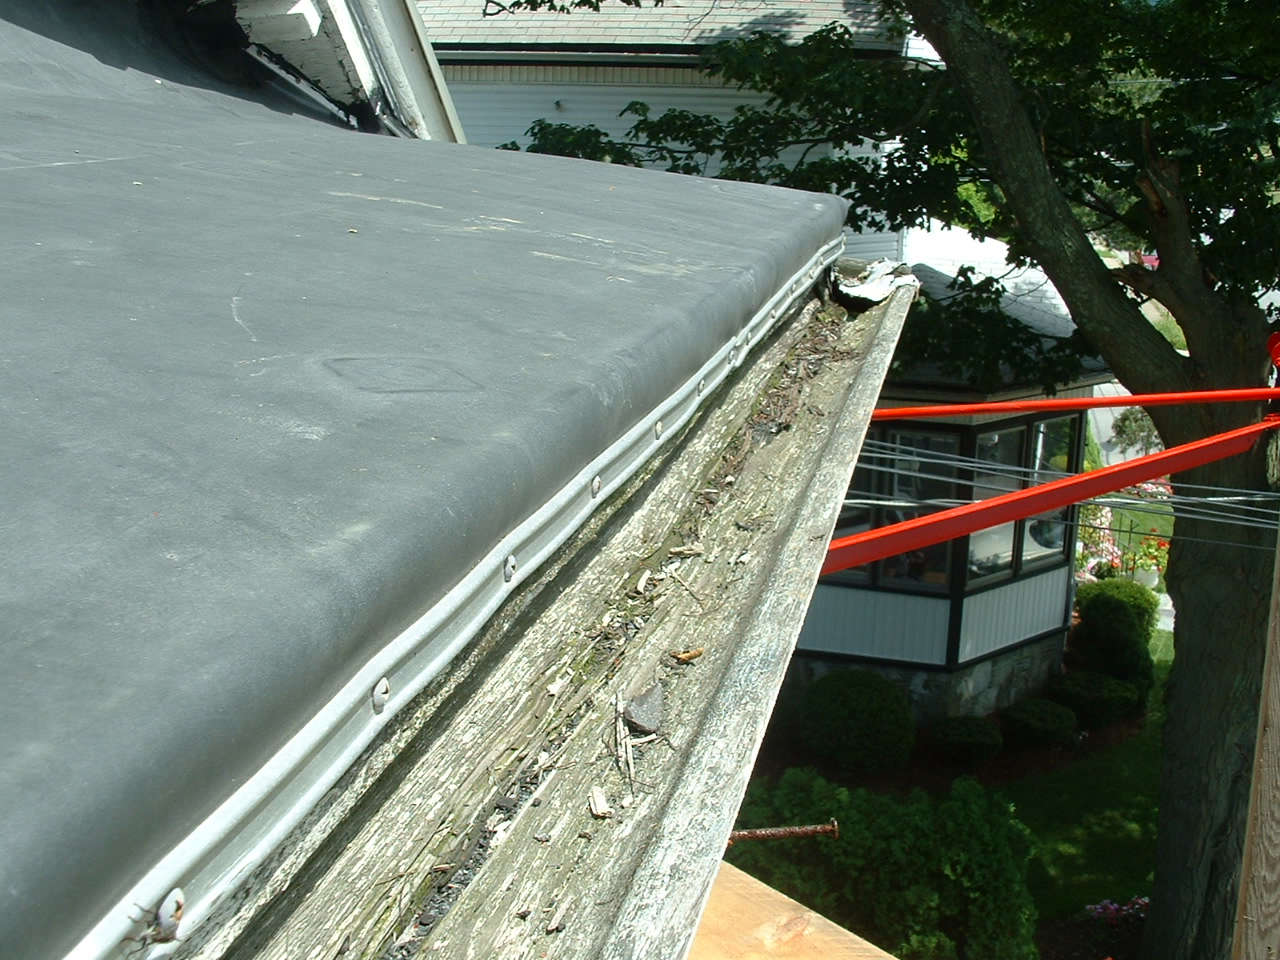
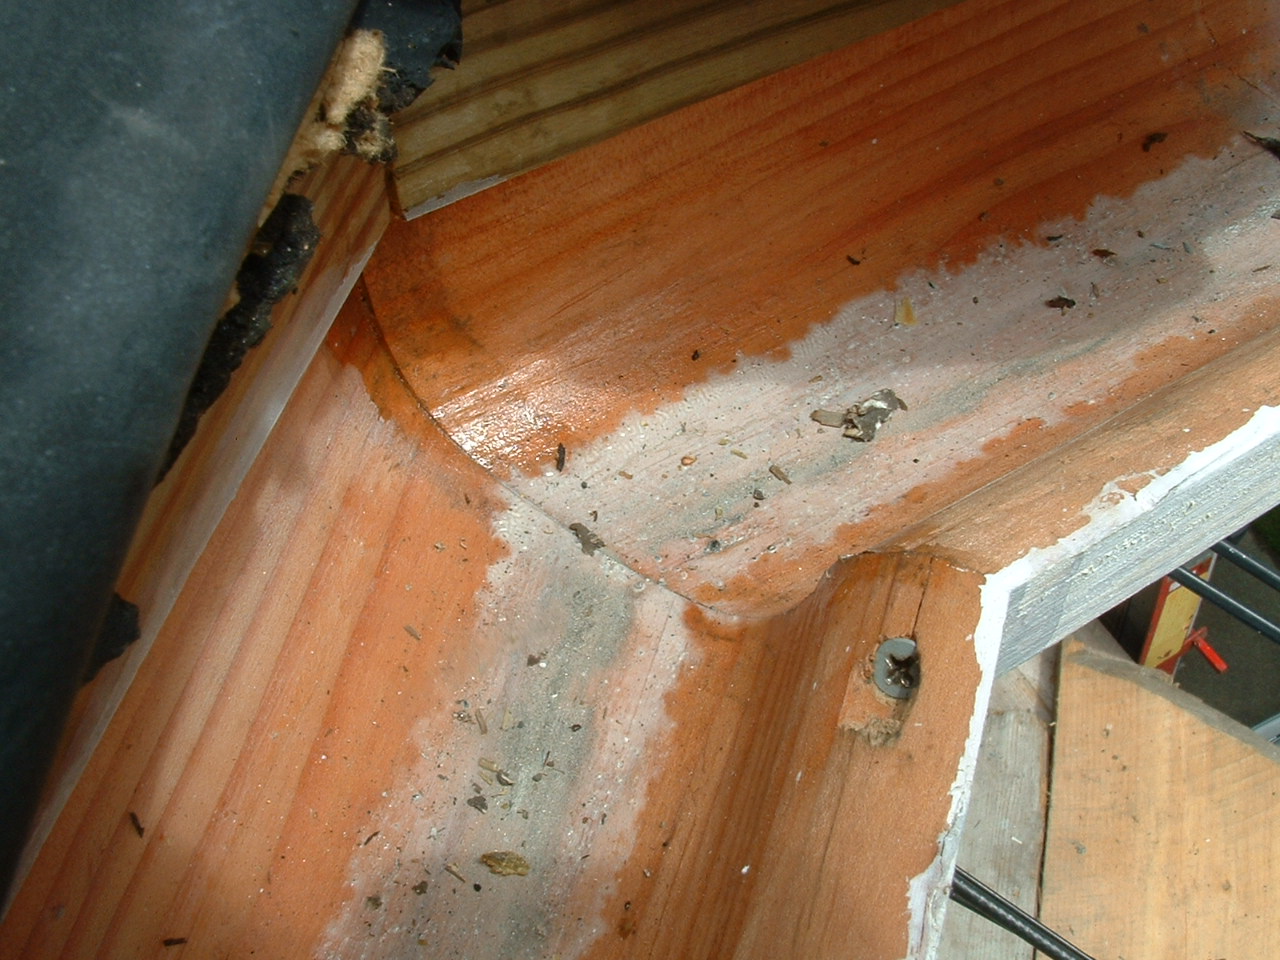
The joint at the other end of this 18' section is gone too. The rubber roofers socked their turn-bar into the back of the gutter creating a good entry point for water. Apparently, once the surface of the inside of the gutter is penetrated, rot ensues.
Rather than piece the ends of this section, I'll use 18' of the new 24' section I had ordered to replace the four gone sections around the bay bump-out, and order an additional 16' section from Beacon Lumber in New Bedford. This way all of the wood gutter on the front of the house will be new. I'll use the remaining good parts of the old gutter for repairs elsewhere.
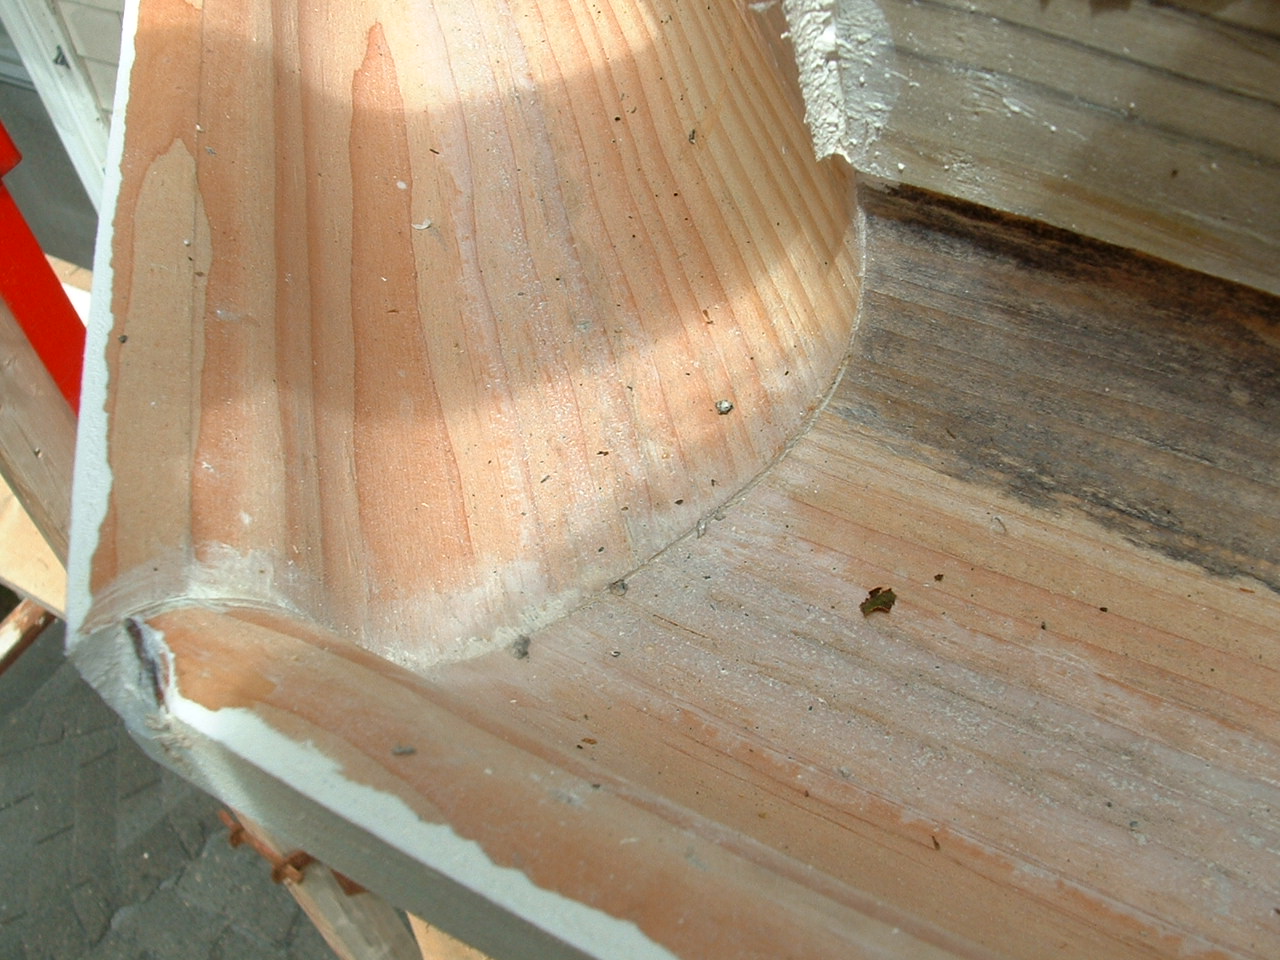
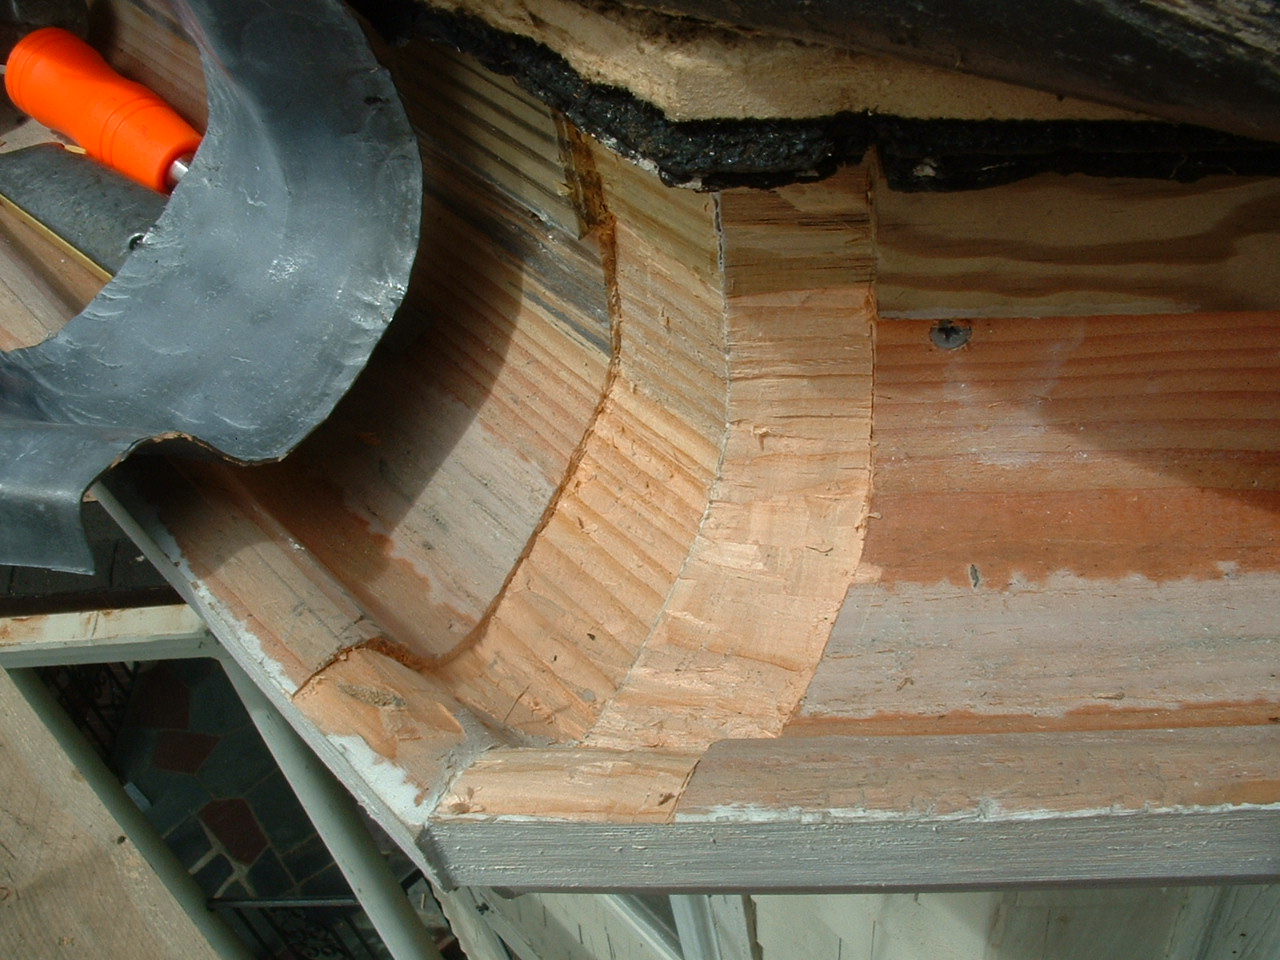
The heavy checking seen in this section is indicative of repetitive intense sun drying of wet wood. This gutter get lots of full sun with its southern exposure. Notice it was painted at one time.
The same section looking the other way. Looking at this damage it is apparent to me that the wood must be protected from repeated wetting and violent drying cycles.
The other side of this joint. It is imperative that these gutters drain properly after a rain. This way paint (necessary for protection against checking) will hold up (it won't last under water for extended periods).
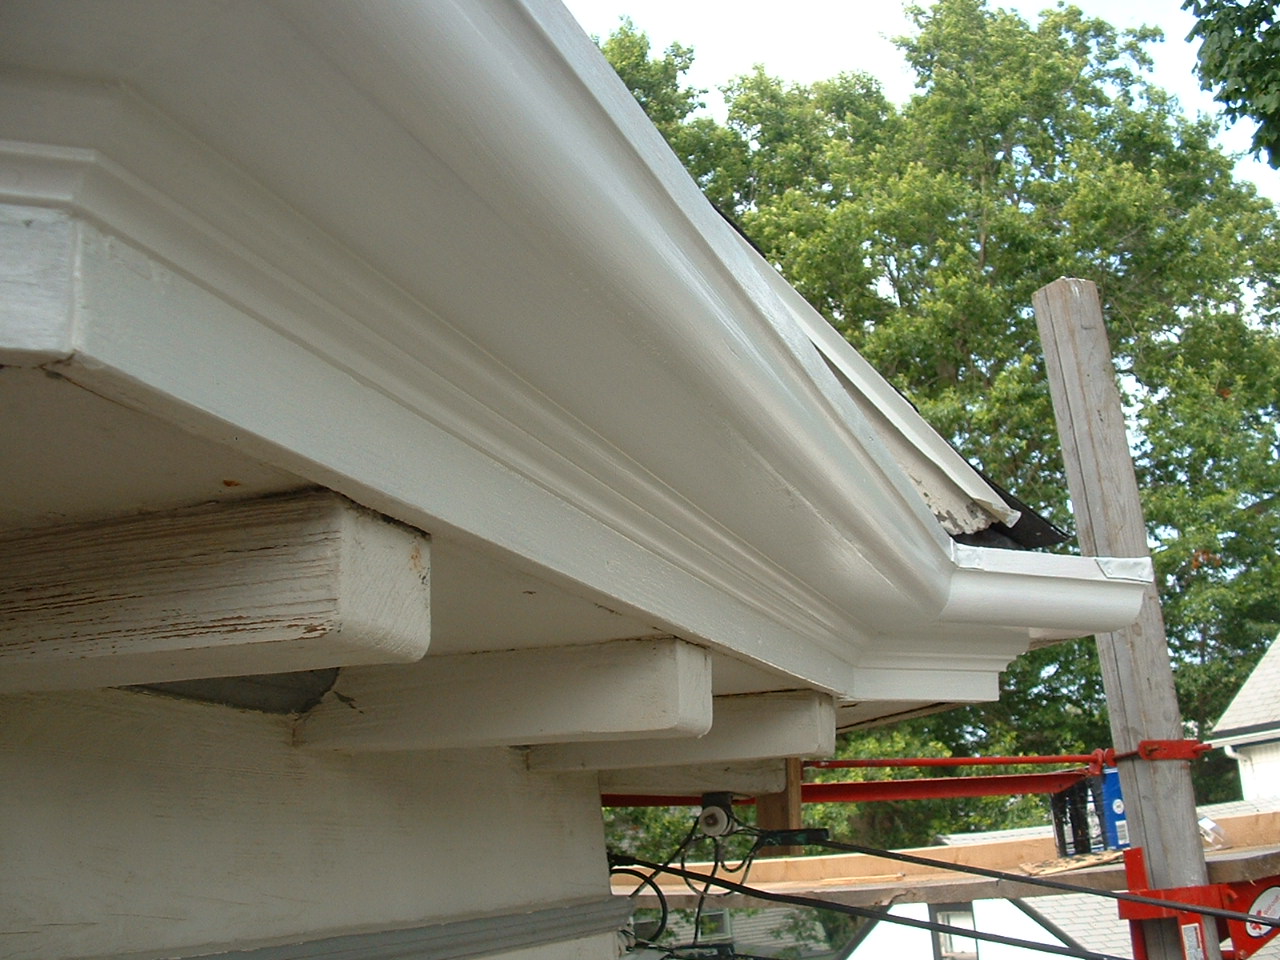
This section is along the front of the bay bump-out sitting in the broiling sun. Compare these two photos with the north gutter (below) which is in near perfect shape. The unfortunate result of direct sunshine on wet wood (rapid drying) is to cause the wood to split wide open.
The 36' one piece 4"x6" north gutter in near perfect shape! Most people would think the the lack of drying sun on the north side would lead to greater chance of rotting. Apparently, the opposite is true.
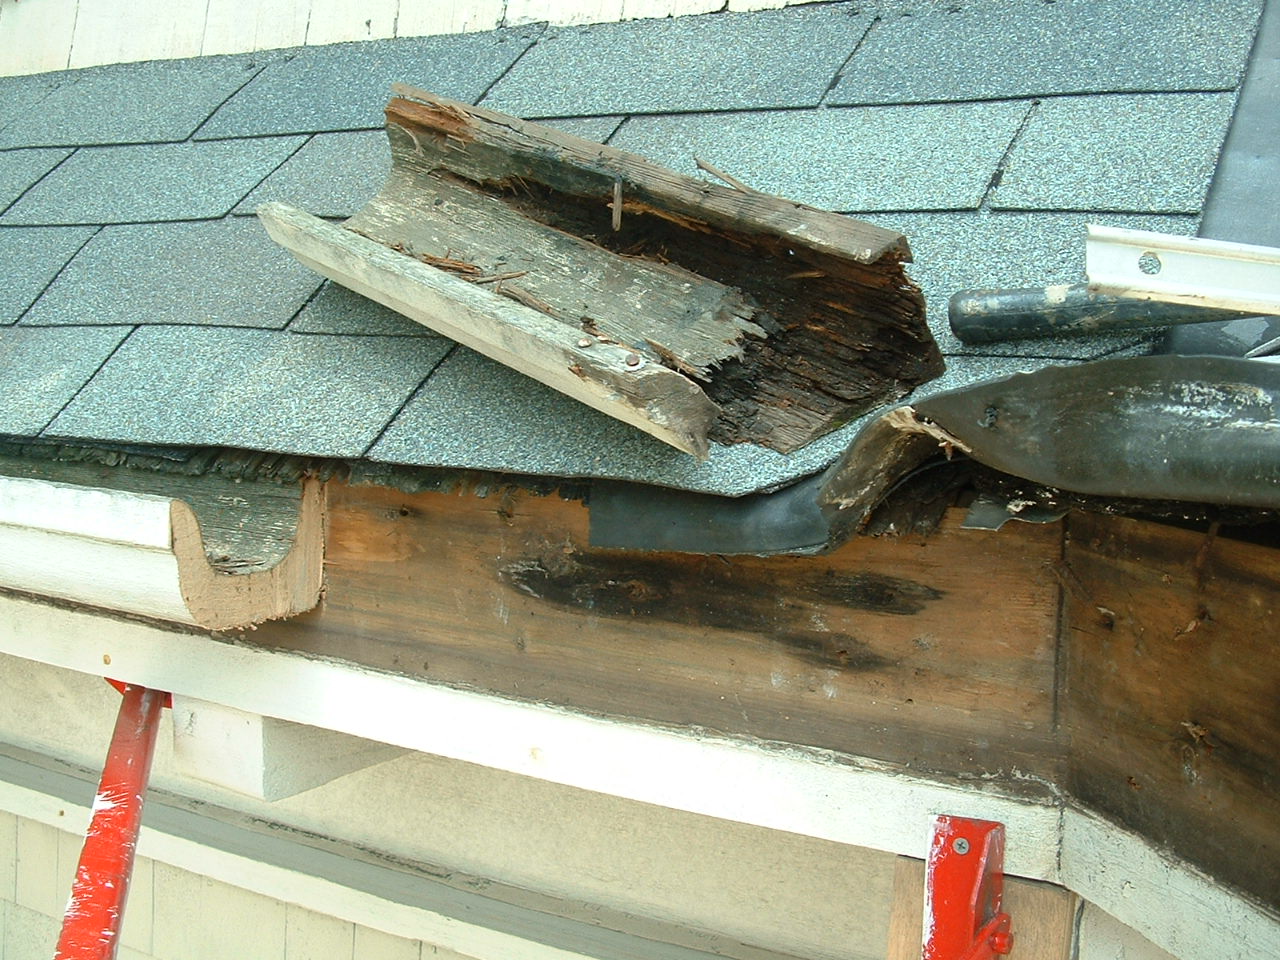
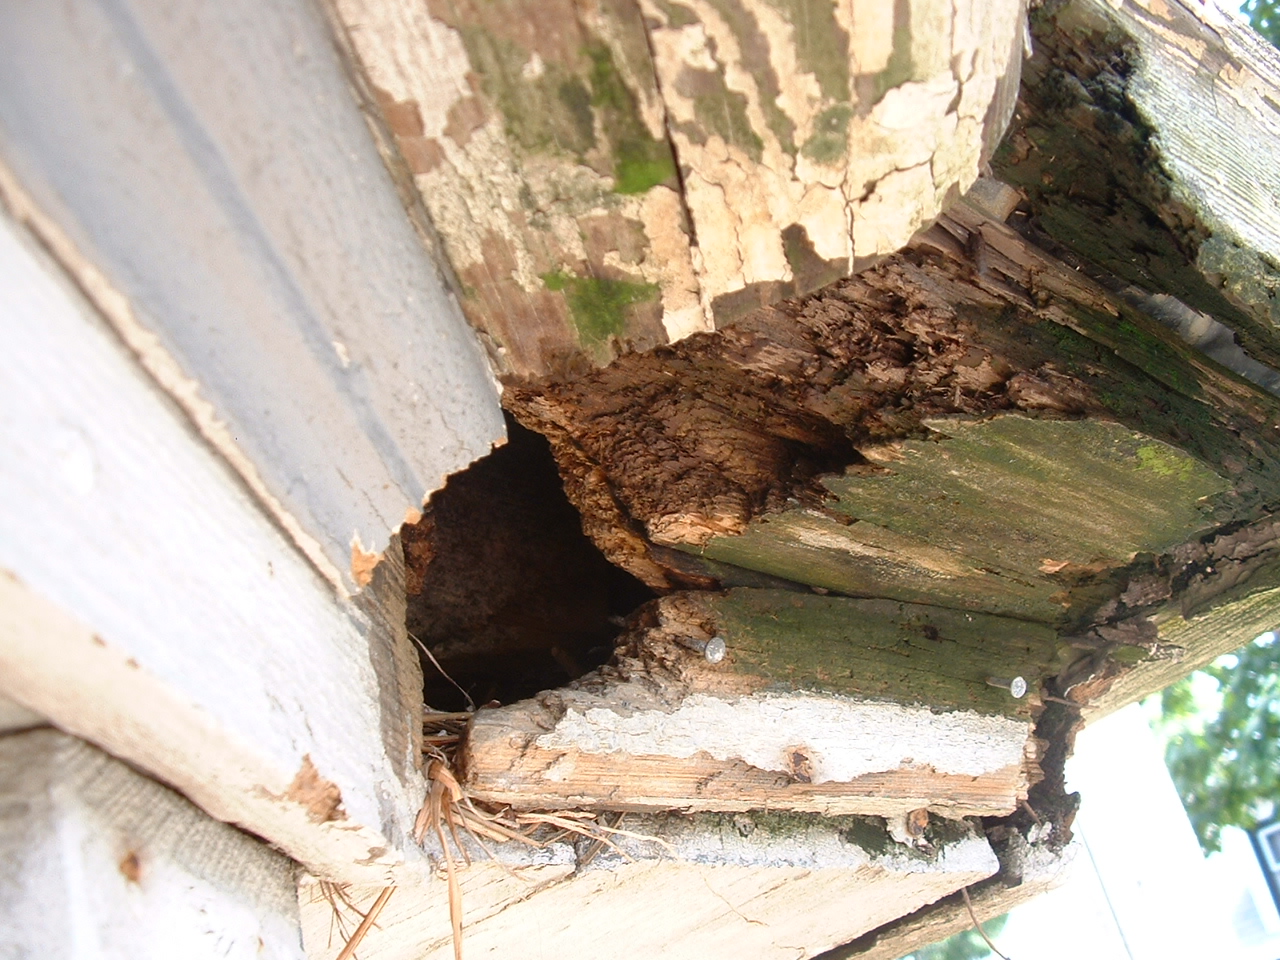
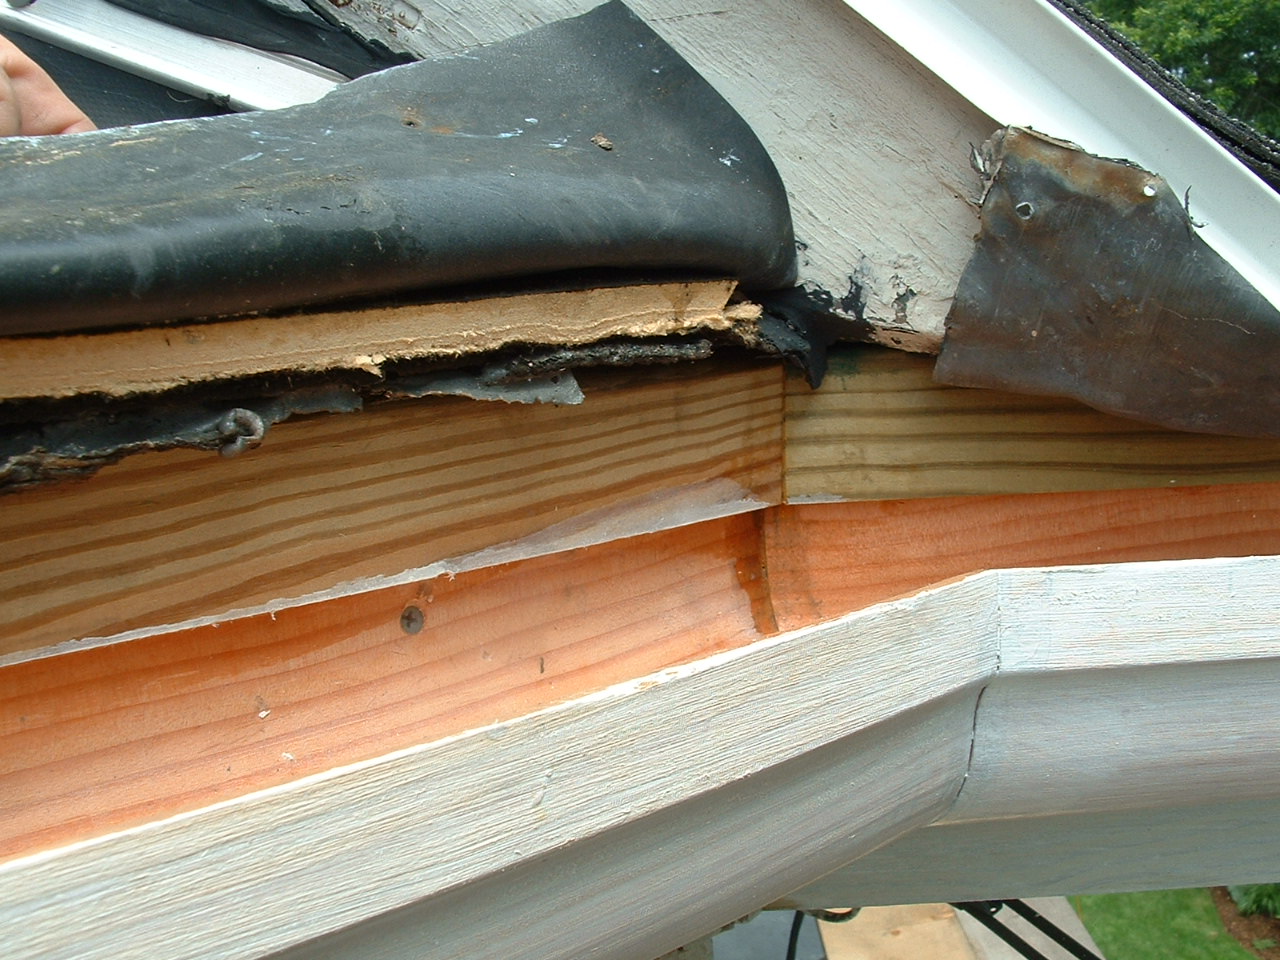
Except of course this NW corner which rotted out at the corner due to plugged downpiping and needed replacing.
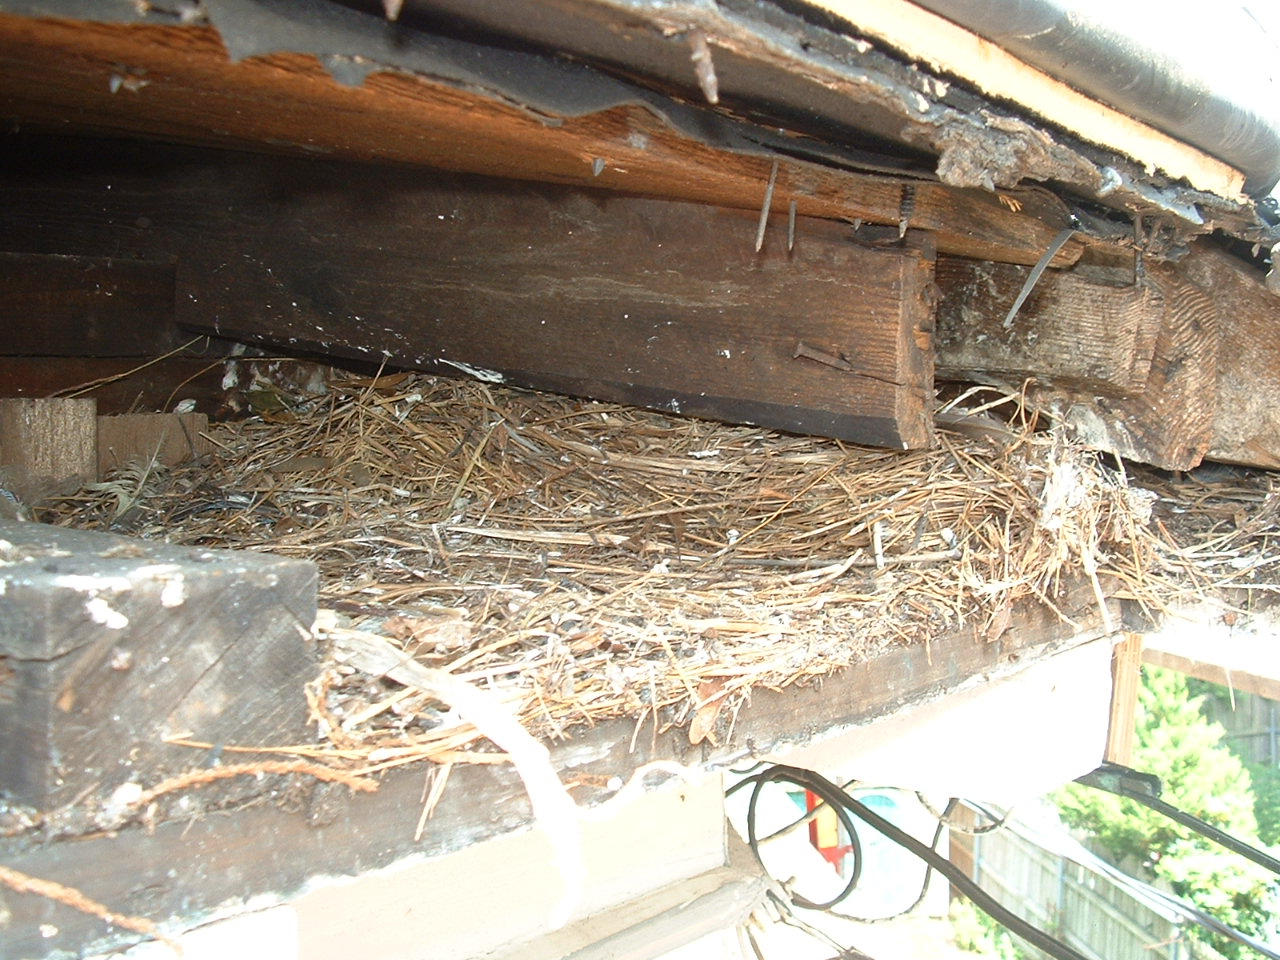
Birds easily pecked their way through the perpetually wet soft wood on this SE corner the make a penthouse suite
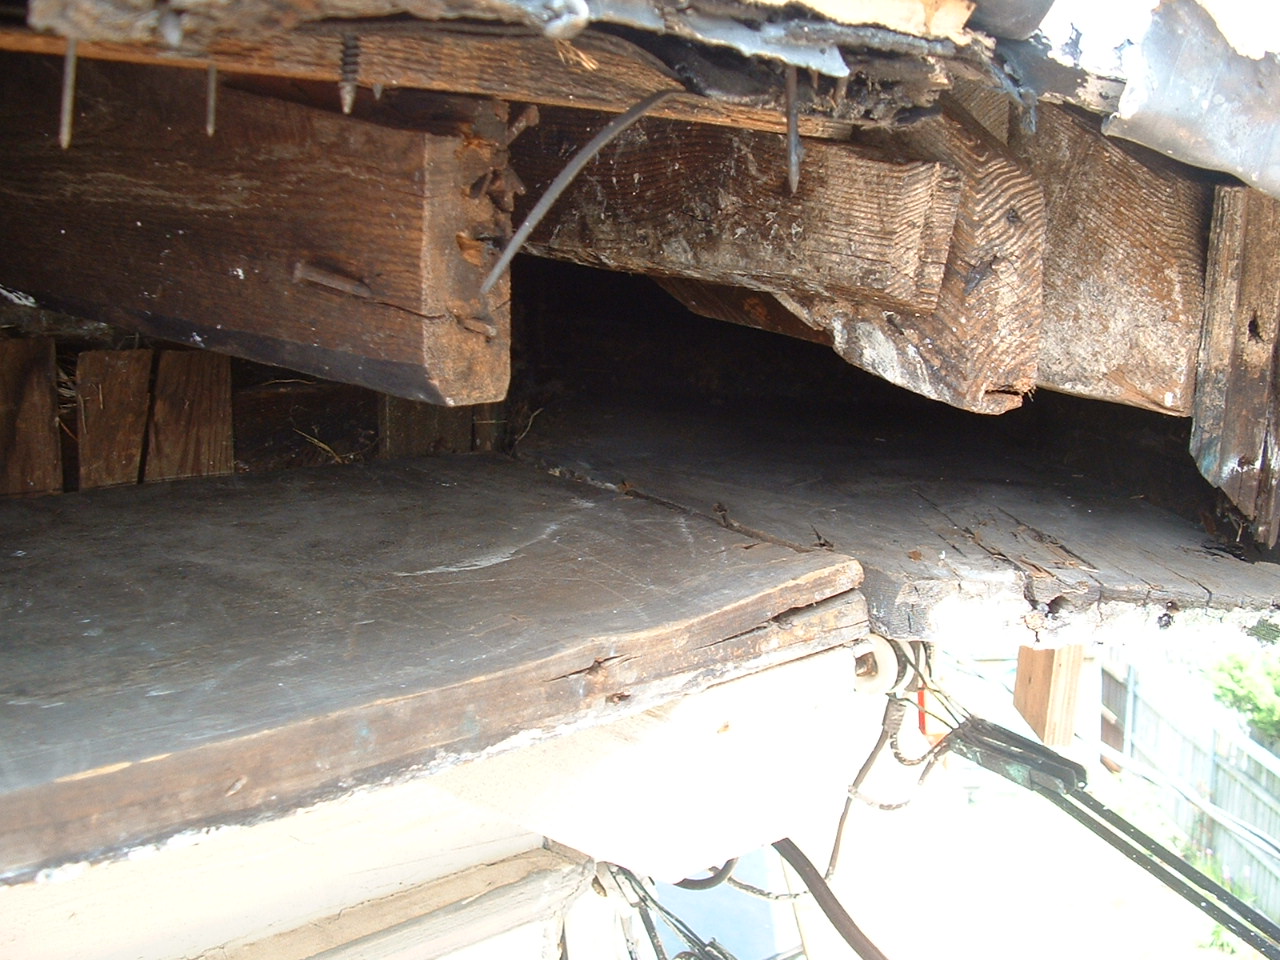
Removing the gutter, molding, and fascia the eviction process began.
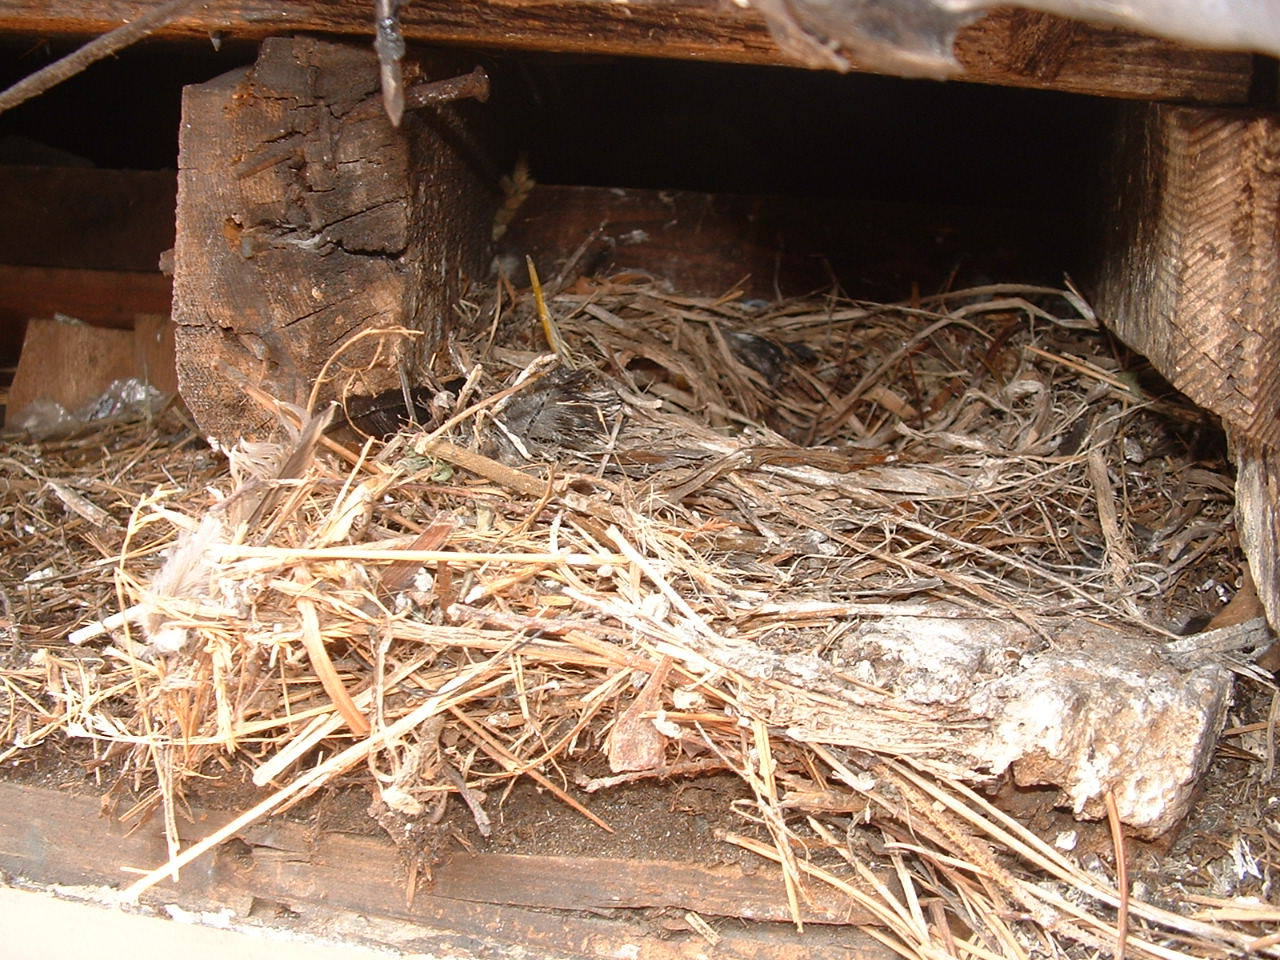
It looks like they've been here for years, nest on top of nest
All cleaned out. I could have just repaired the rot and left the nest but if water ever leaks in here, the nest would hold water, making any drying next to impossible.
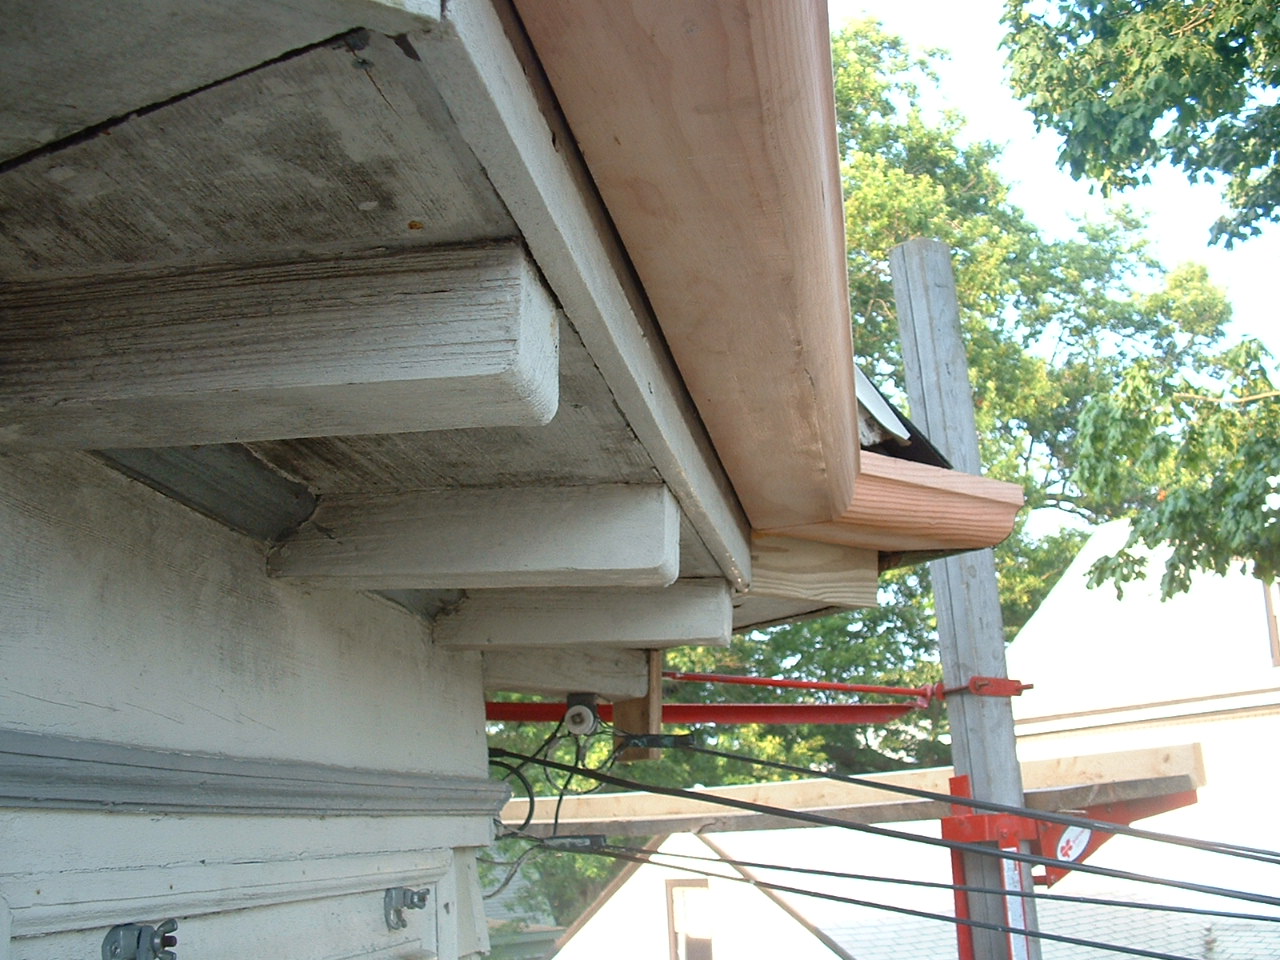
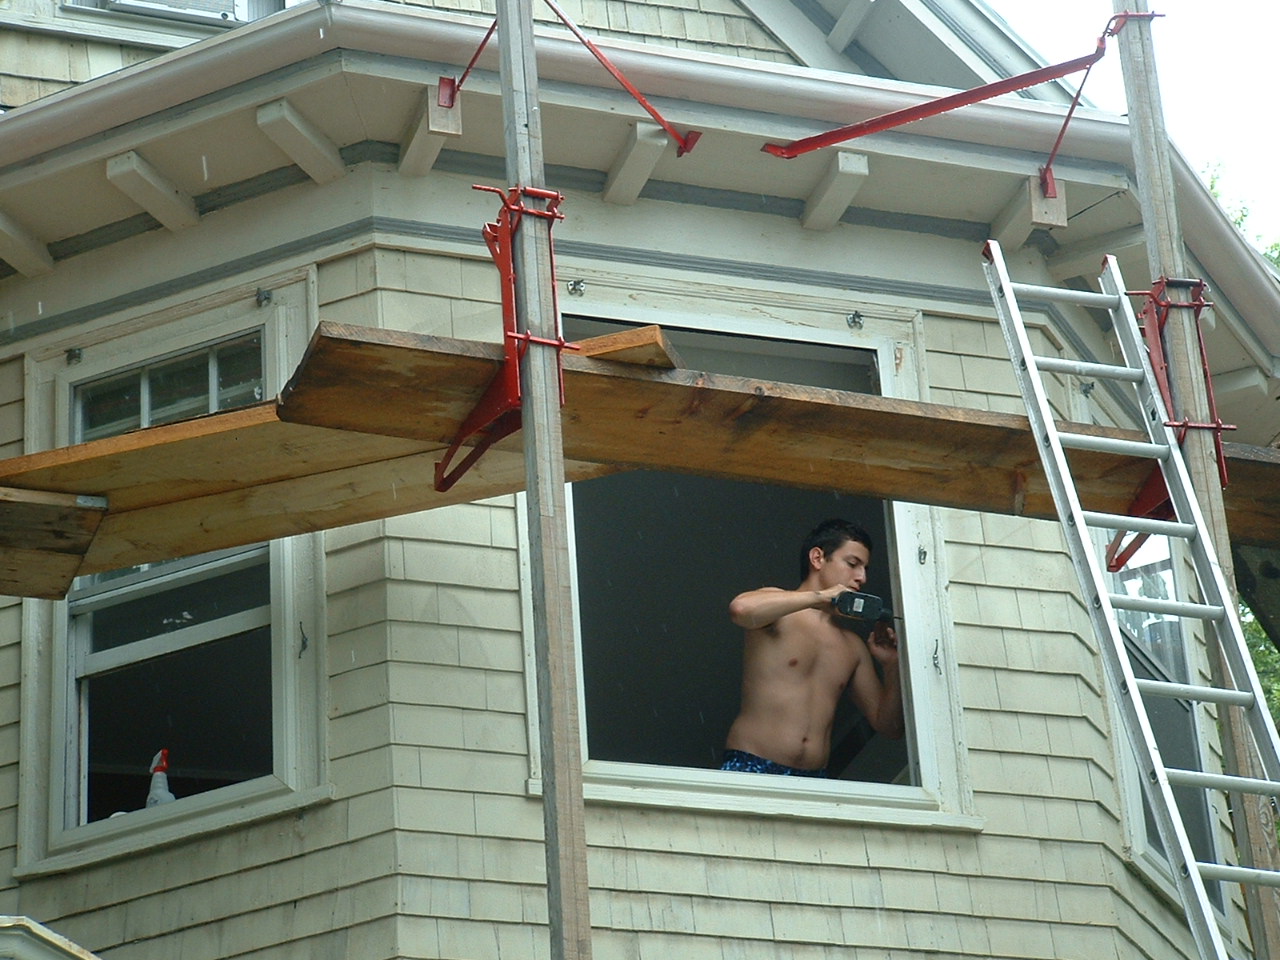
The fascia is replaced, pressure treated was used to replace the rotted section. New gutter sections were fitted with compound angle cuts to attain the pitch necessary for the bay bump-out gutters to empty to the east gutter.
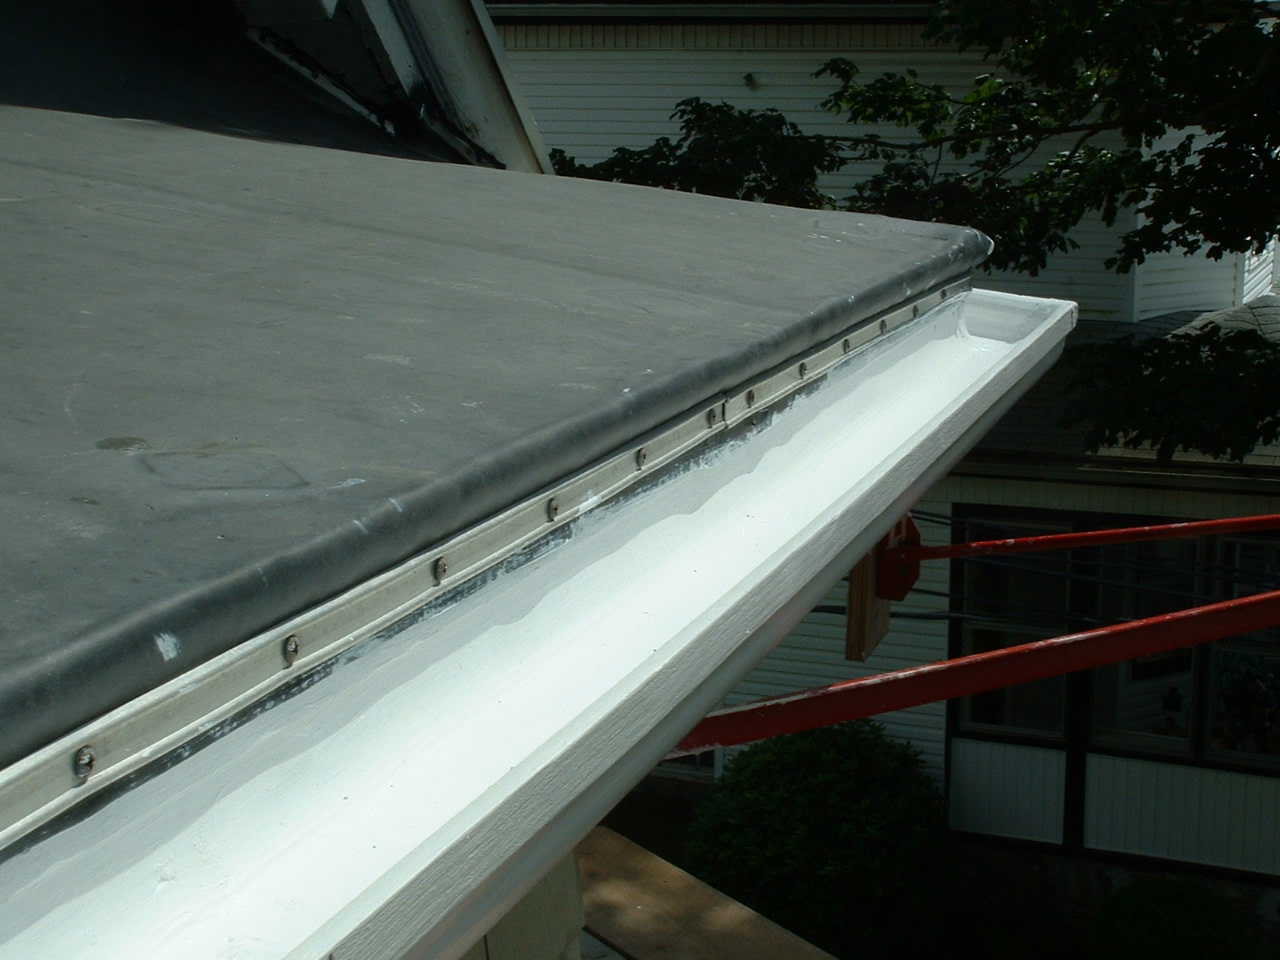
The 18' section was replaced with new. All gutters were sanded with 40 grit sandpaper to give tooth for paint. This guaranties the paint will adhere forming a base coat that will last a very long time. Notice the mold problem in these photos.
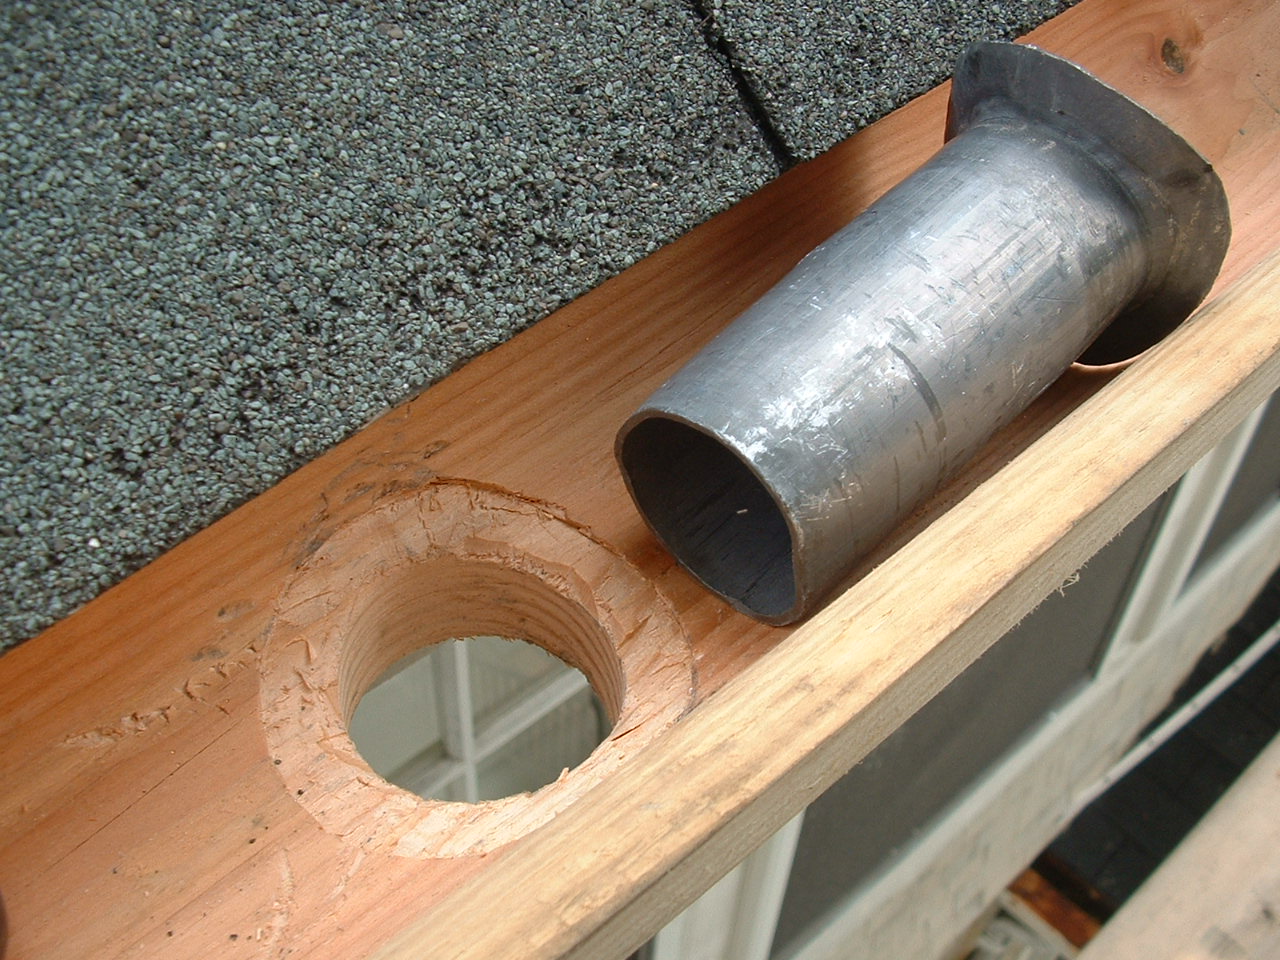
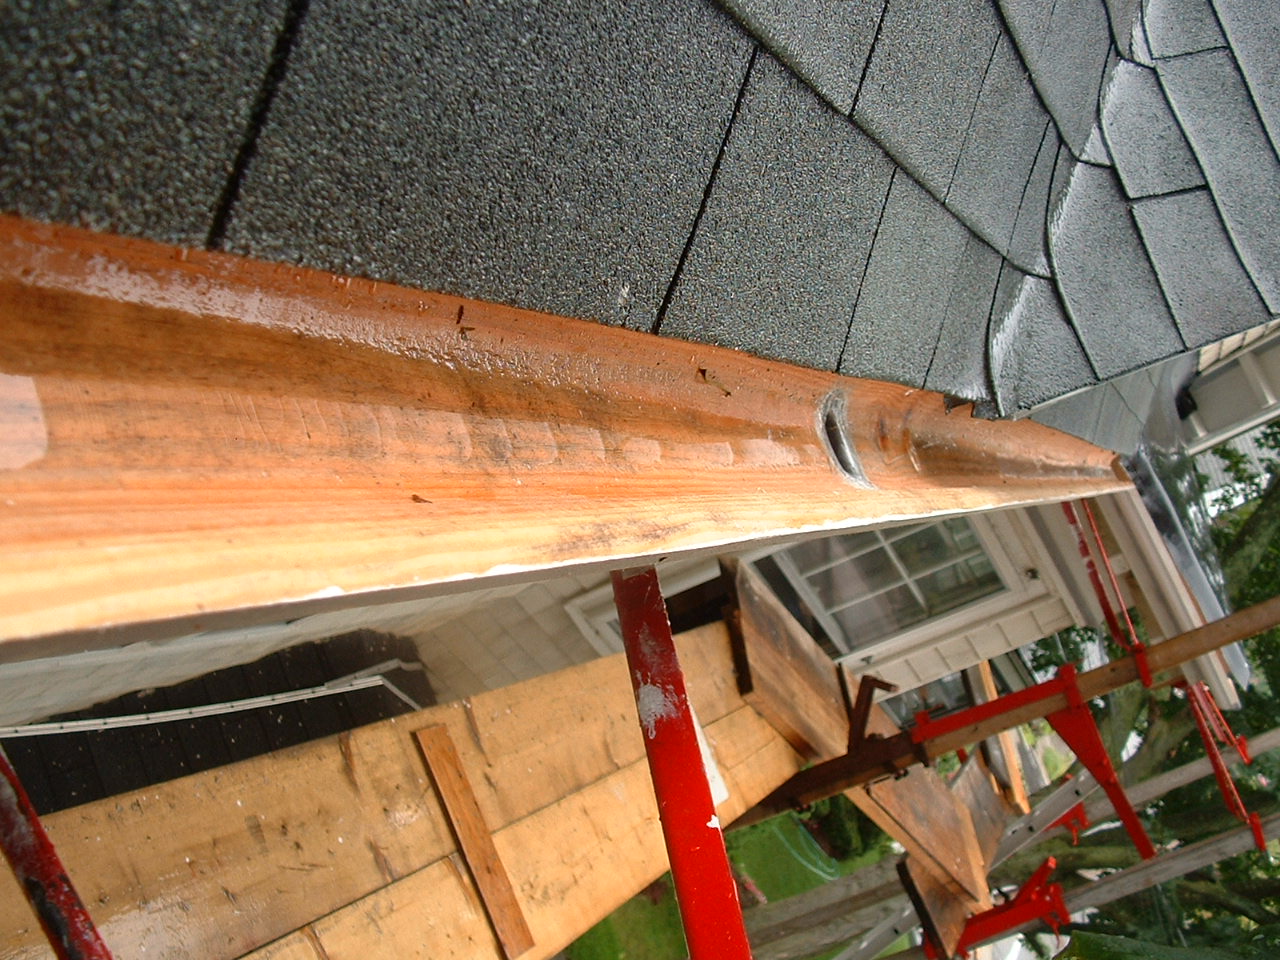
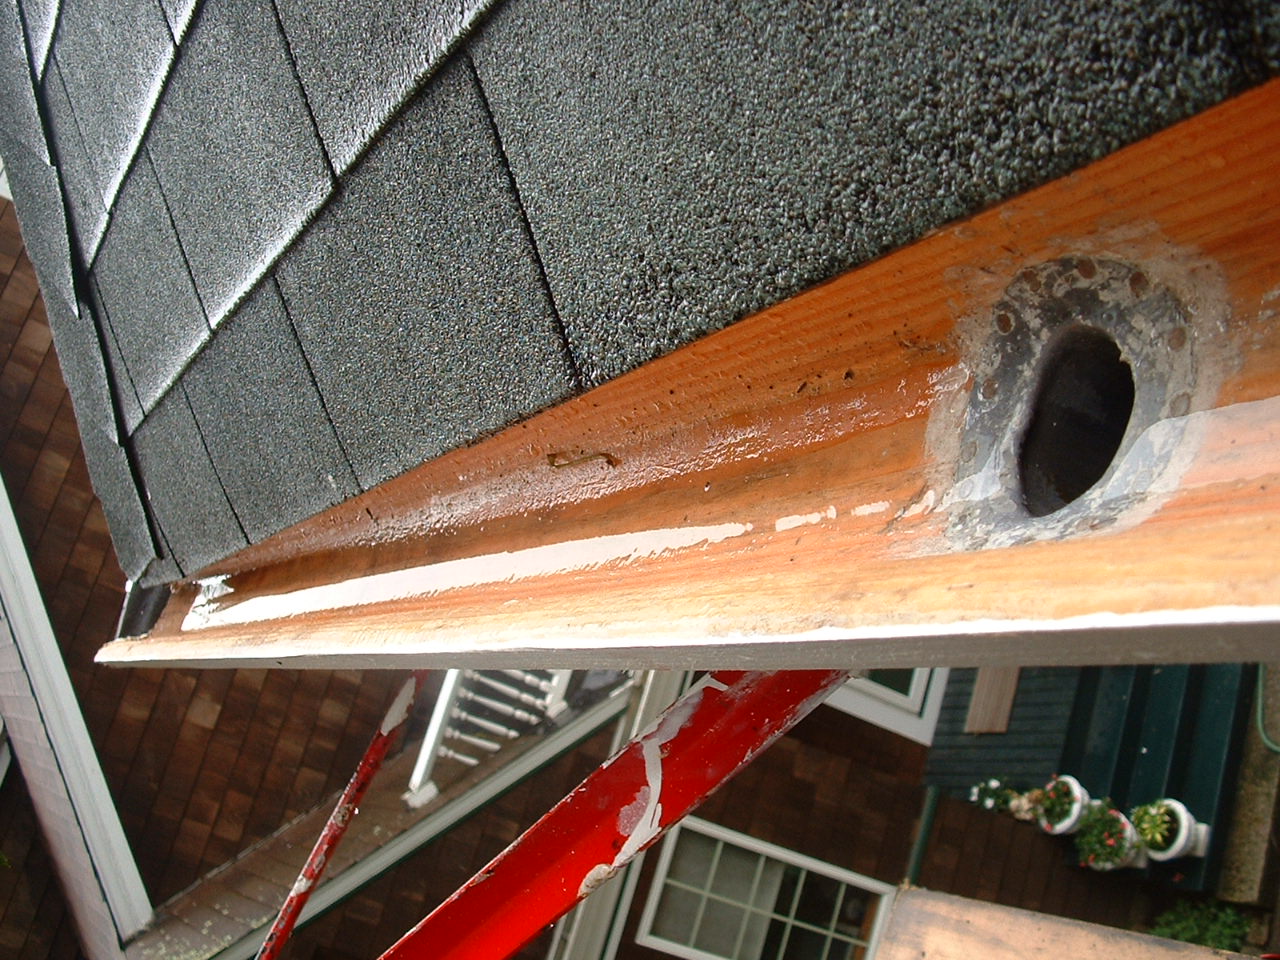
There are only 4 leader outlets on this entire house that has 148 lineal feet of gutter. I'm increasing the size of 1 3/4" to a larger 2". This south leader outlet is now mortised.
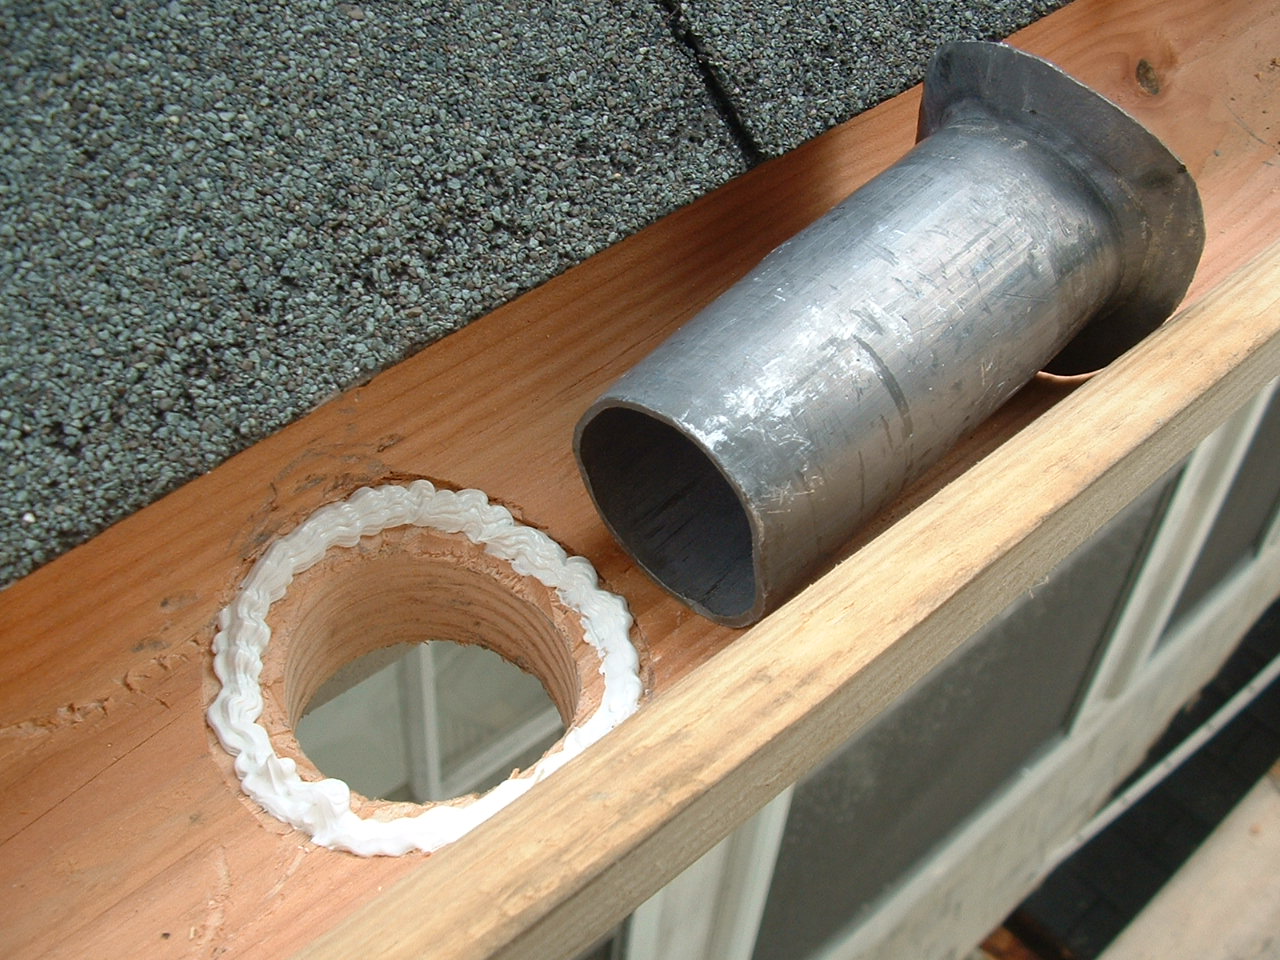
...and set in a bed of 50yr, elastic, adhesive caulk to get a good seal.
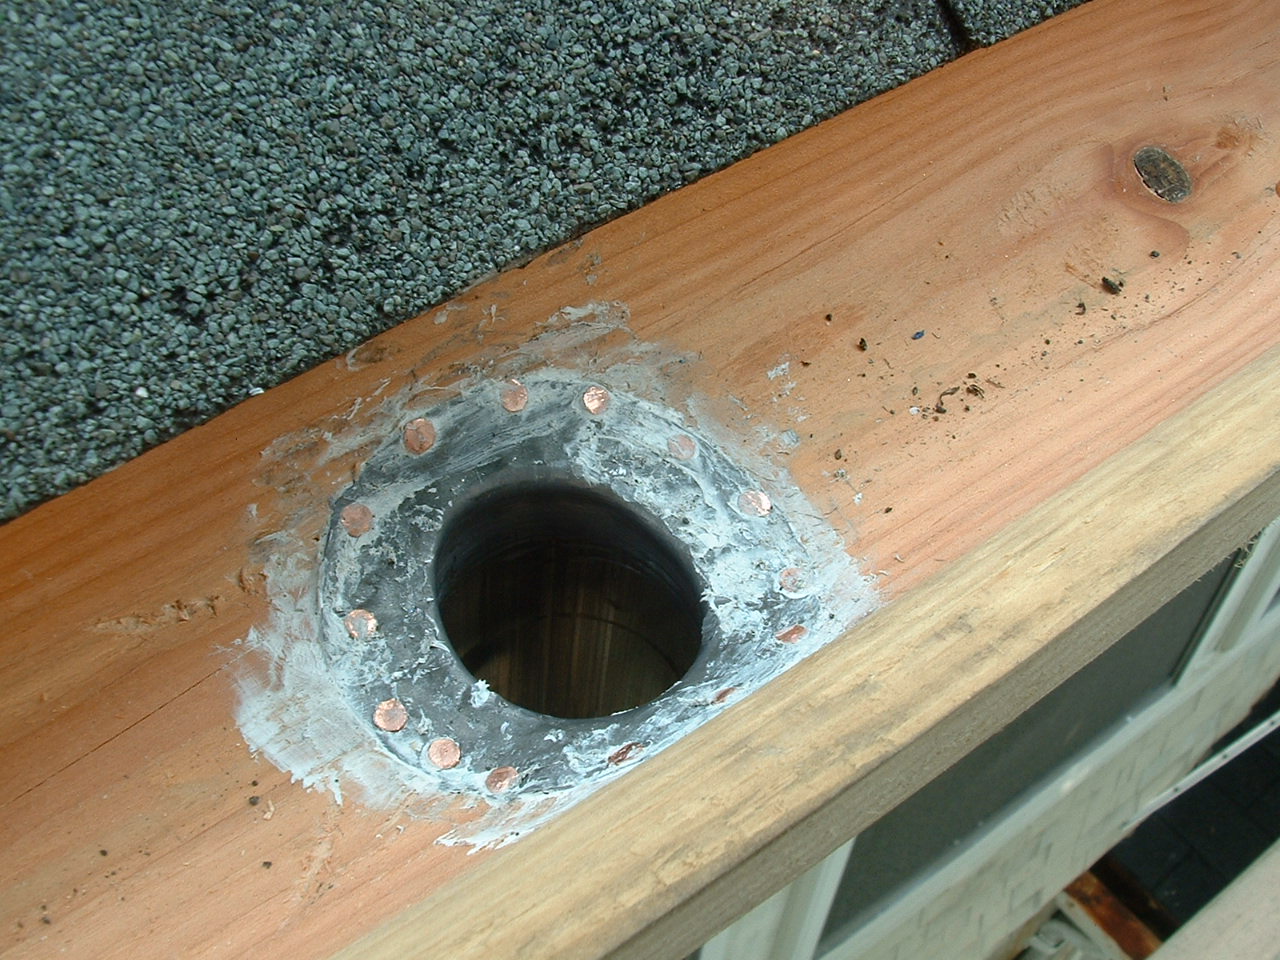
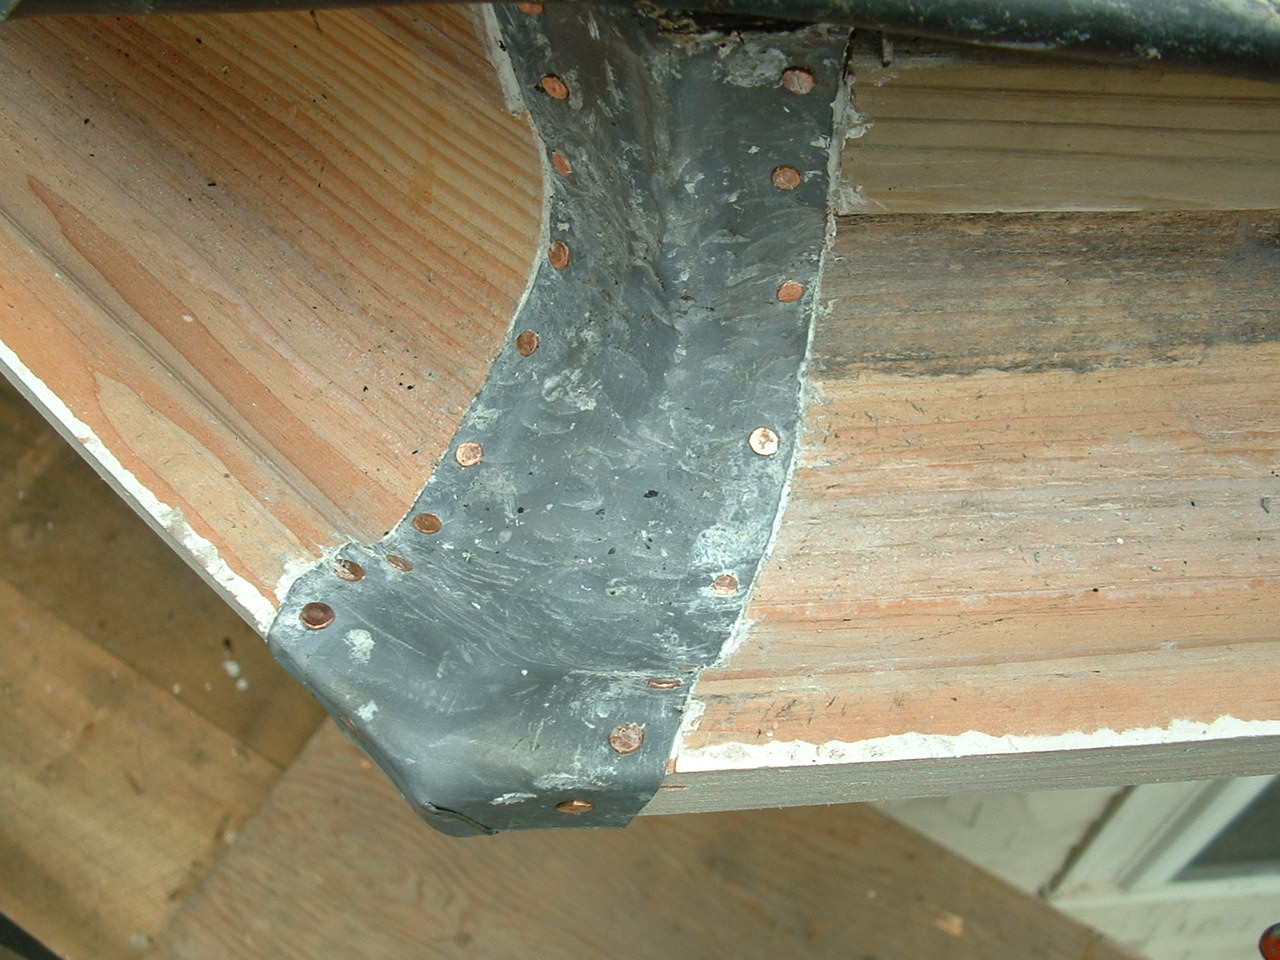
Installed flush with the gutter's contoured bottom and secured with solid copper tacks, this larger lead leader outlet will have a lesser chance of being clogged and will drain the gutter quicker in a thunderstorm.
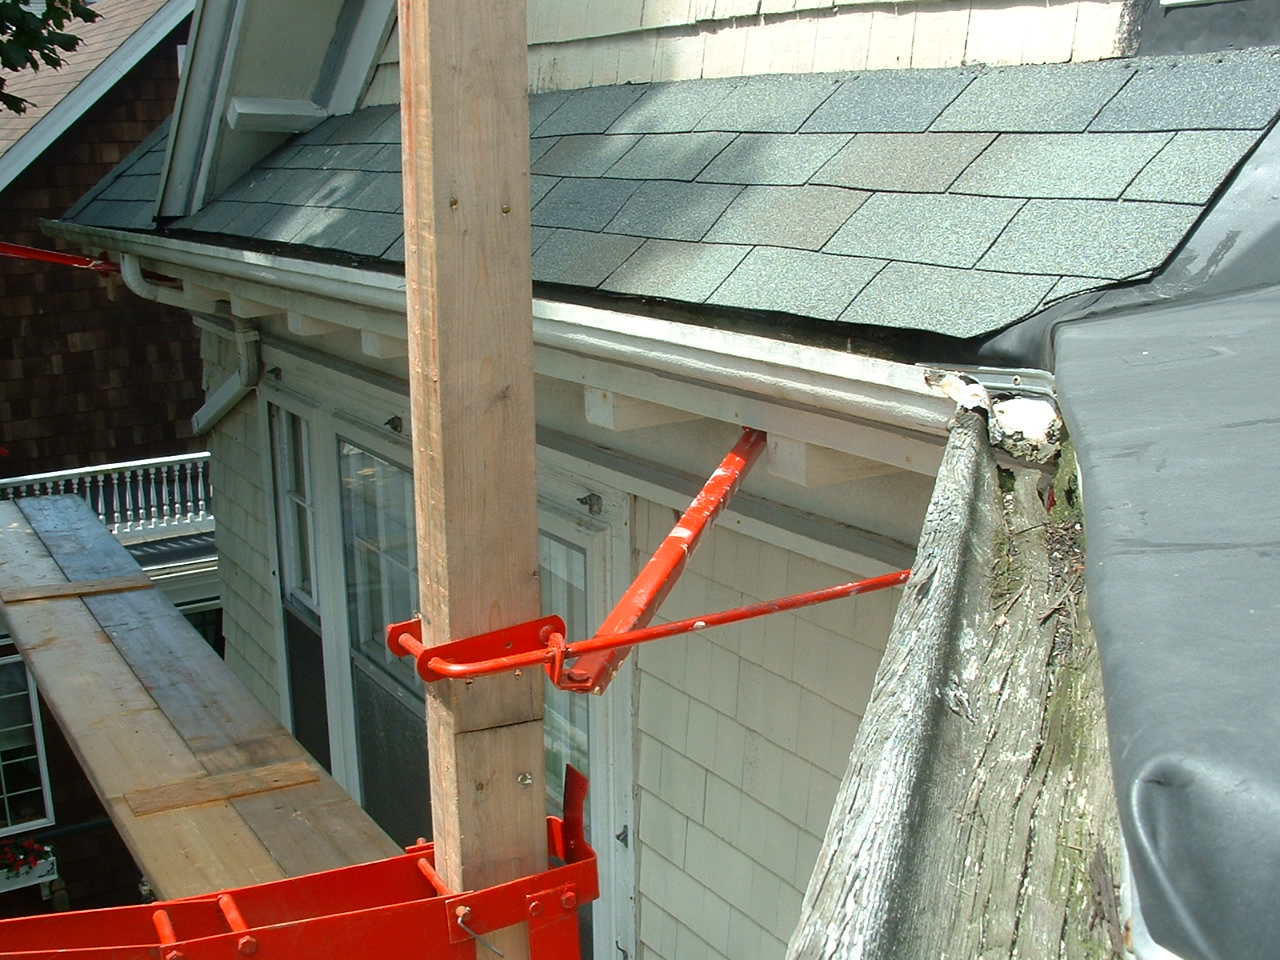
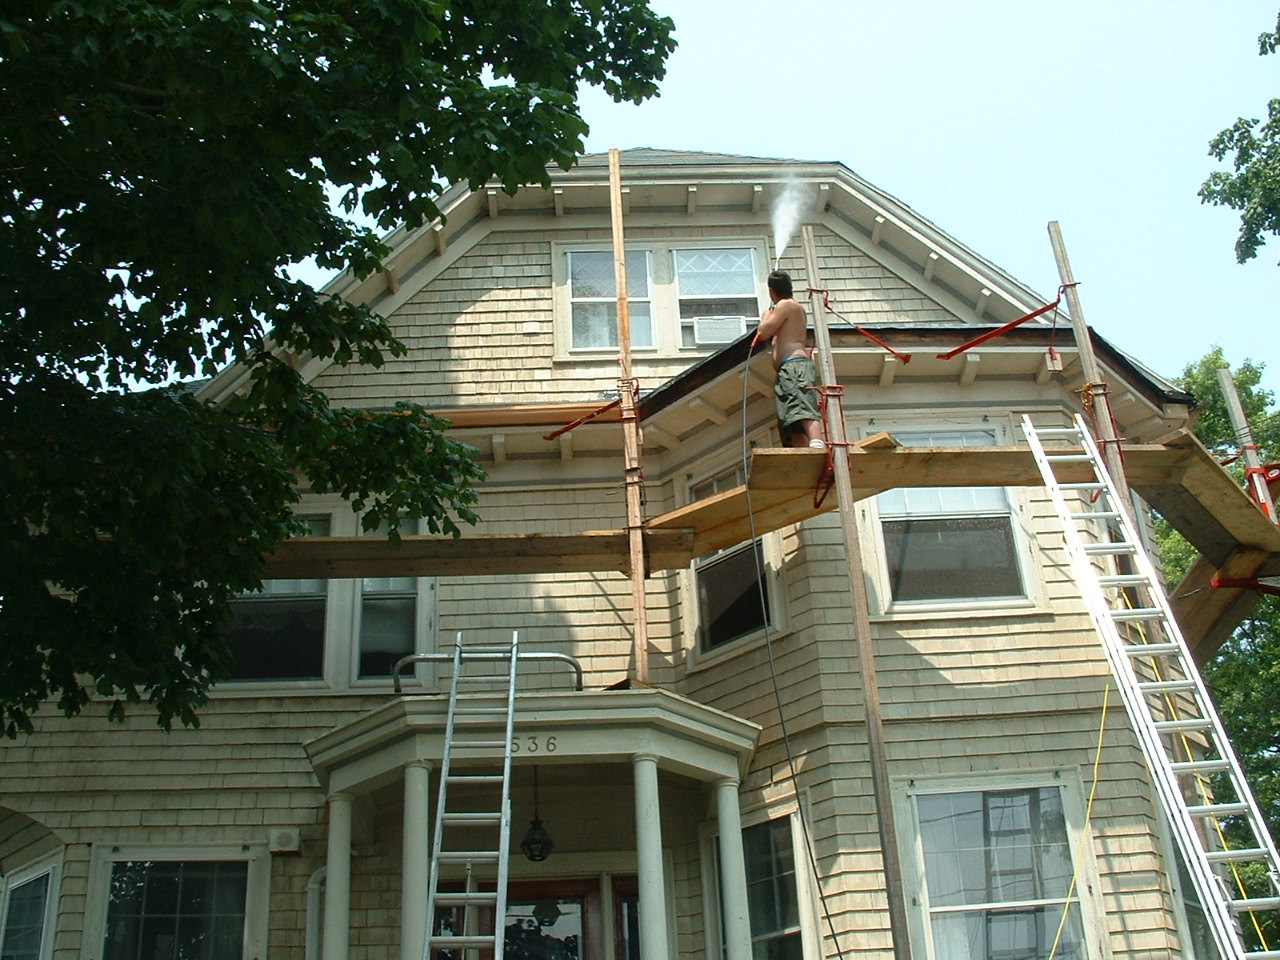
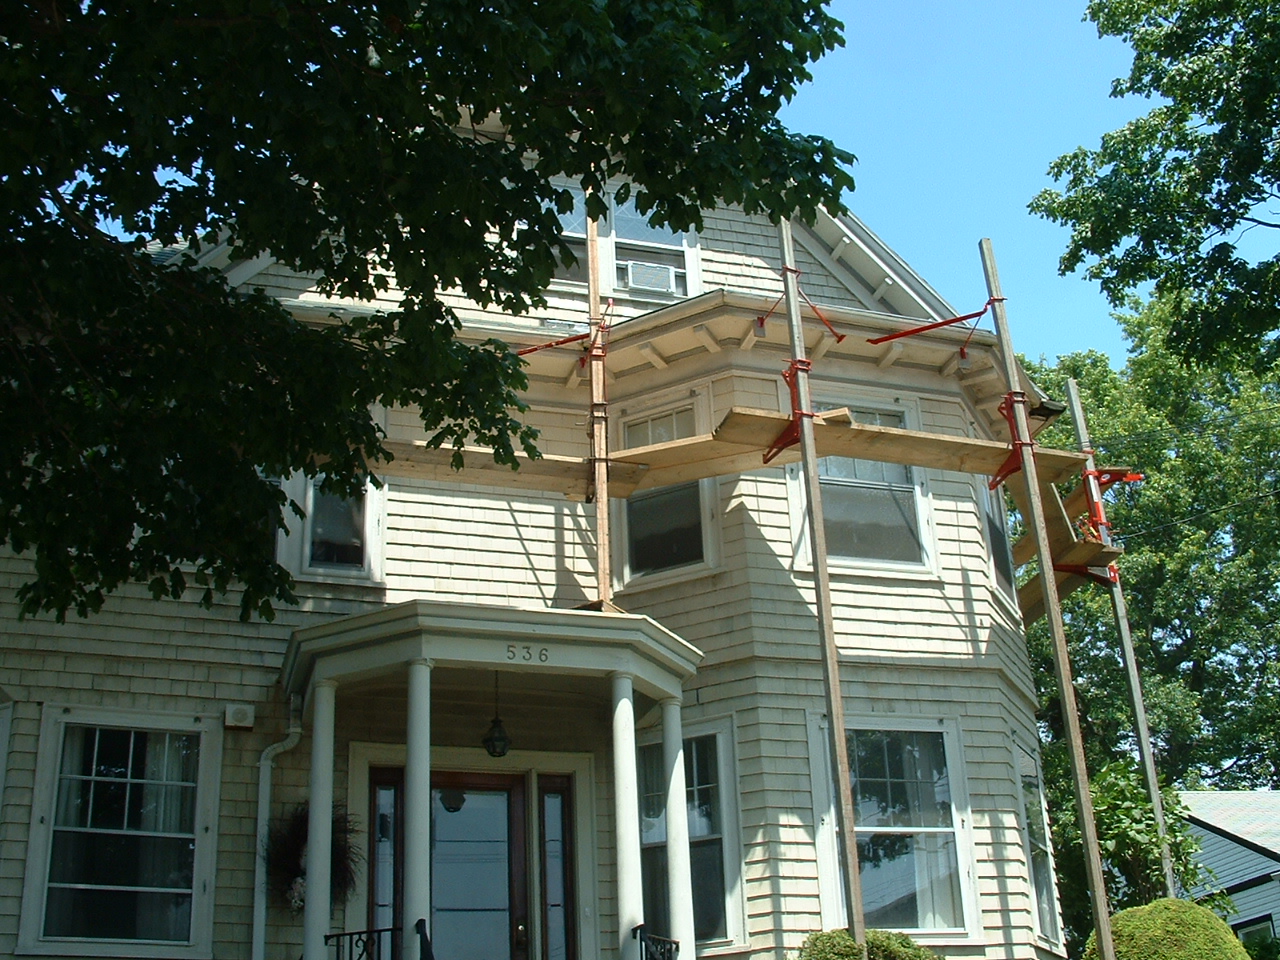
While waiting for the additional special order gutter it was decided to take advantage of the stagging and pressure wash with bleach to get rid of the mold.
The results were spectacular! The paint cleaned up nicely and held tight during the pressure wash process. Notice the gutters sections are now installed and primed around the bay bump-out.
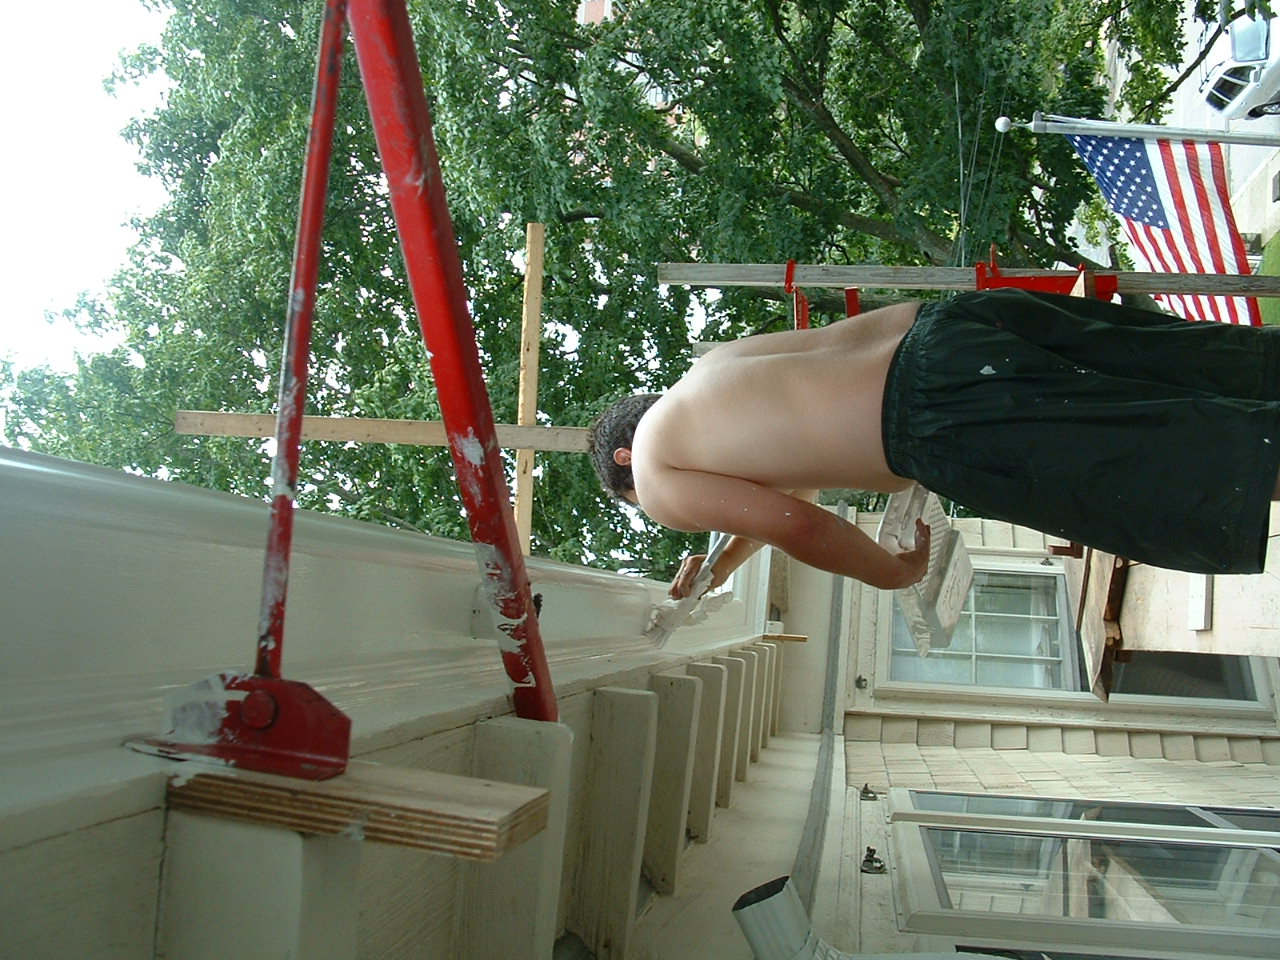
Marc worked on the windows, replacing the old broken sash cords while I leaded the joints.
The following 4 shots are of the joints around the bay bump-out, from west to east. When this joint is leaded the knot hole with not be visible.
These joints are tight, sealed with 50yr, elastic, adhesive, caulk and fastened with screws in pre-drilled and counter sunk holes (to prevent splitting the wood).
The 1" pressure treated boards on the back of the gutter were fastened in a bed of caulk and screwed 6" on center. Water will only spill over the front of these gutters.
The insides were initially treated with penetrol oil to seal the raw wood.
A rain test showed all joints to be water tight even though they were not yet leaded. I installed the new gutter exactly where the old one was and can see now that there will always be standing water between the SW outside corner and the leader outlet.
Looking the other way (west). Pushing this corner up requires pushing up the west gutter as well and its already as high as it can go. Lowering the other end might have been a possibility but the original installers wanted the gutter pitched down from the bay bump out.
The lead for this 45 degree joint is formed and the gutter scored.
The mortise is complete.
...and the lead set in a bed of elastic, adhesive caulk with copper tacks.
All the joints are now leaded.
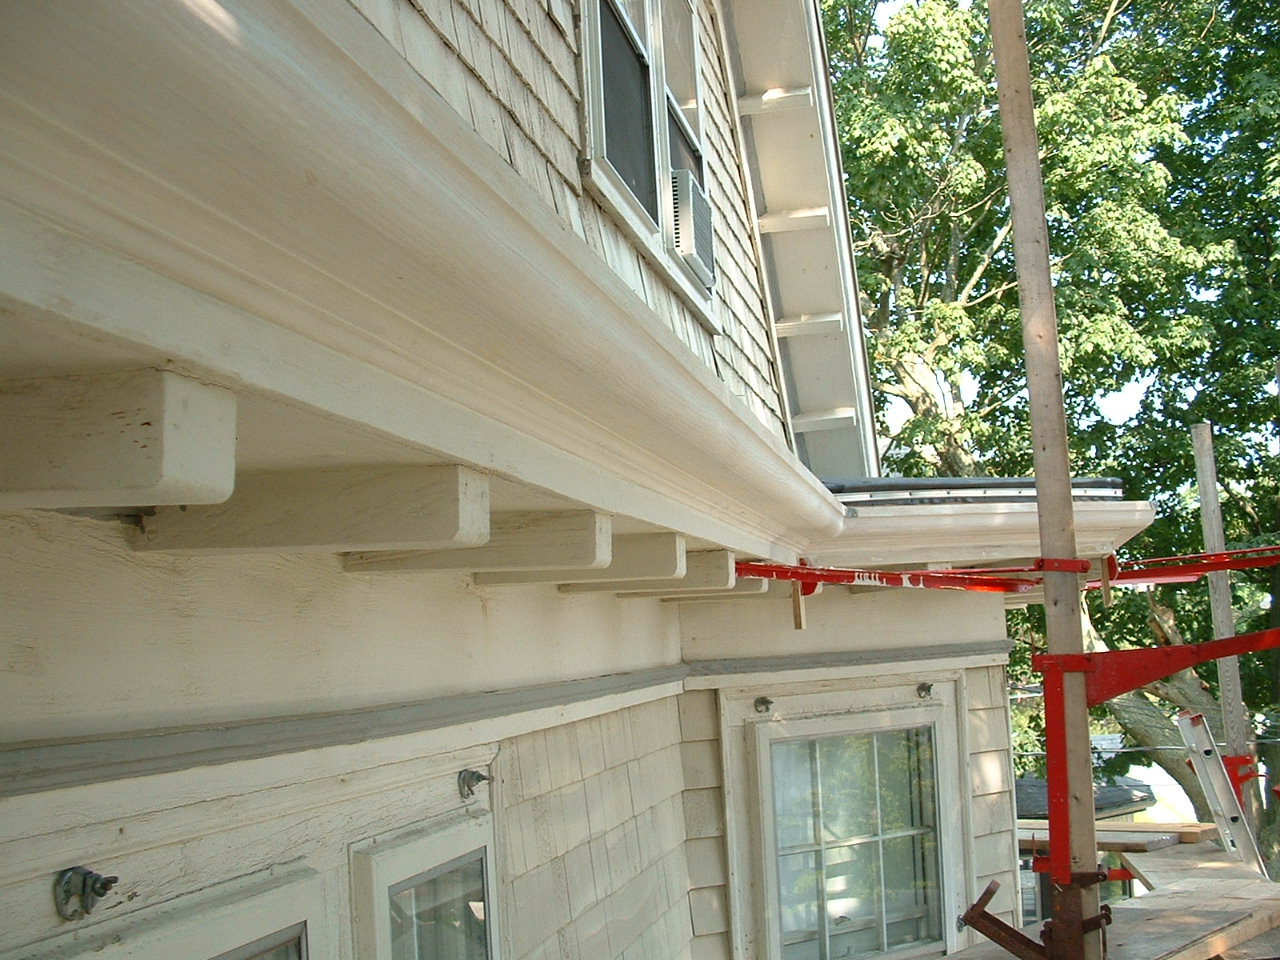
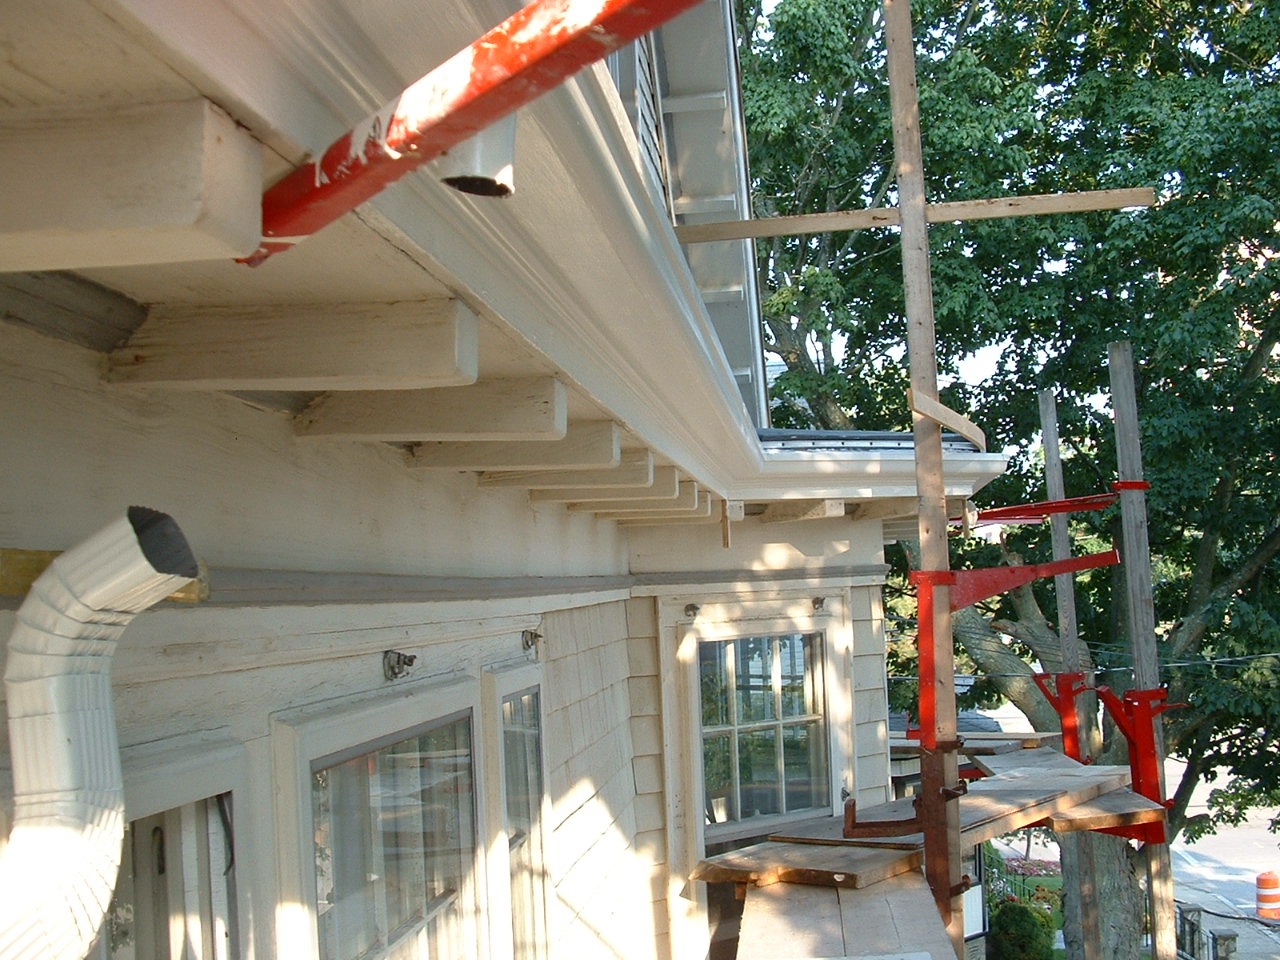
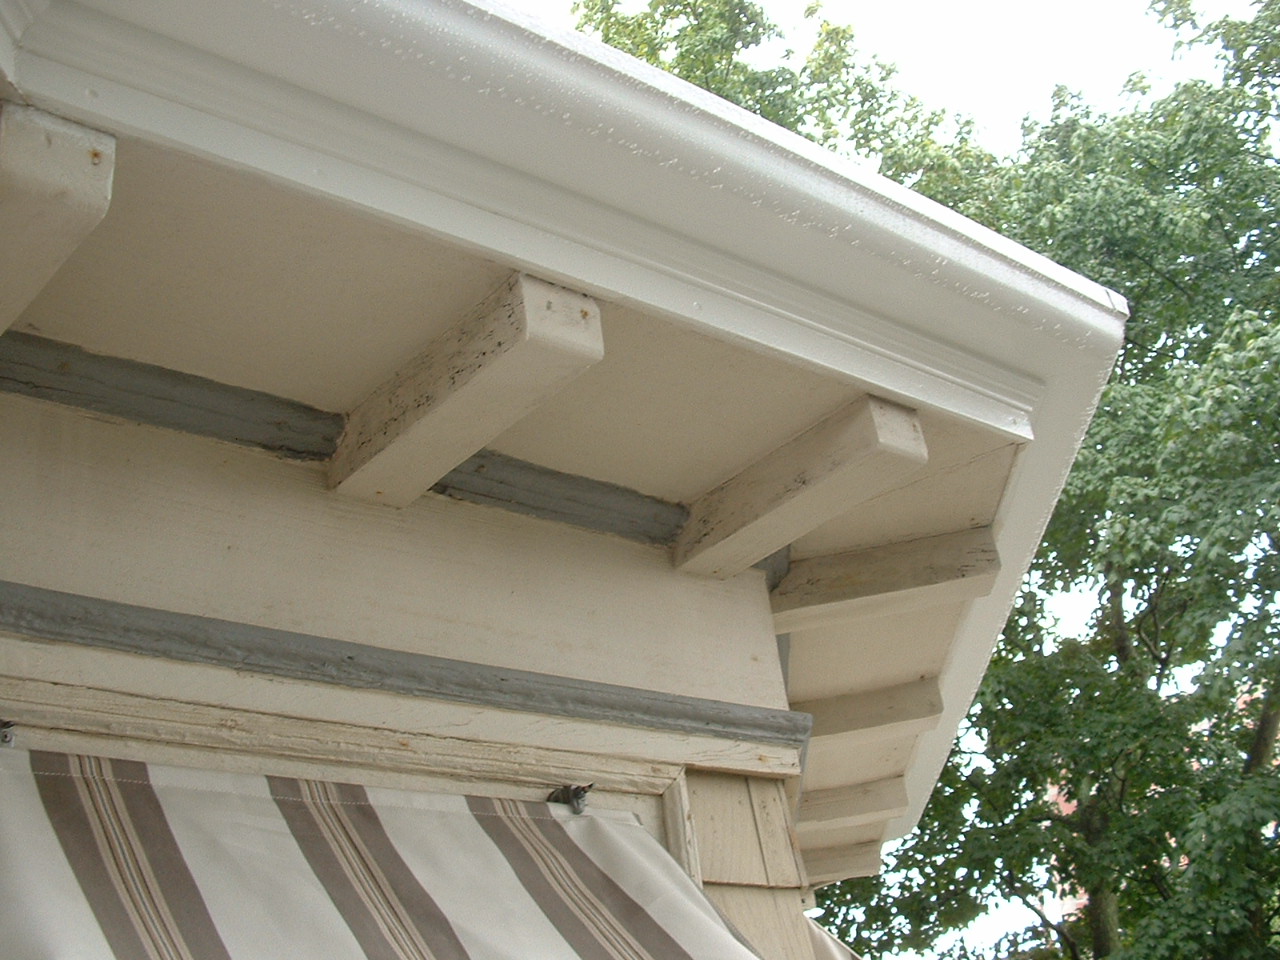
Close to finished on the front. Here all new bed molding was pre-sanded, pre-primed, cut fit and installed under the 38 lineal feet of gutter. All fasteners were set and filled. A light sanding and another coat of oil primer mixed penetrol was applied to the gutter, bed molding and fascia.
A look from above at showing the inside.
A final coat of oil base finish paint is being applied.
New downpiping elbows are being installed to replace the old grungy ones.
There is nothing like the shine of Benjamin Moore's oil base, finish paint. A gloss paint sheds dirt and cleans easily.
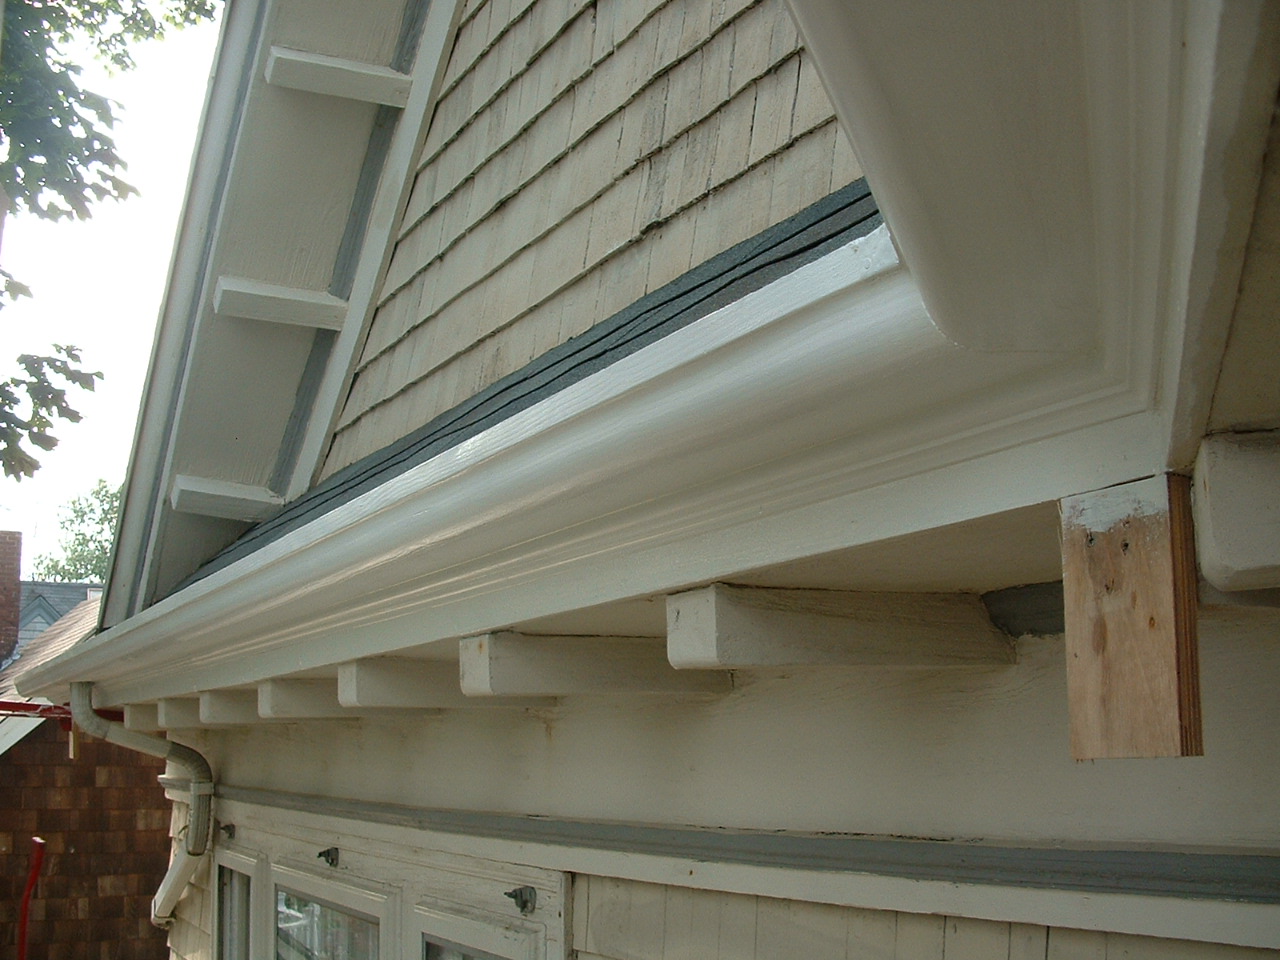
The SE side from below.
The SE side of the bay bump out from above
One gust of wind and leaves just blow right out of wood gutters. You can't say that about their aluminum counterpart. The paint will keep these new fir gutters from getting wet and then checking in the violent sun.
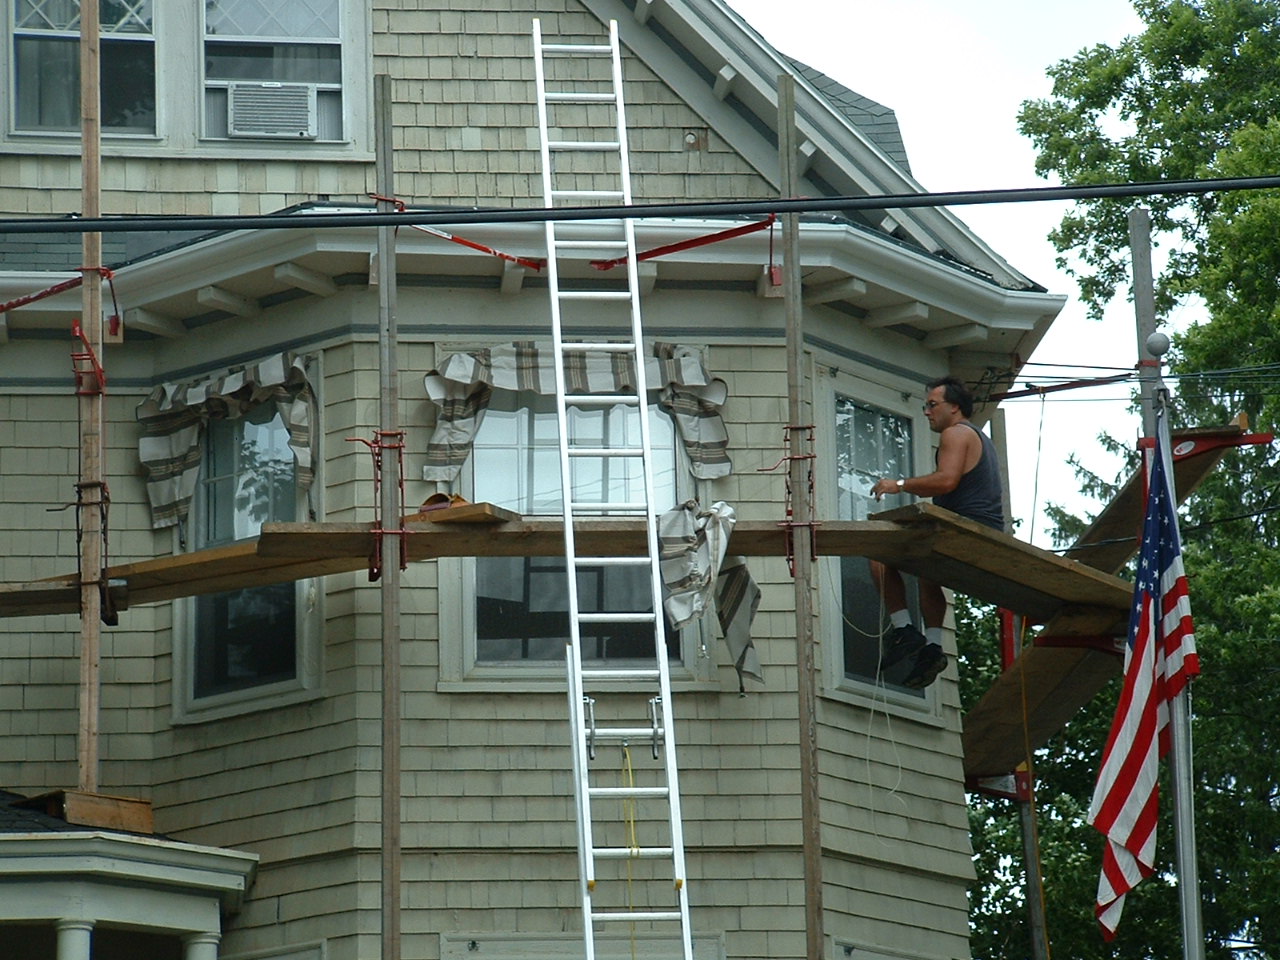
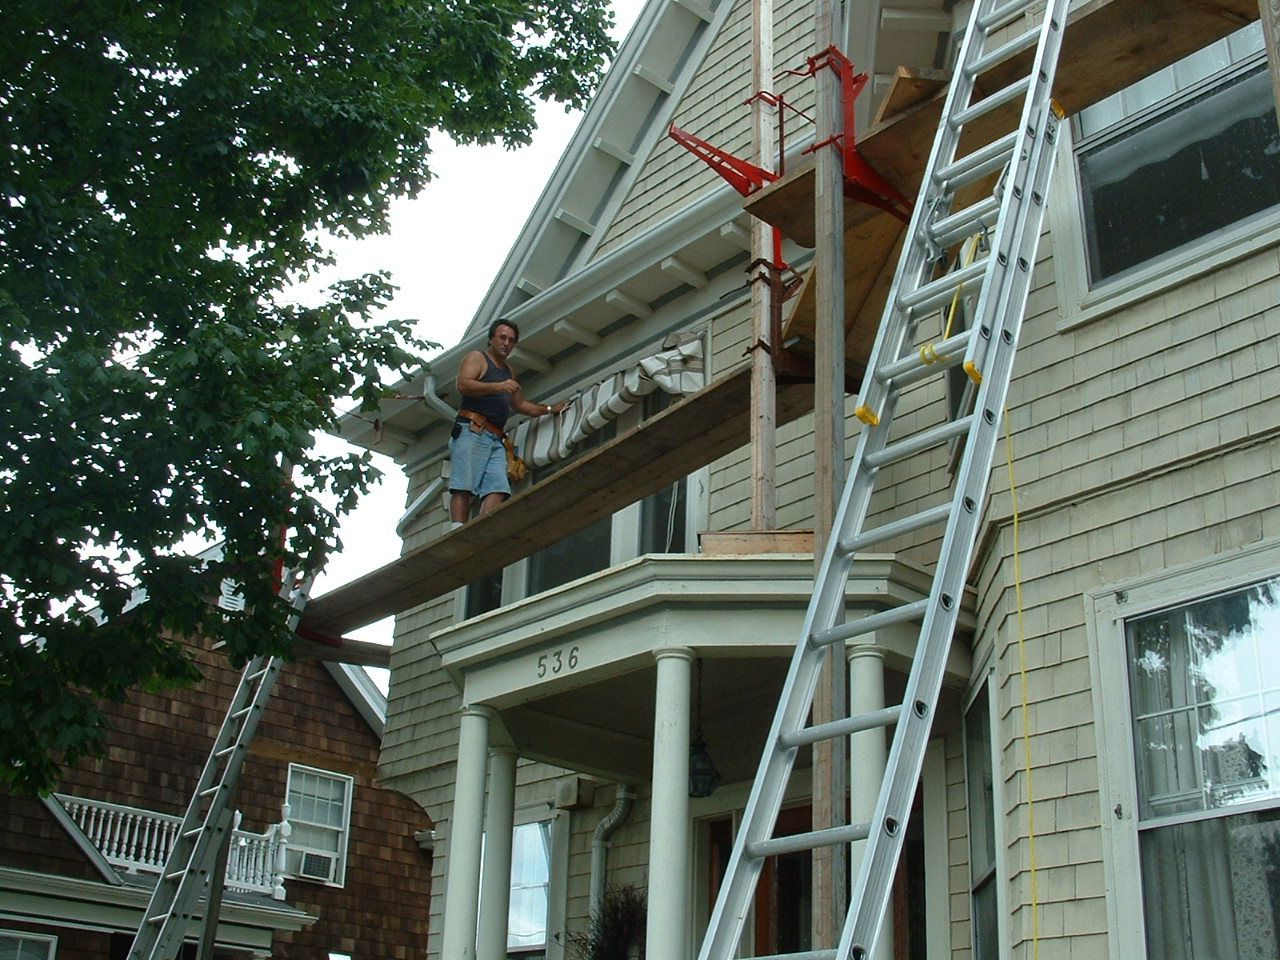
The awnings are being installed.
A closer look.
Installing this large wide awning from a ladder would have been no easy task.
Click on this photo to see the rain drops beaded up on the new oil based paint. This paint will last decades because I broke the milling glaze by sanding the fir gutters with 40 grit sandpaper and added penetrol oil to the primer and finish coats for superior adhesion.
 There are 50 reduced sized photos along with descriptions to view as you scroll down this page. I recommend clicking on any of these photos to see the close up details of the original photos, The larger photos will "pop-up".