|
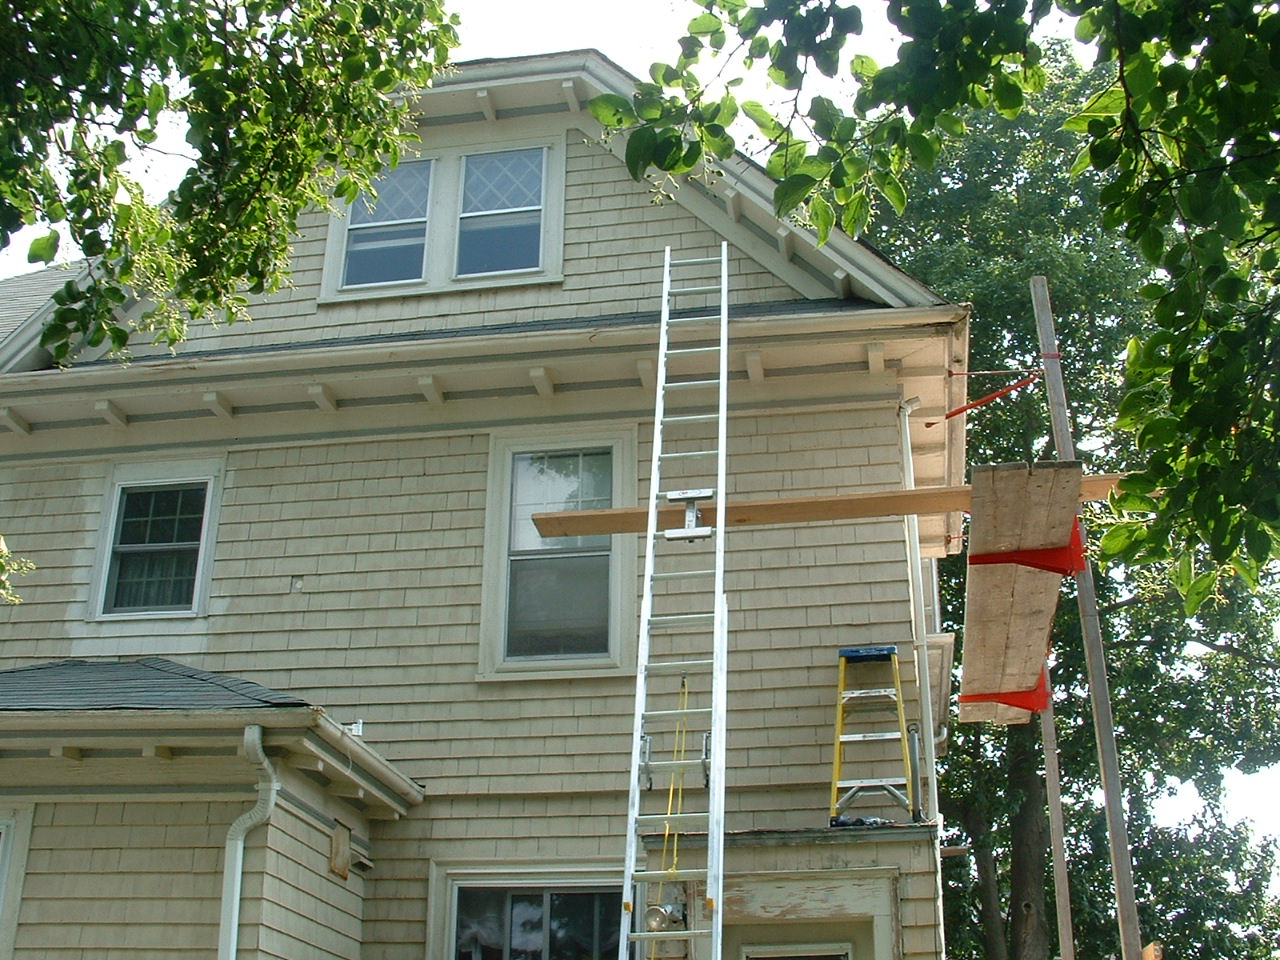
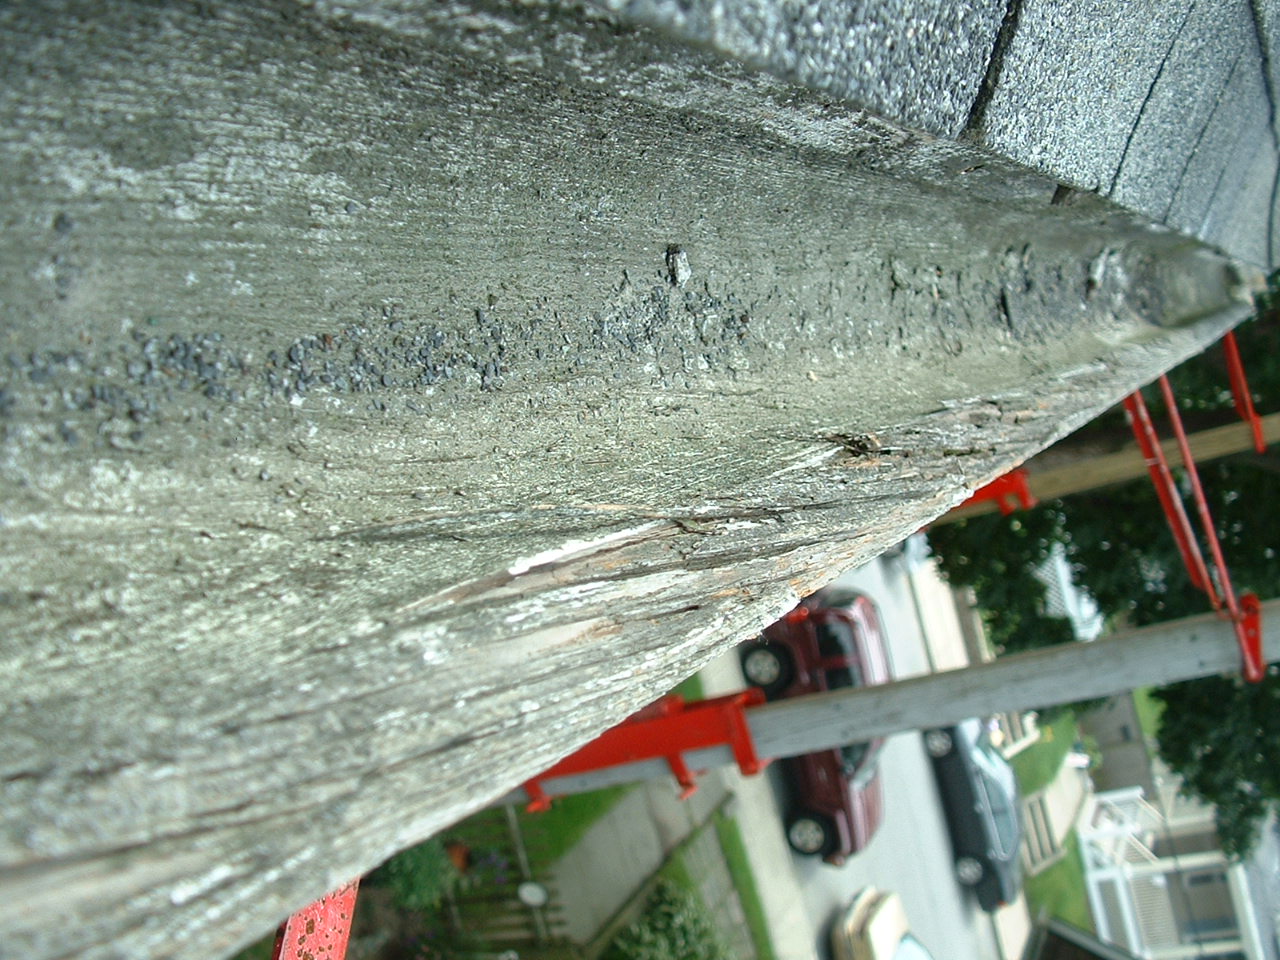
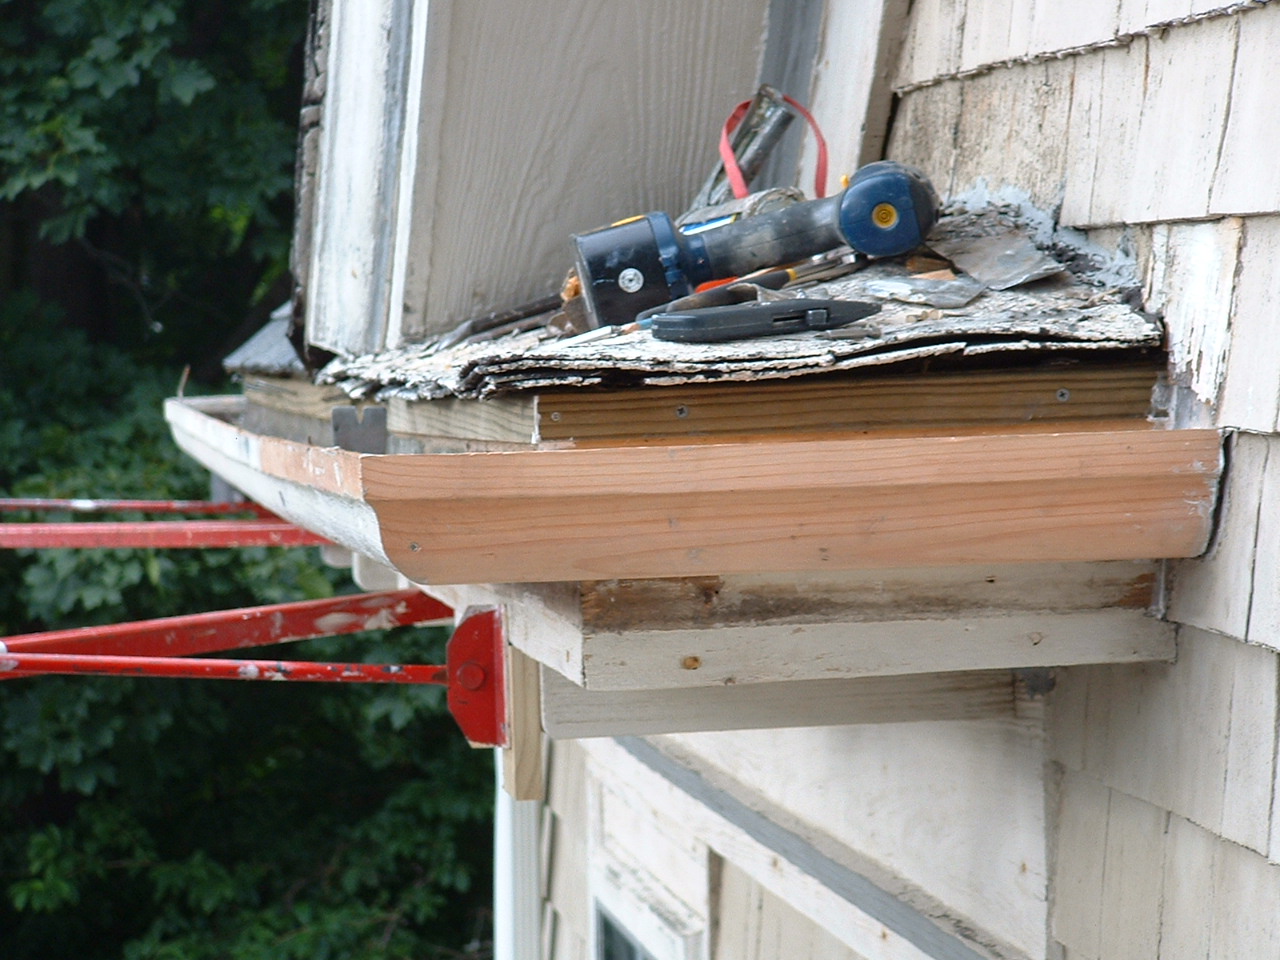
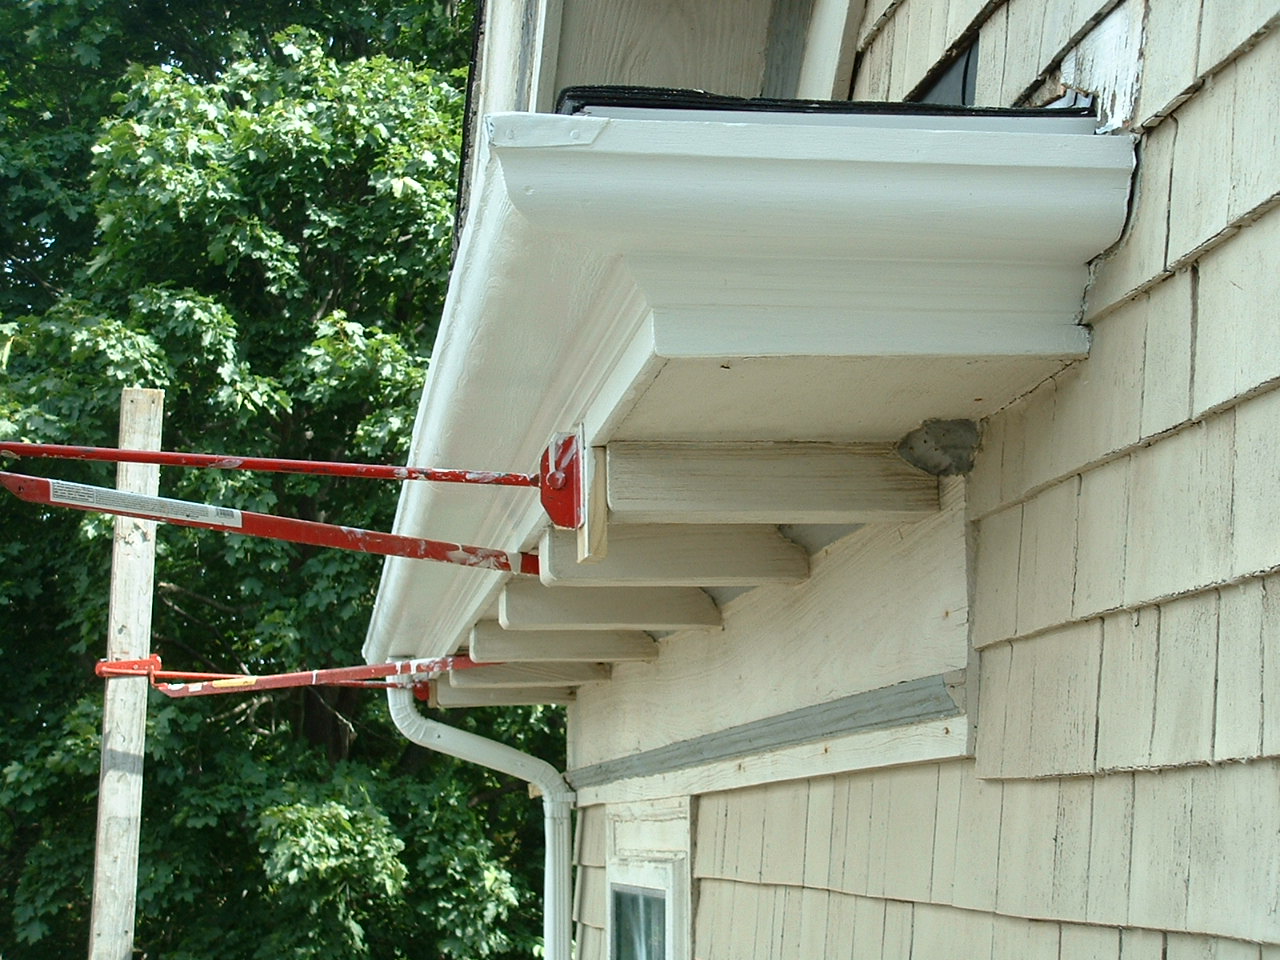
Getting up to the rotted NorthWest corner |
|
|
Again, a plugged leader outlet or downpipe allows standing water to eventually work it's way under a leaded joint and cause rot. |
|
|
Amazing there are not alot of debris in this gutter. Evidently the gutter is self cleaning of organic material by the strong winds being atop of the highlands in Fall River MA. |
|
|
However, unseen organic material trapped in the downpiping will creating standing water in the gutter leading to early joint failure. This leader outlet was clear but the downpiping elbows were plugged. |
|
|
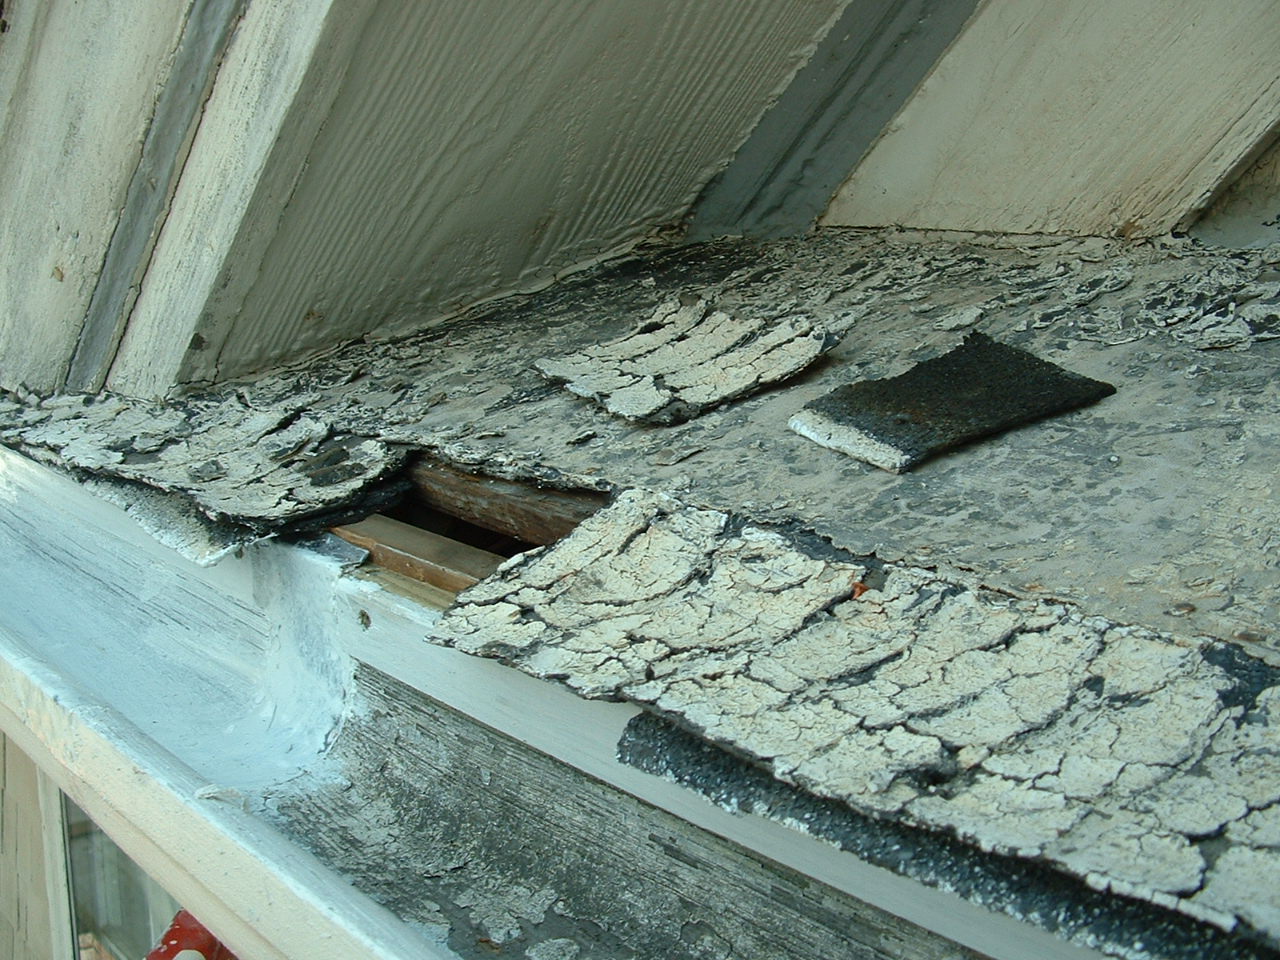
The SW side of the house is highly shaded whereas the NW is not. It is apparent that strong sun has destroyed this section of gutter by causing the unprotected wood to check badly. |
|
|
Wood that repeatedly wets and rapidly dries splits wide open (called checking). The same thing happened to the east sections on south gutter around the bay bumpout. |
|
|
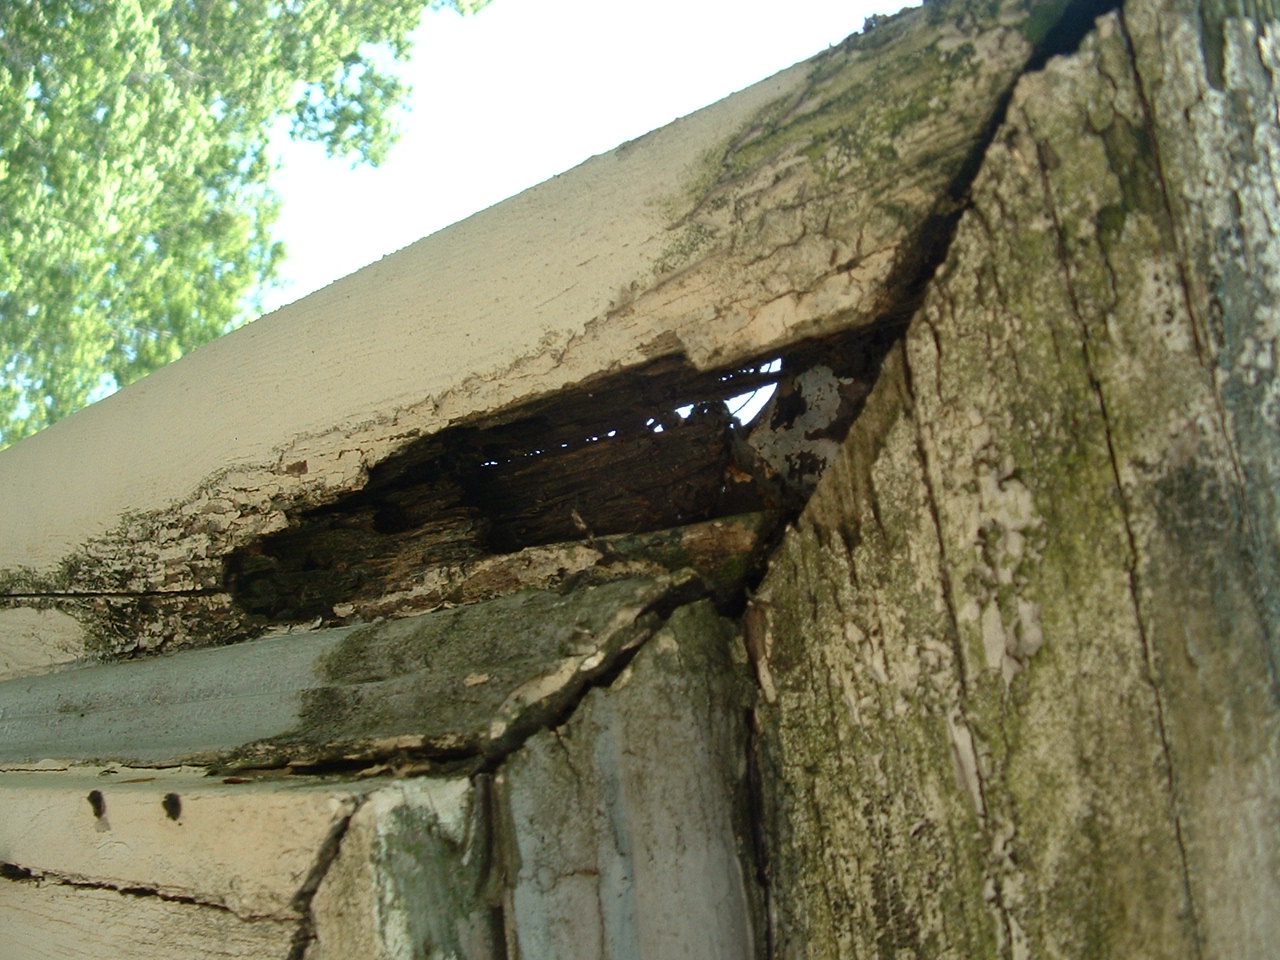
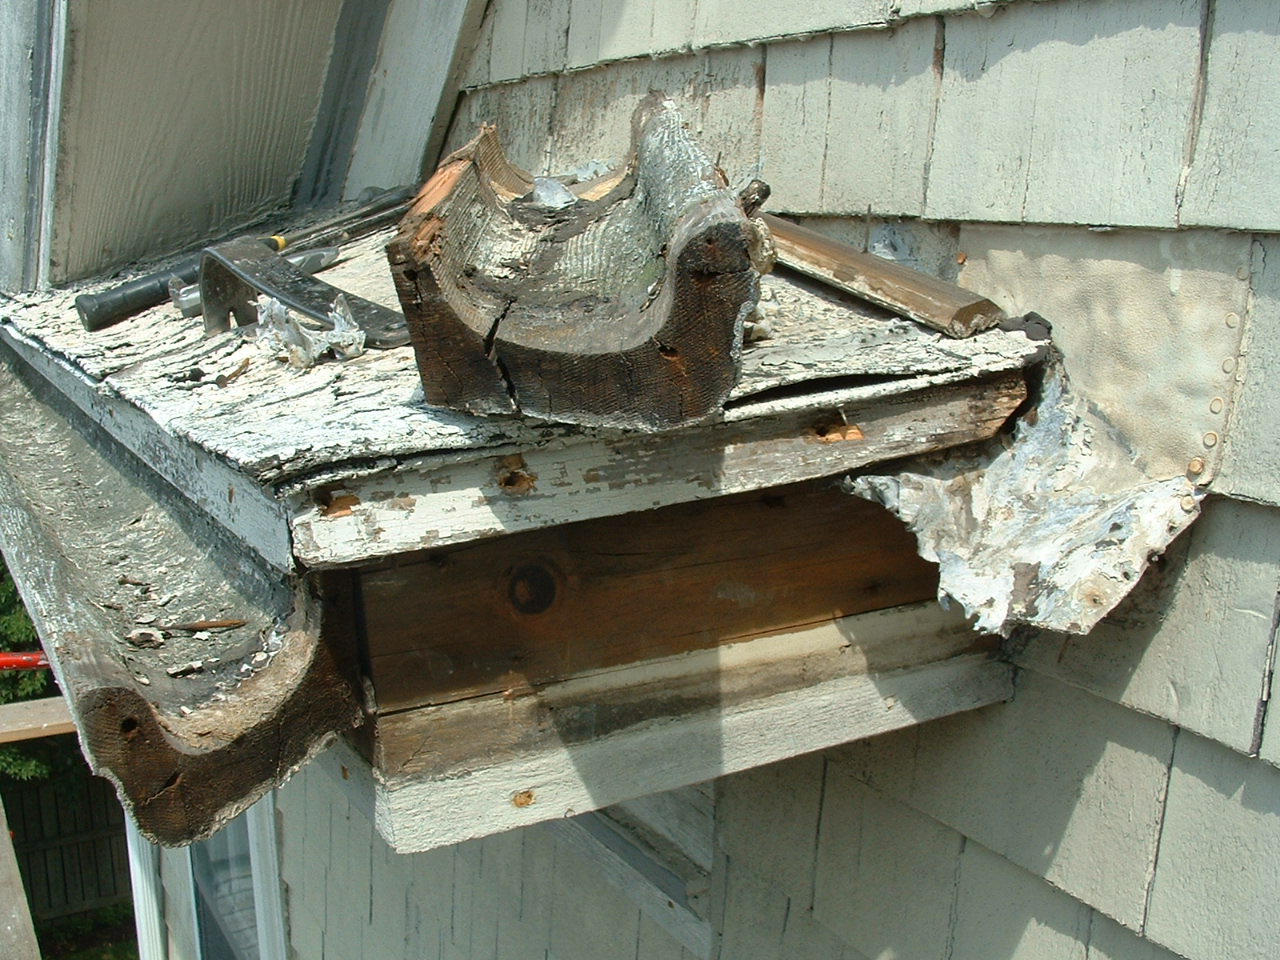
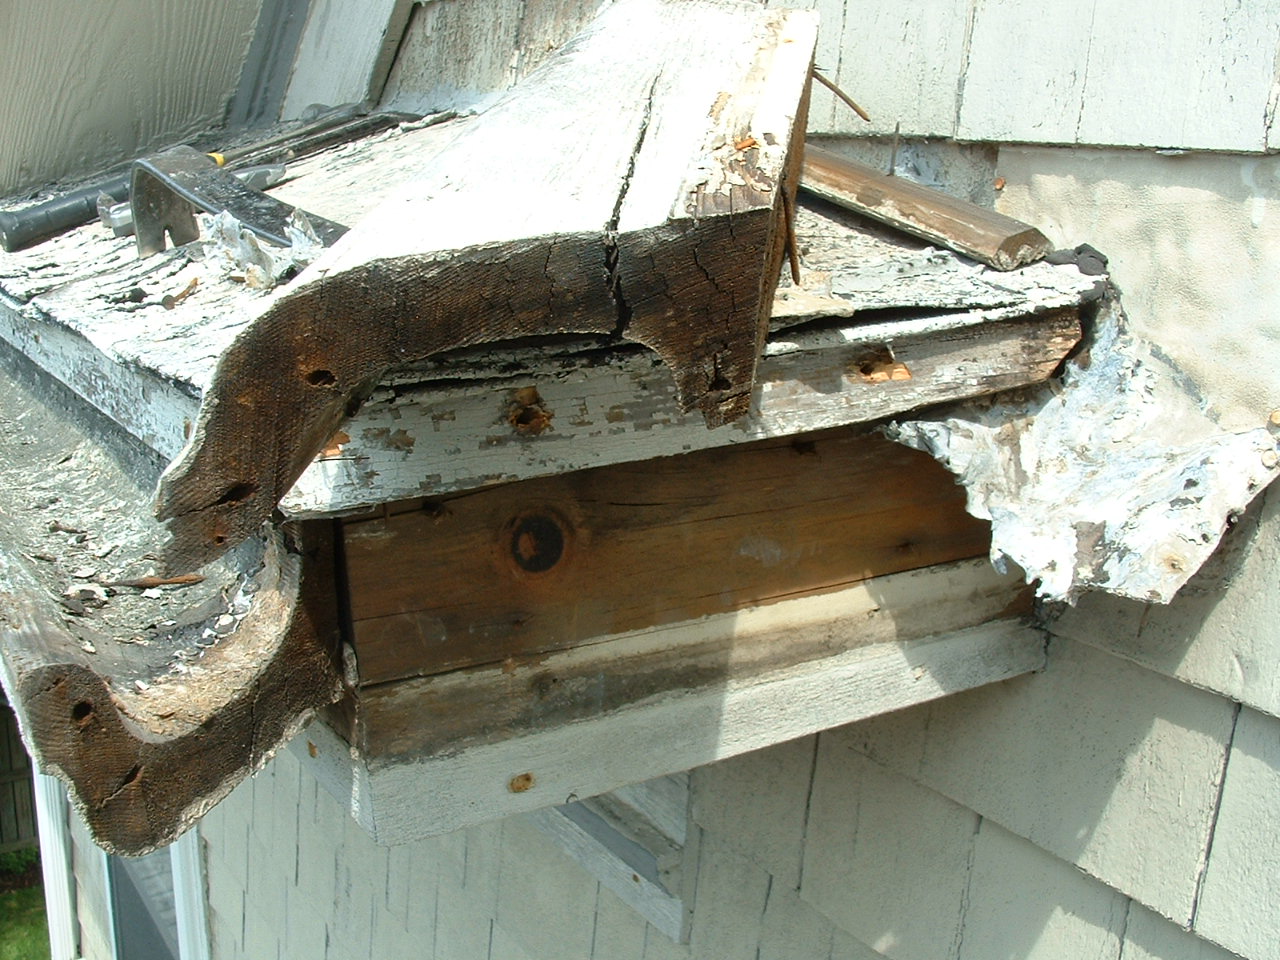
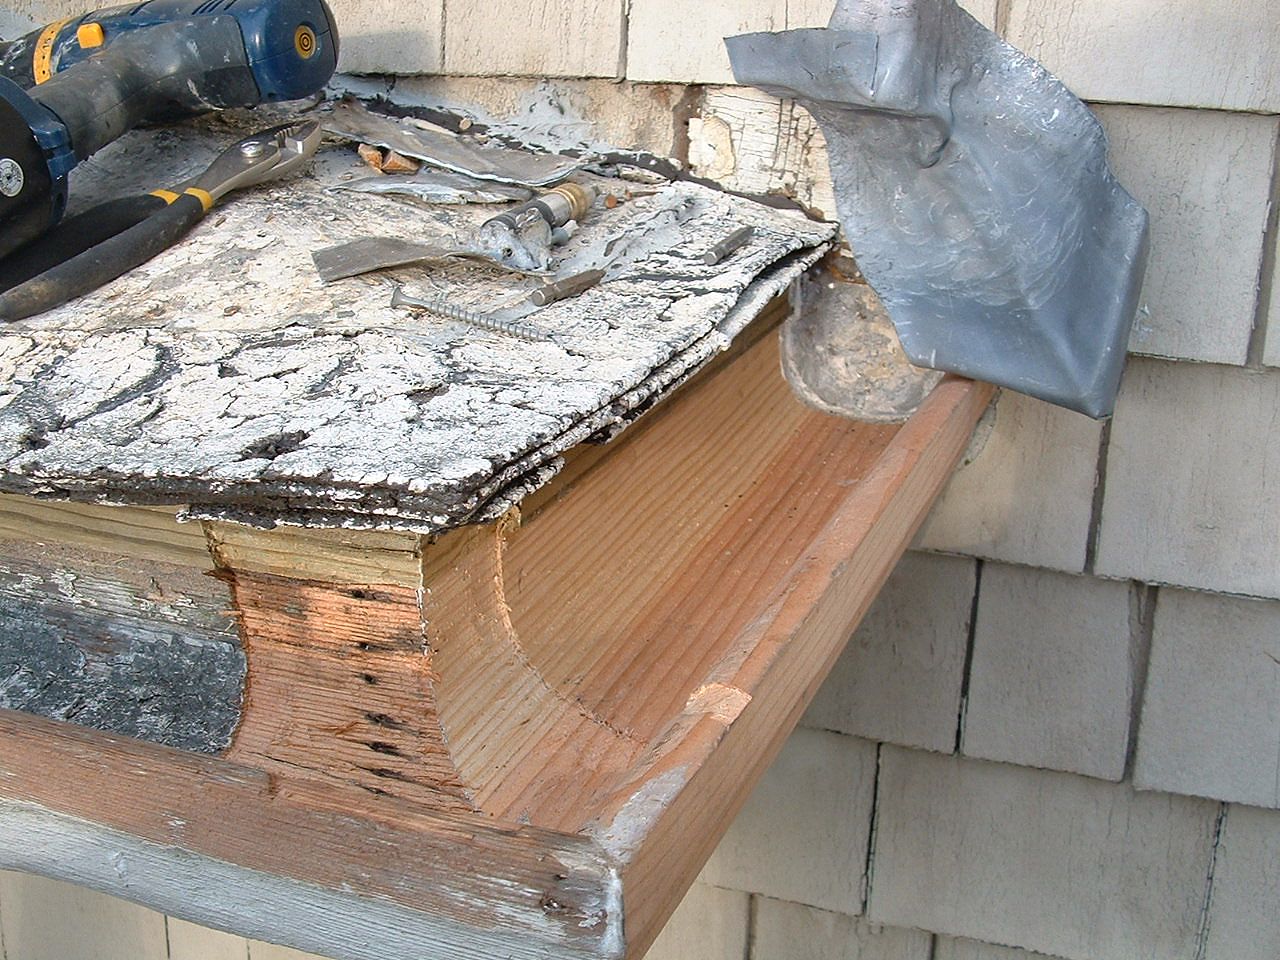
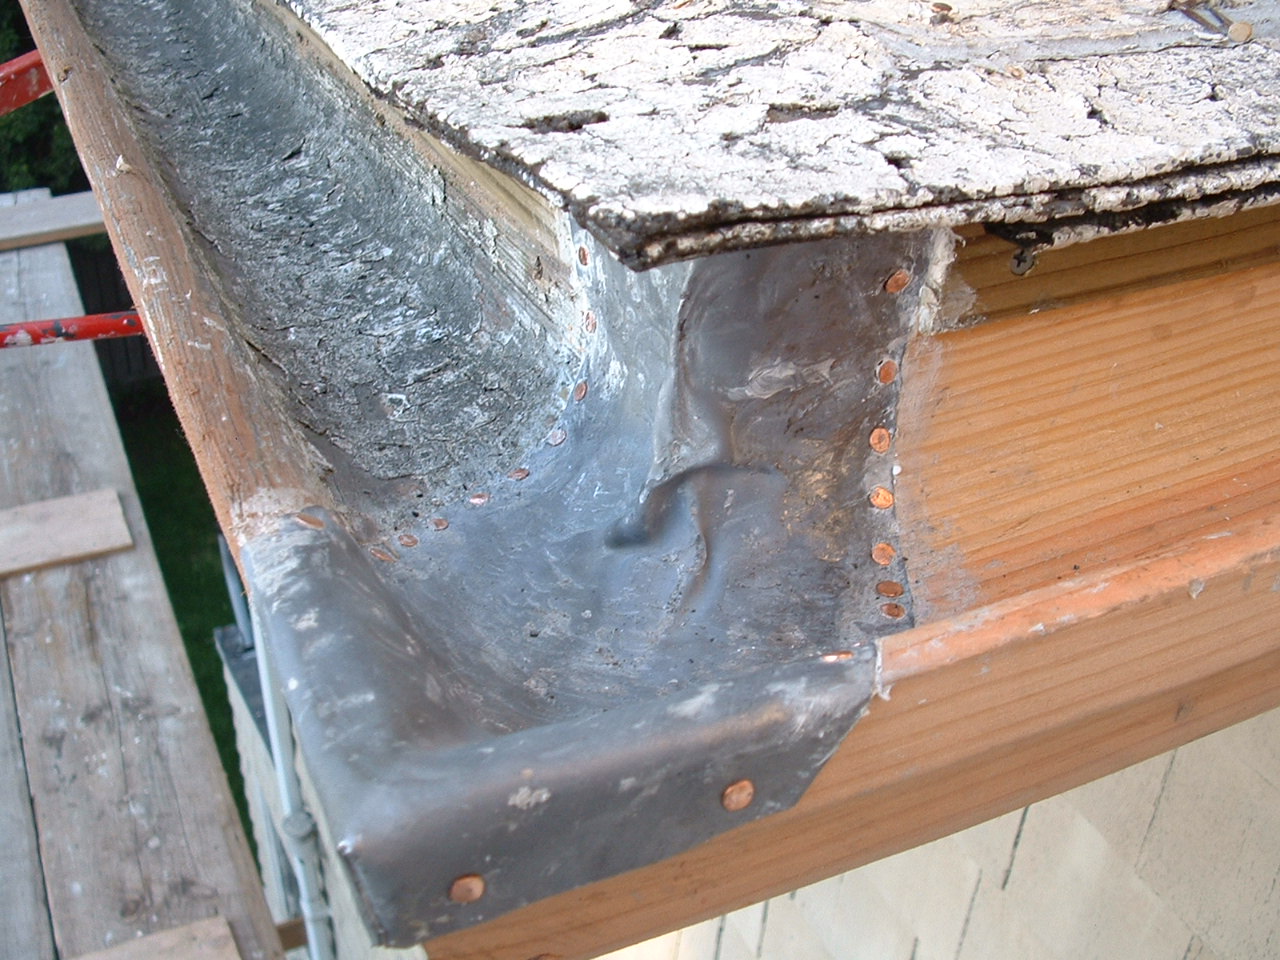
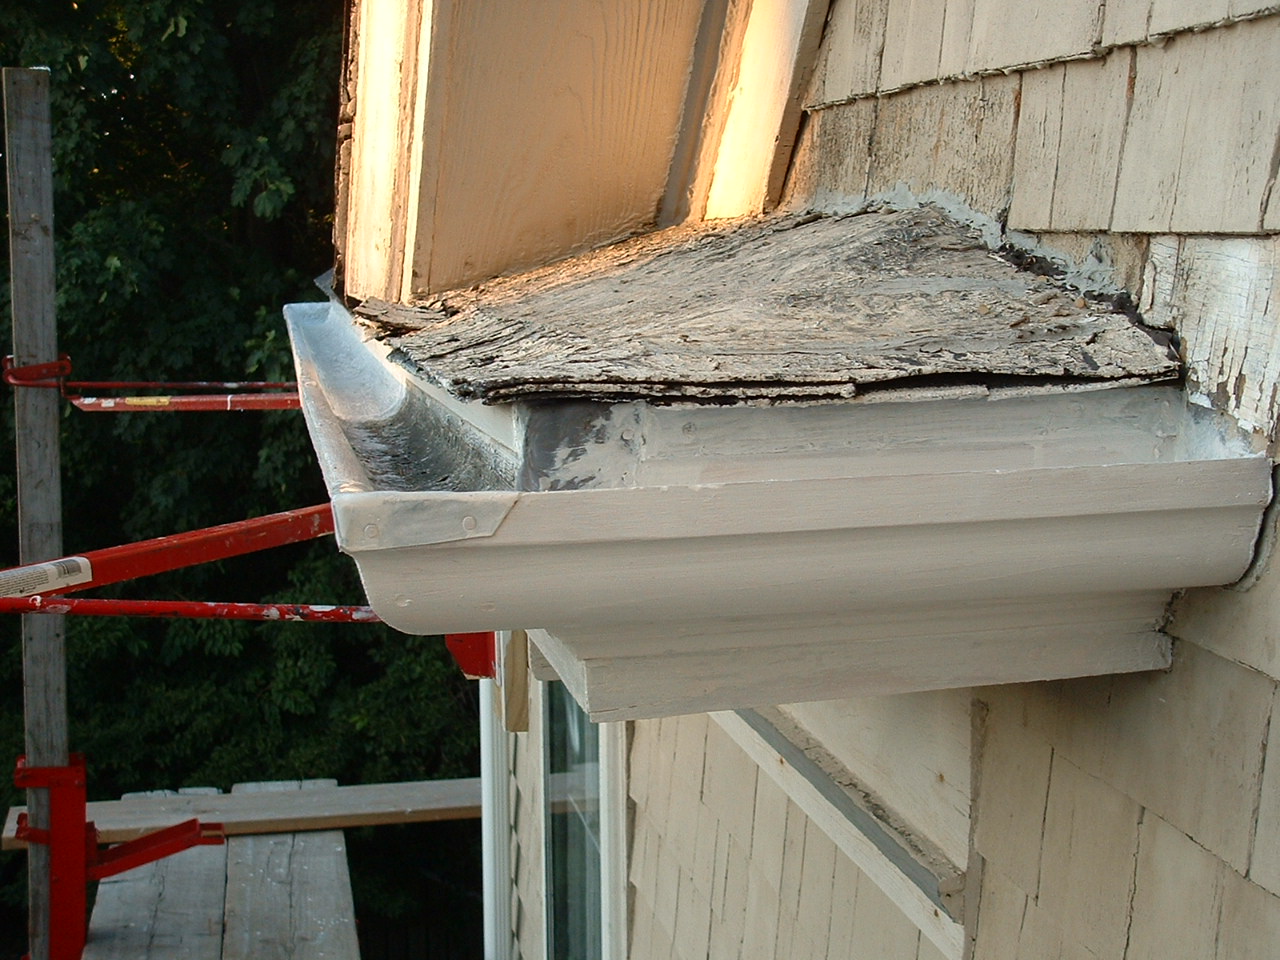
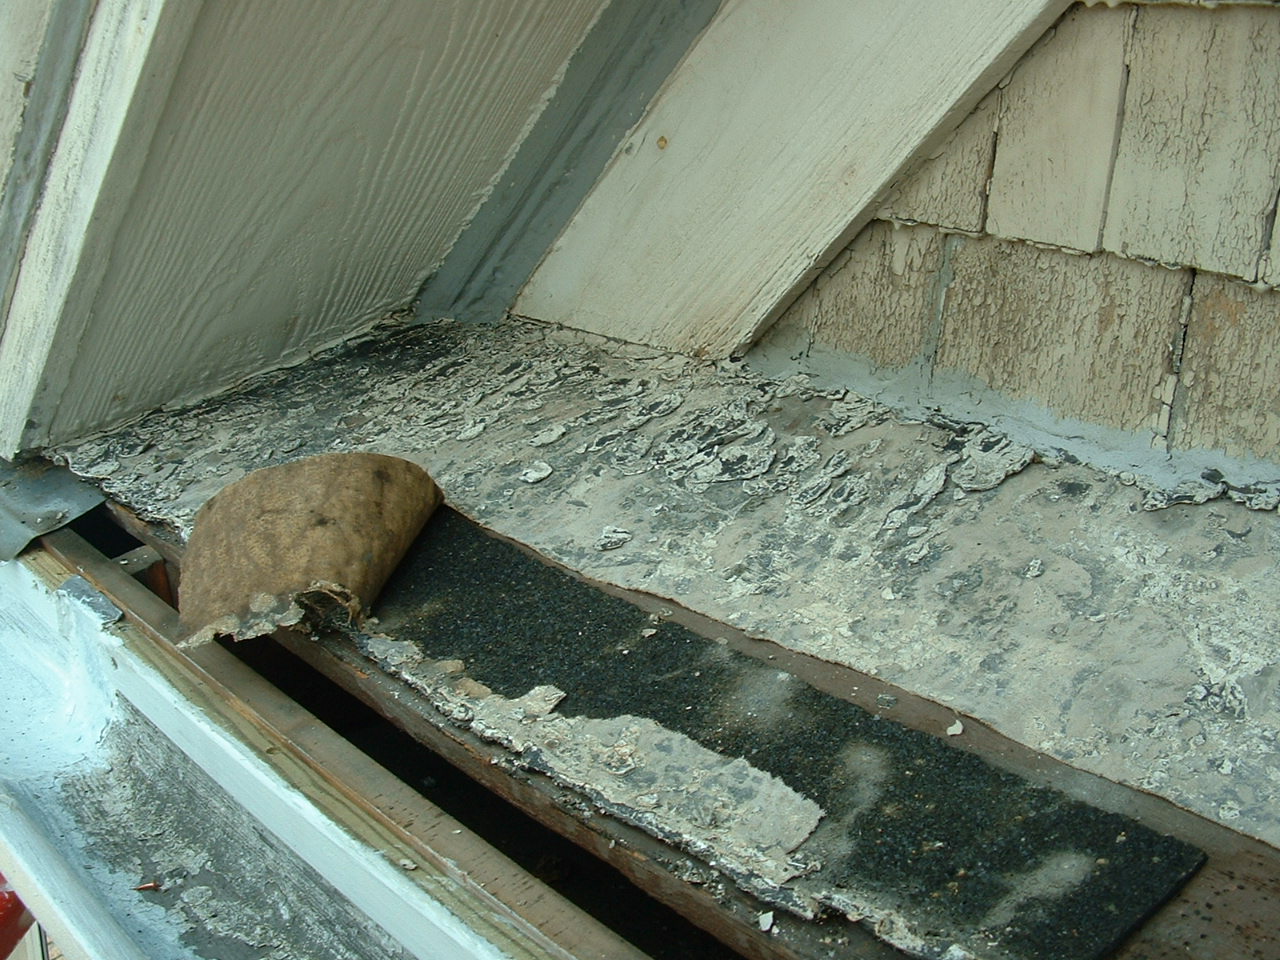
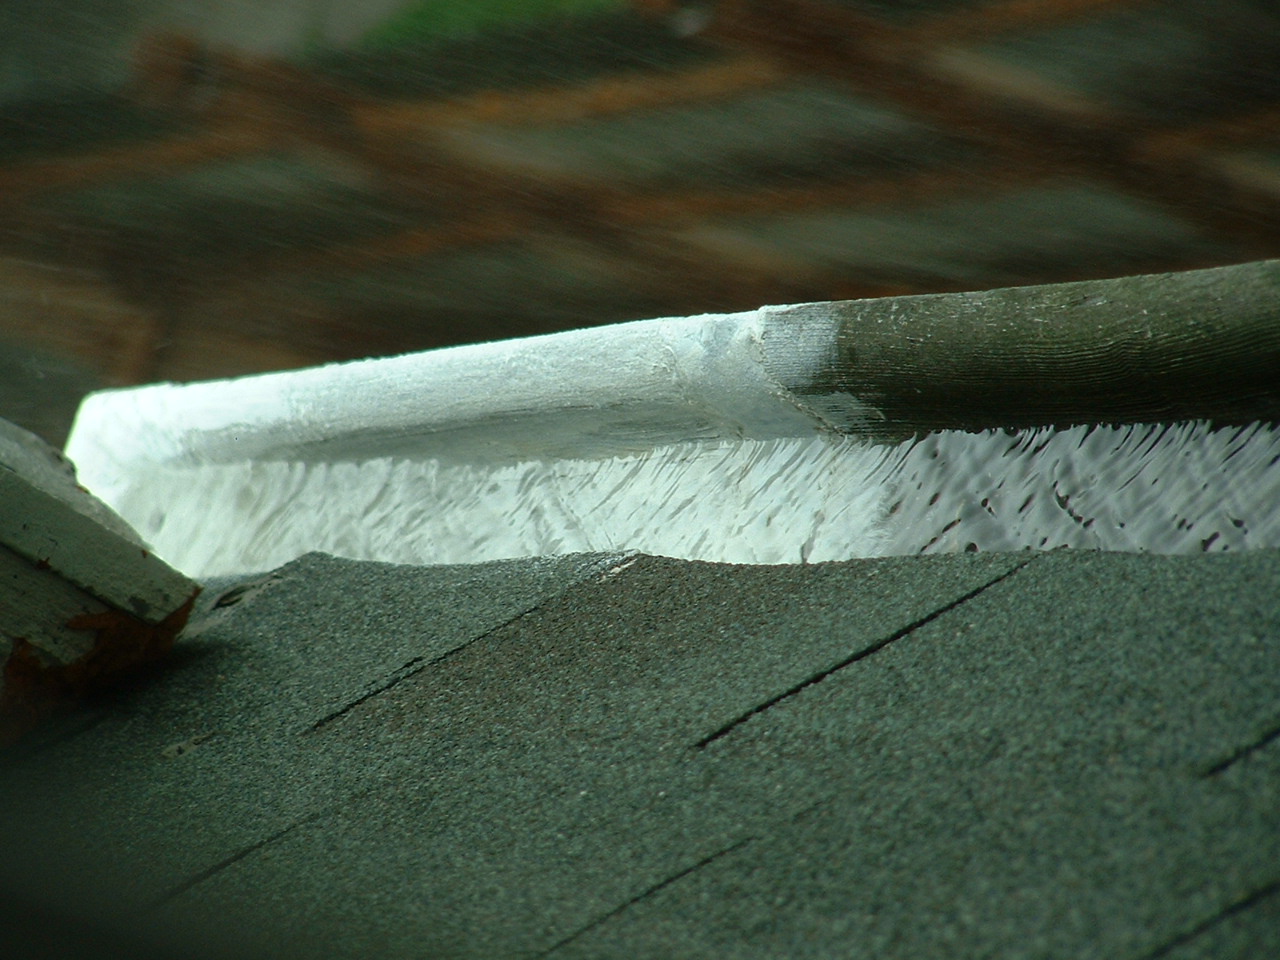
Here is a look down the one peice 38' North gutter that rarely sees direct sun. It's in great shape except for the rotted out end at this NW miter joint. |
|
|
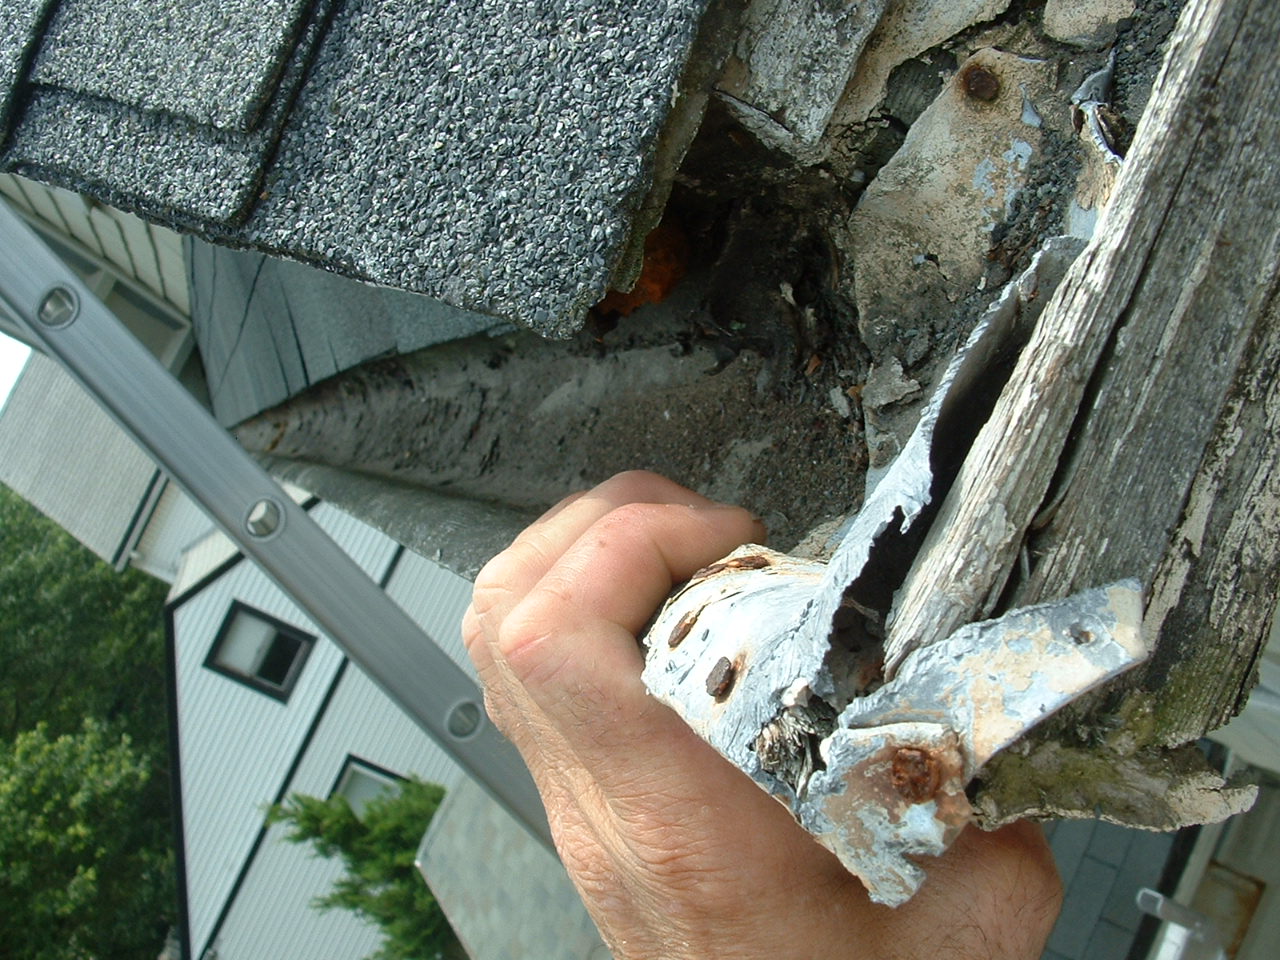
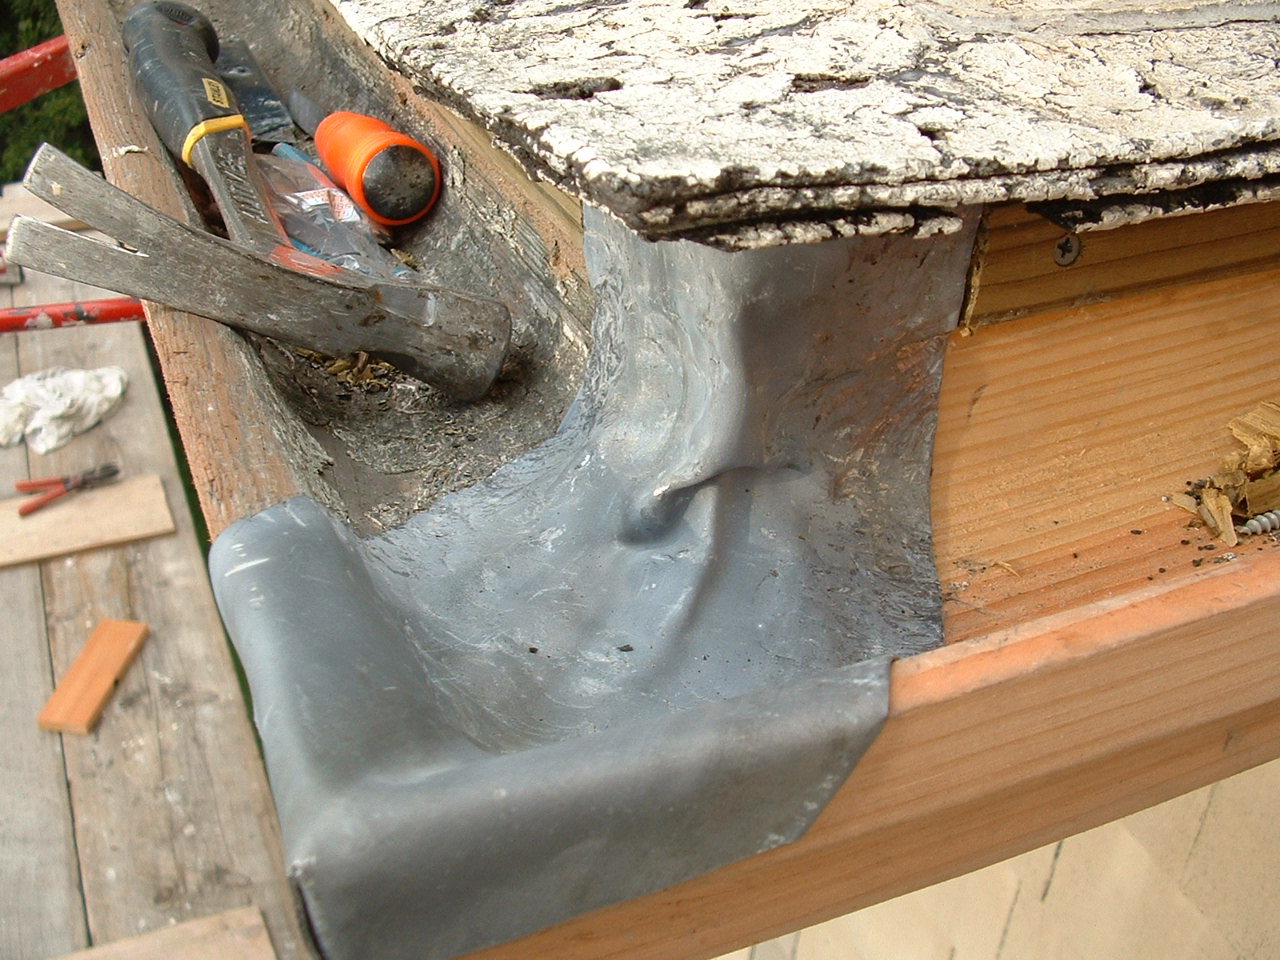
Here's a look under the lead. Someone used tar to seal it. It looks to me like there were many voids for water to seep in. |
|
|
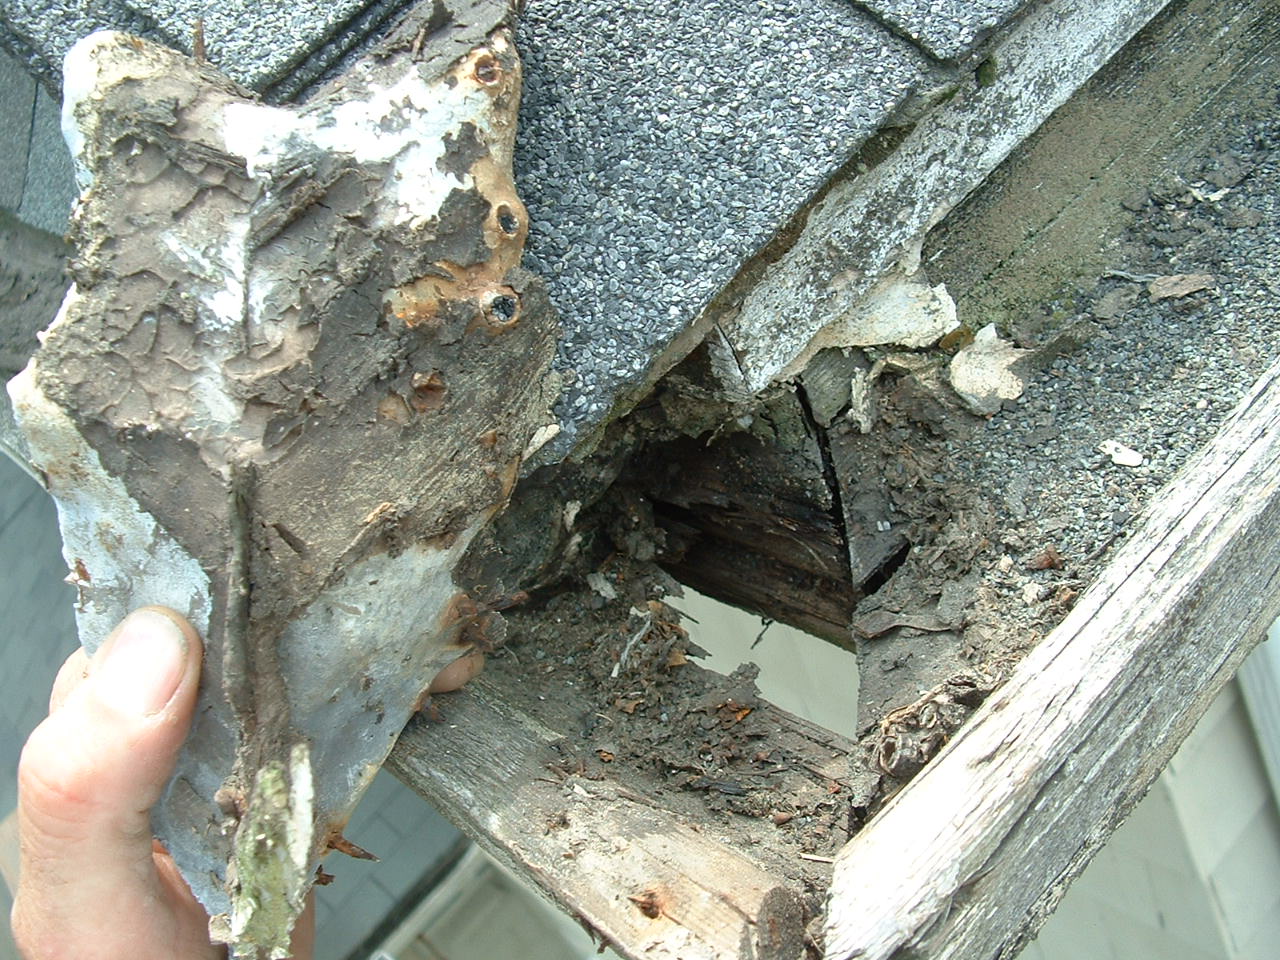
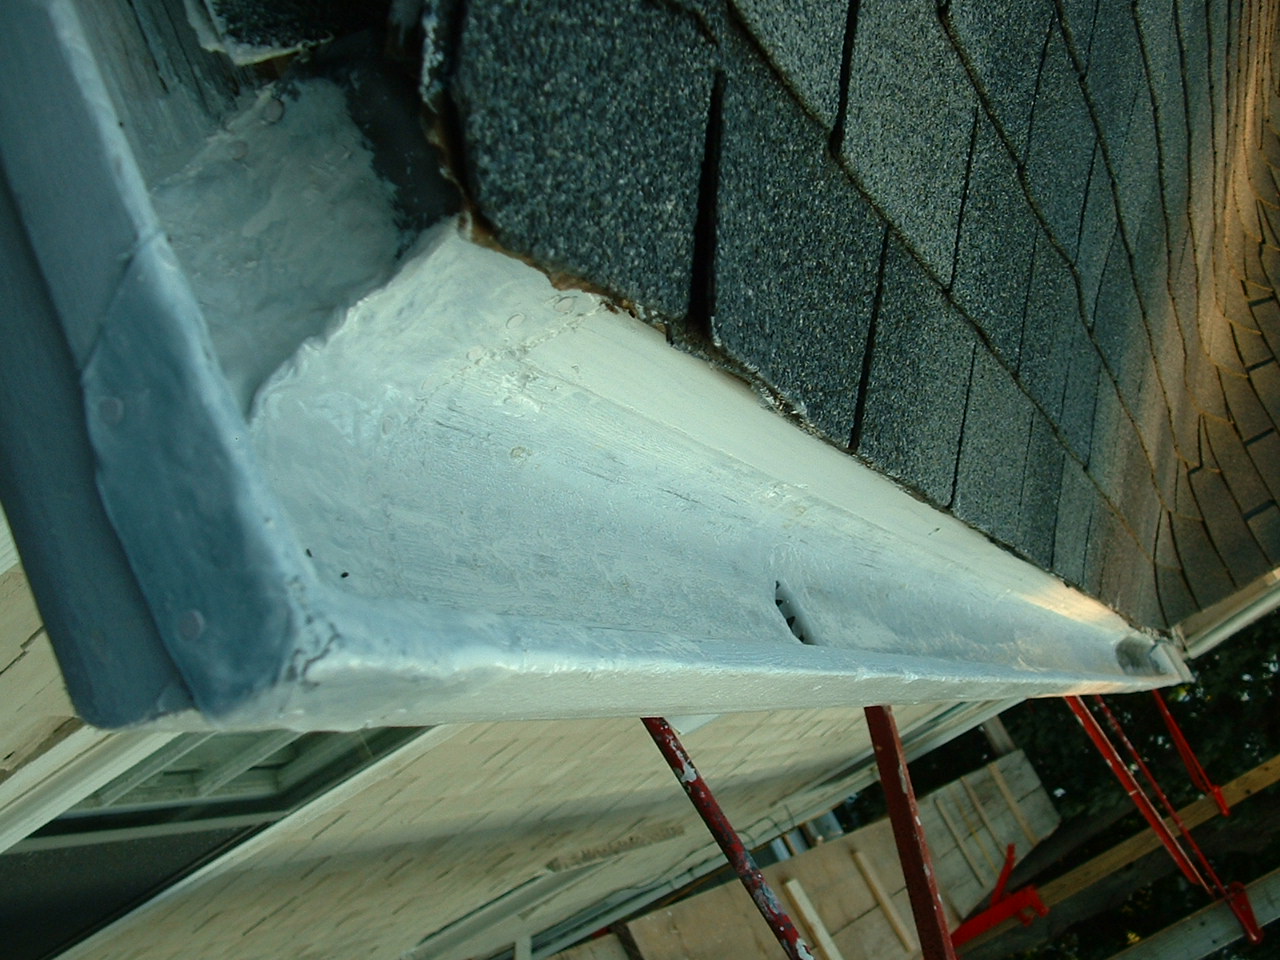
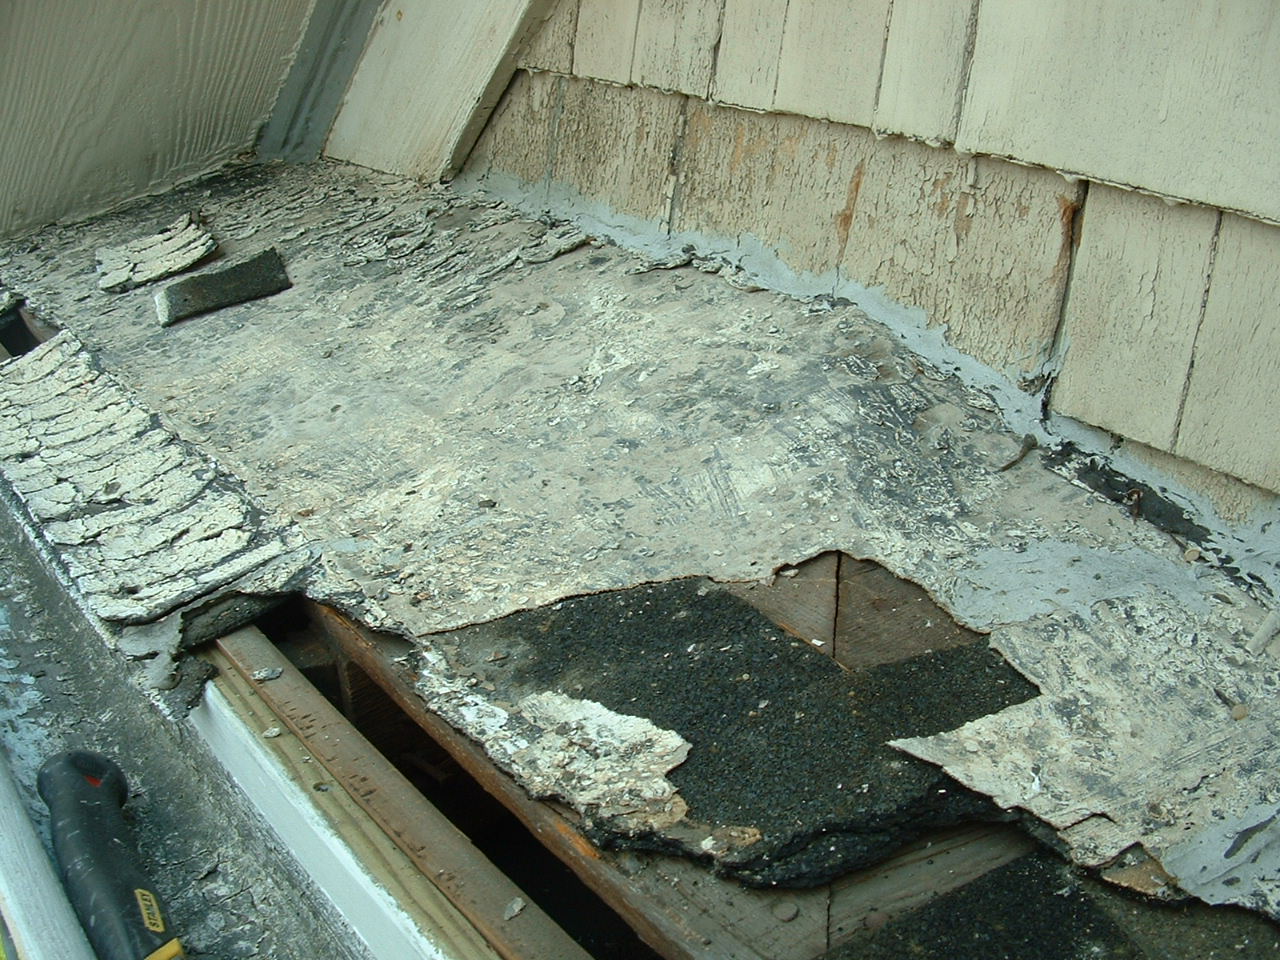
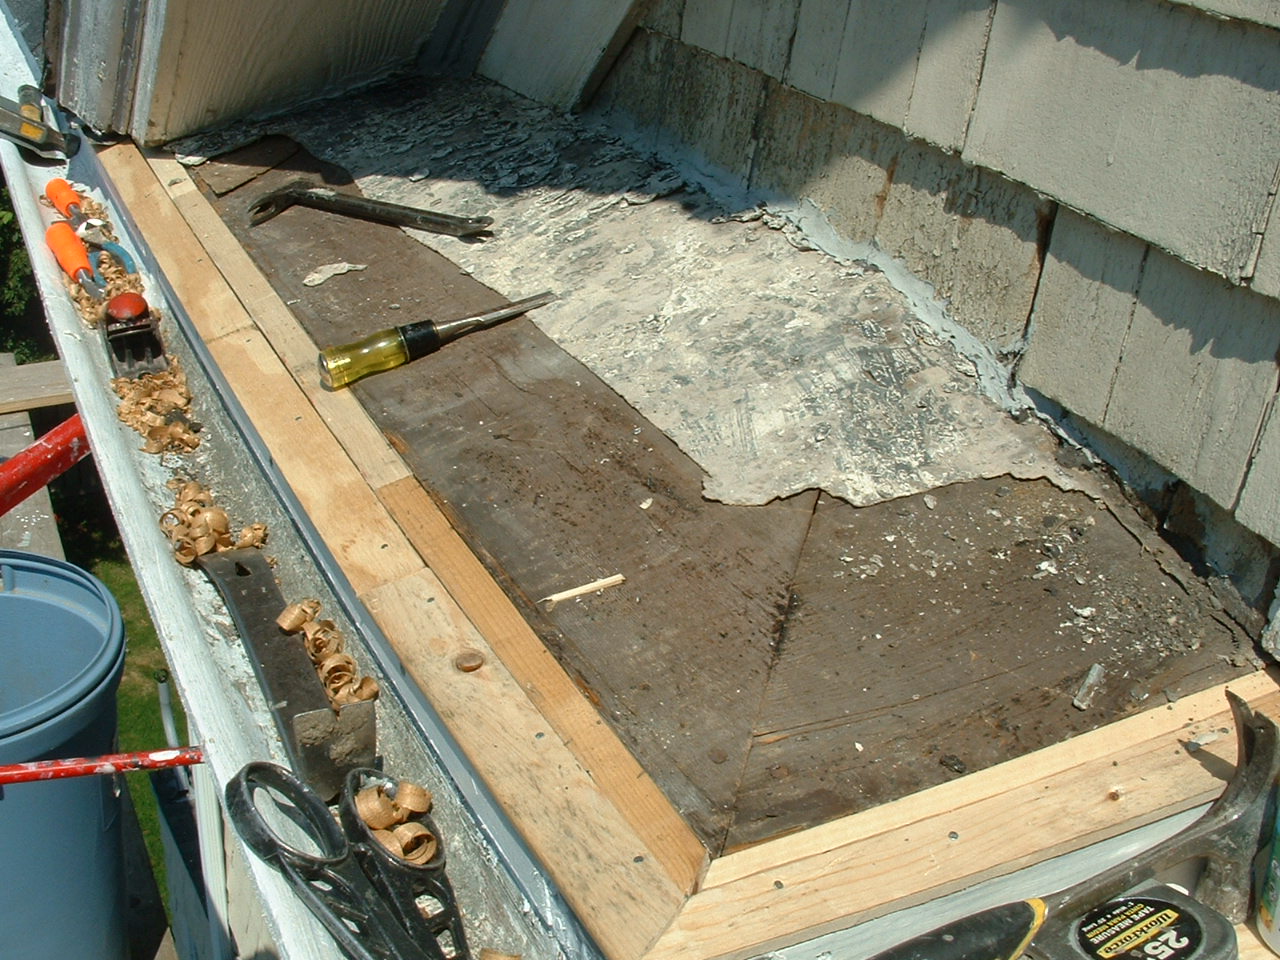
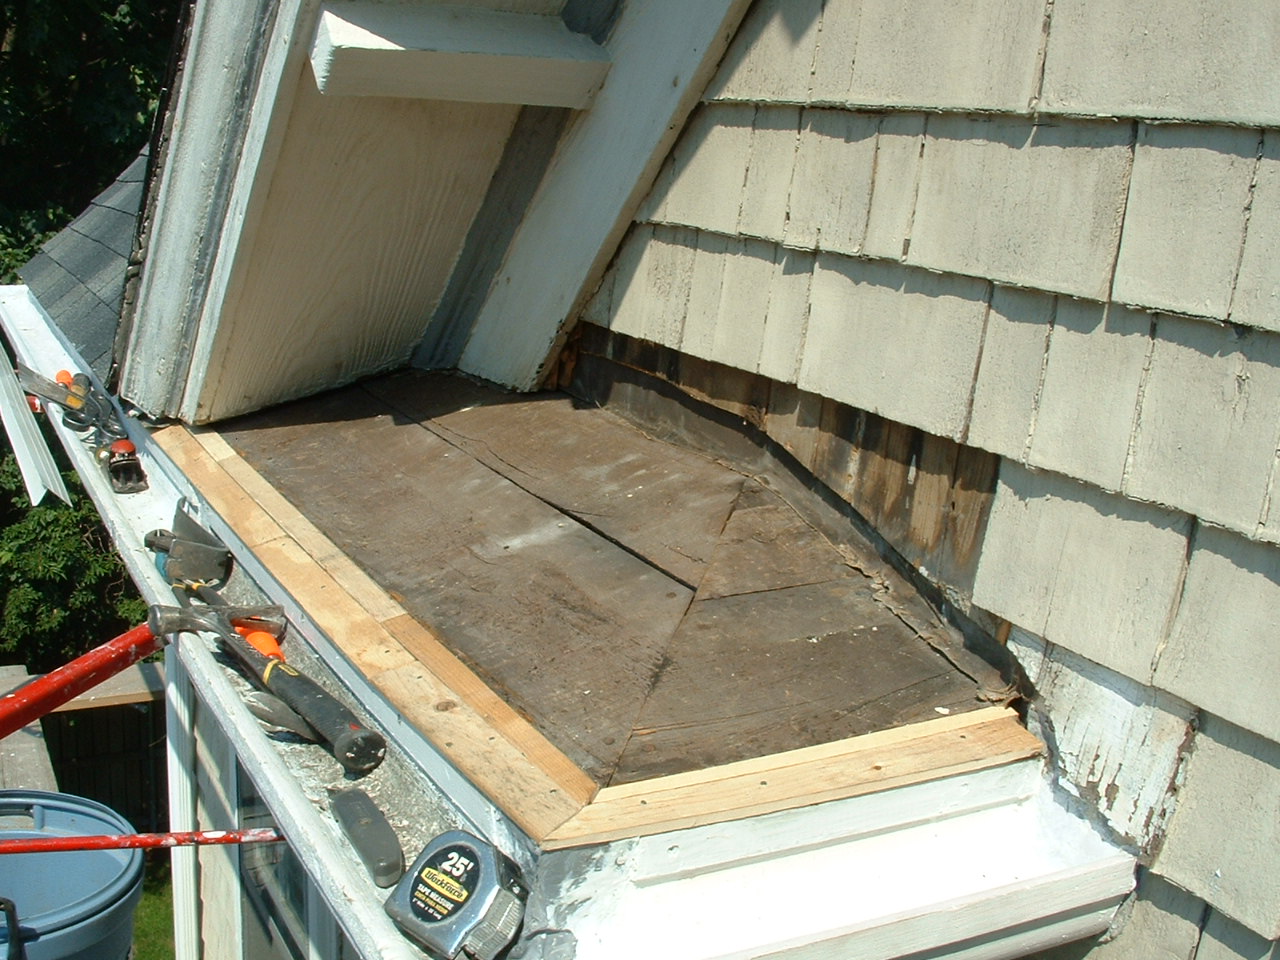
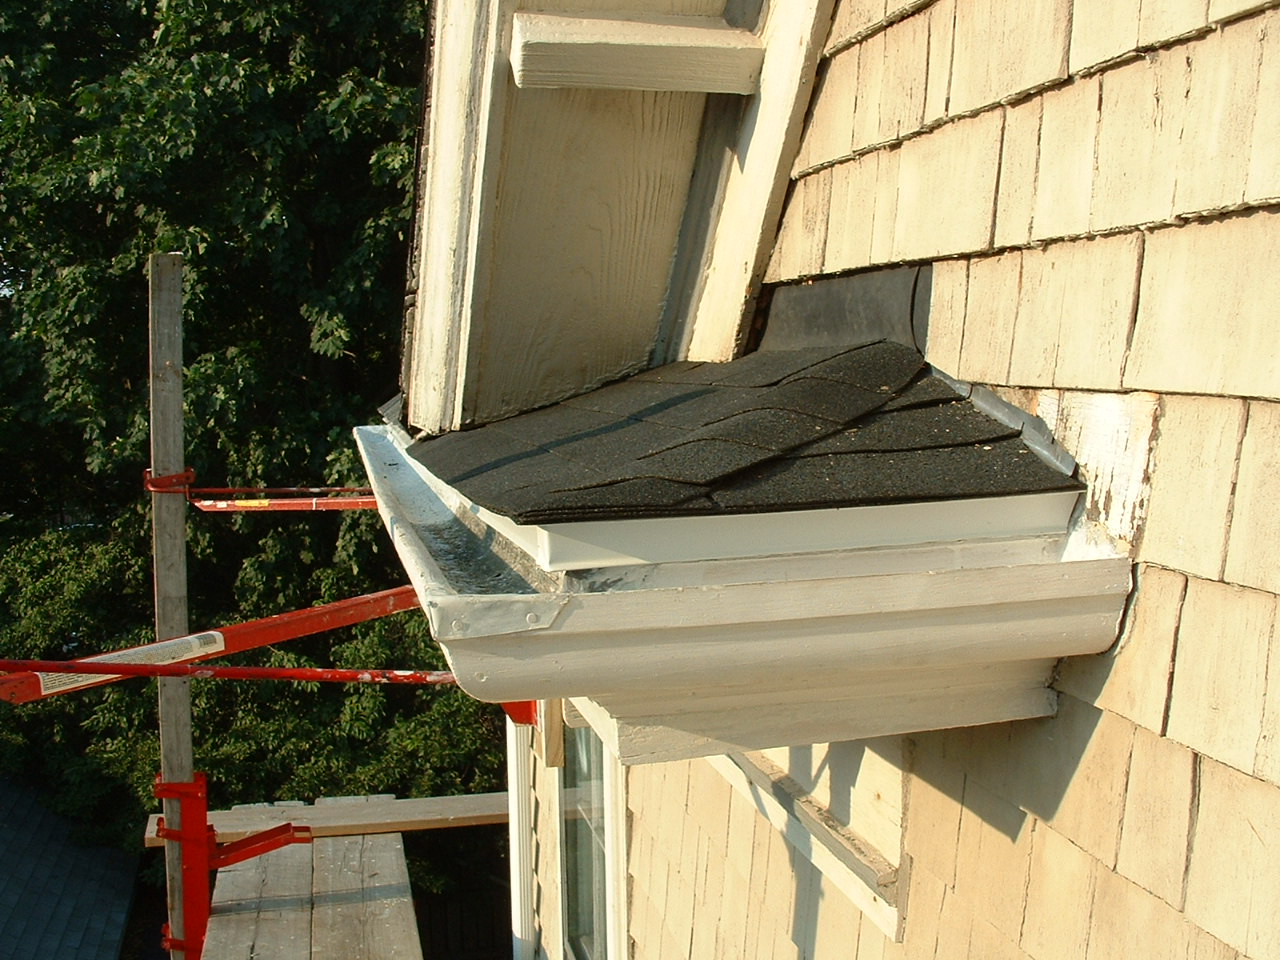
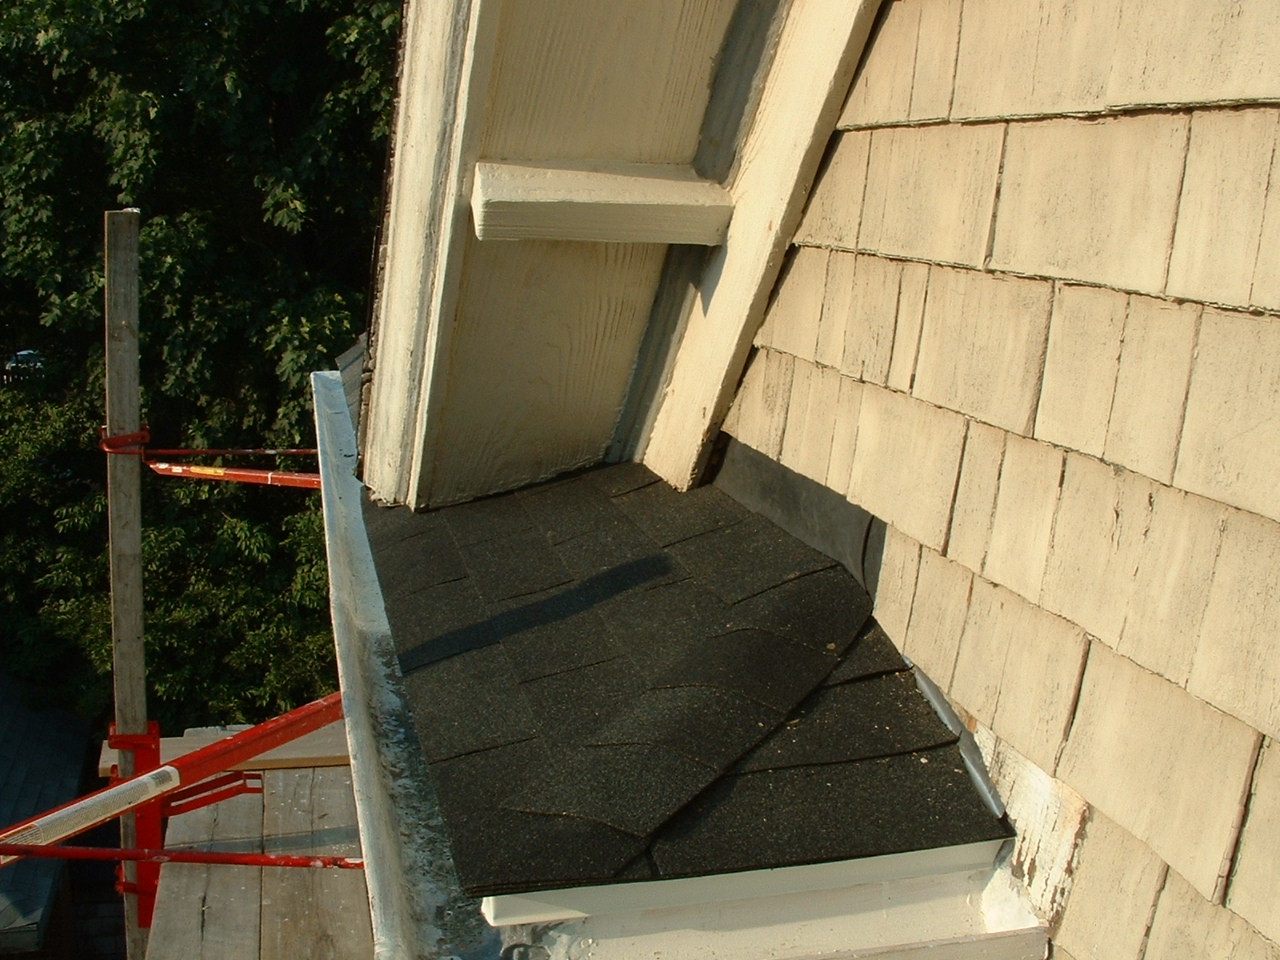
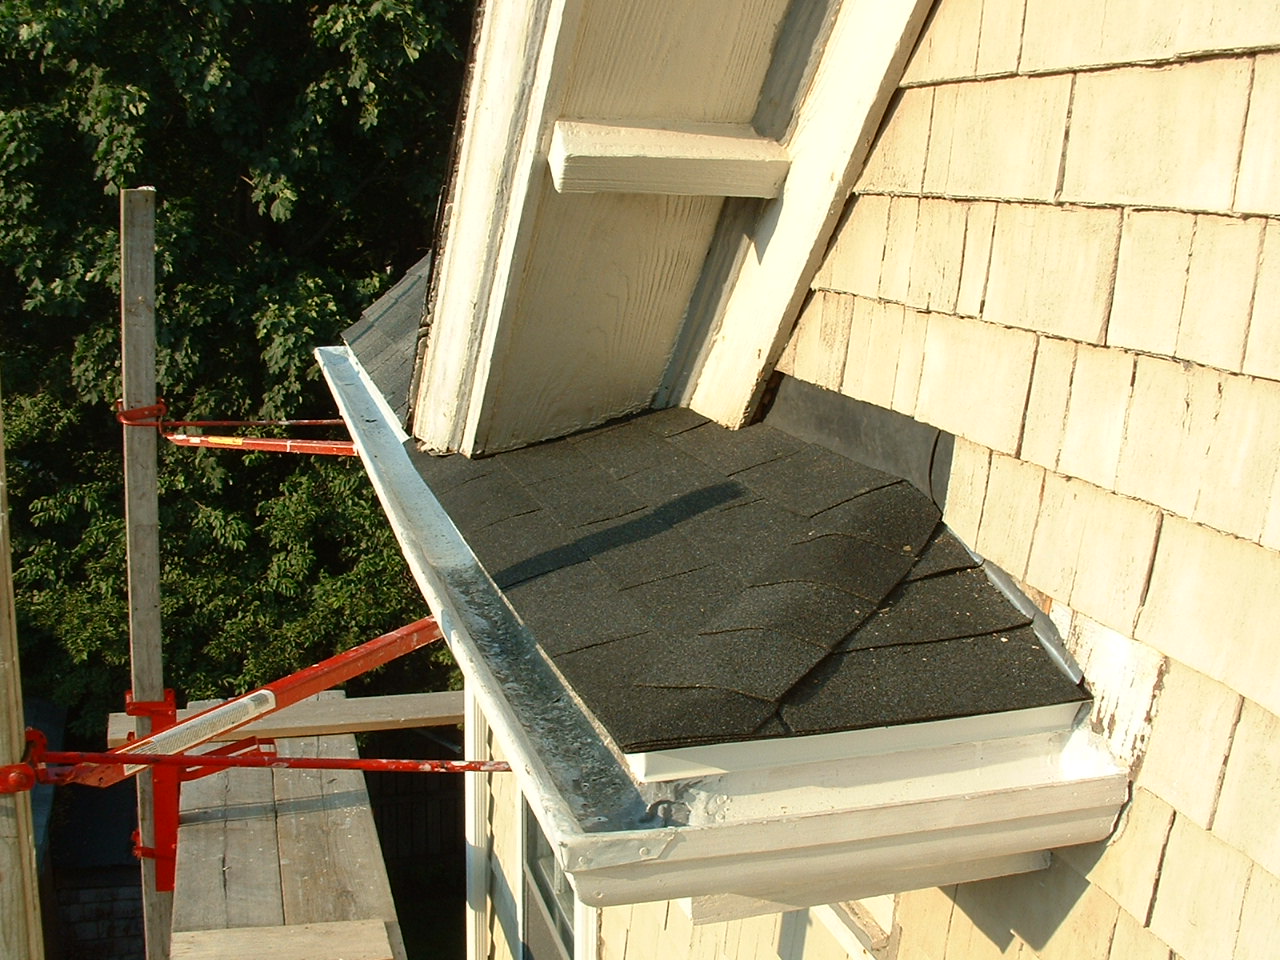
The southerly end of this gutter is in good shape but this return's roofing is ready to fail. I'll have to disturb this brittle roofing if I attempt to work on this gutter, so it will have to replace it. |
|
|
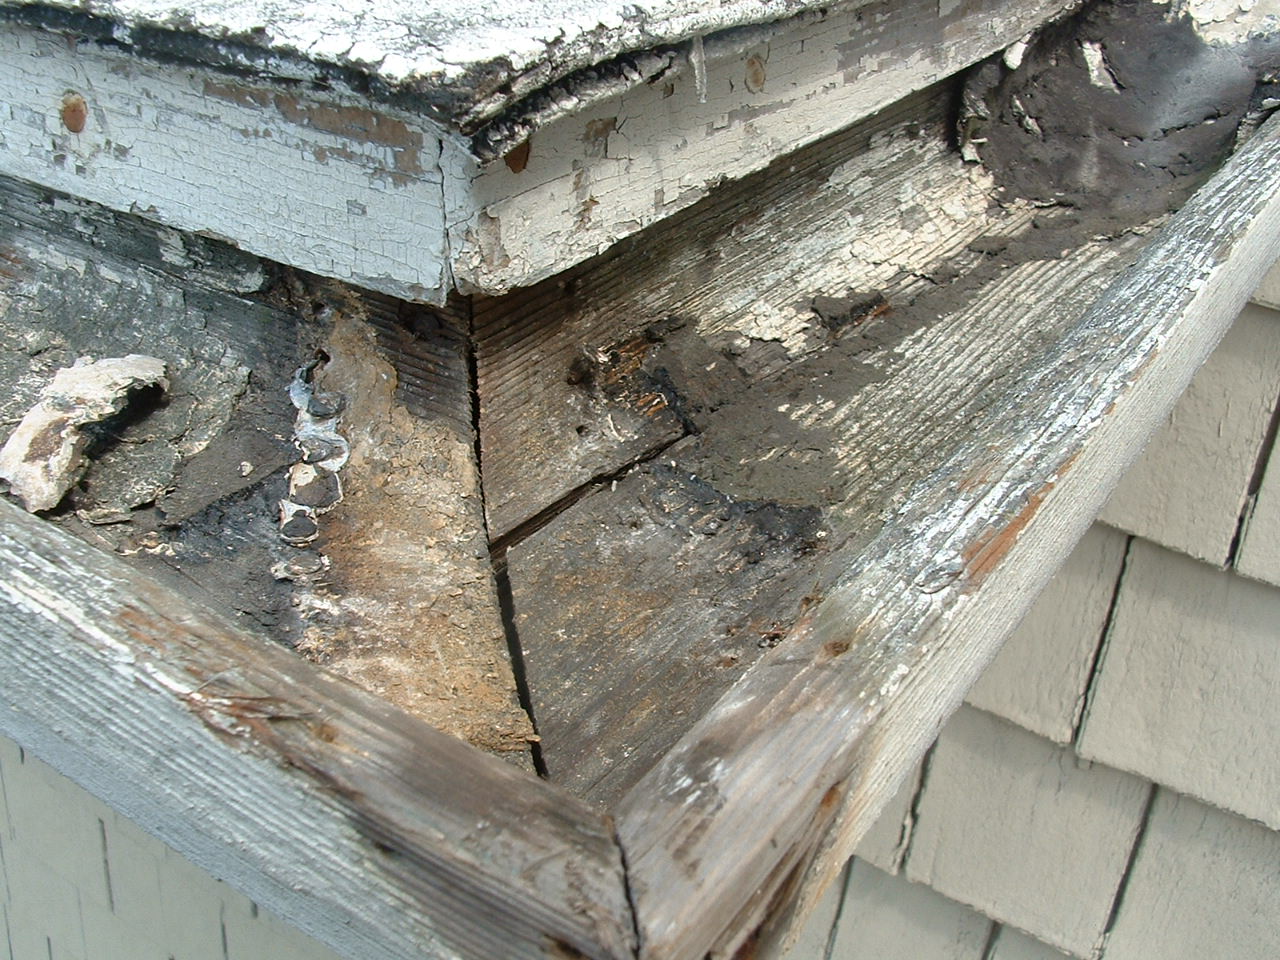
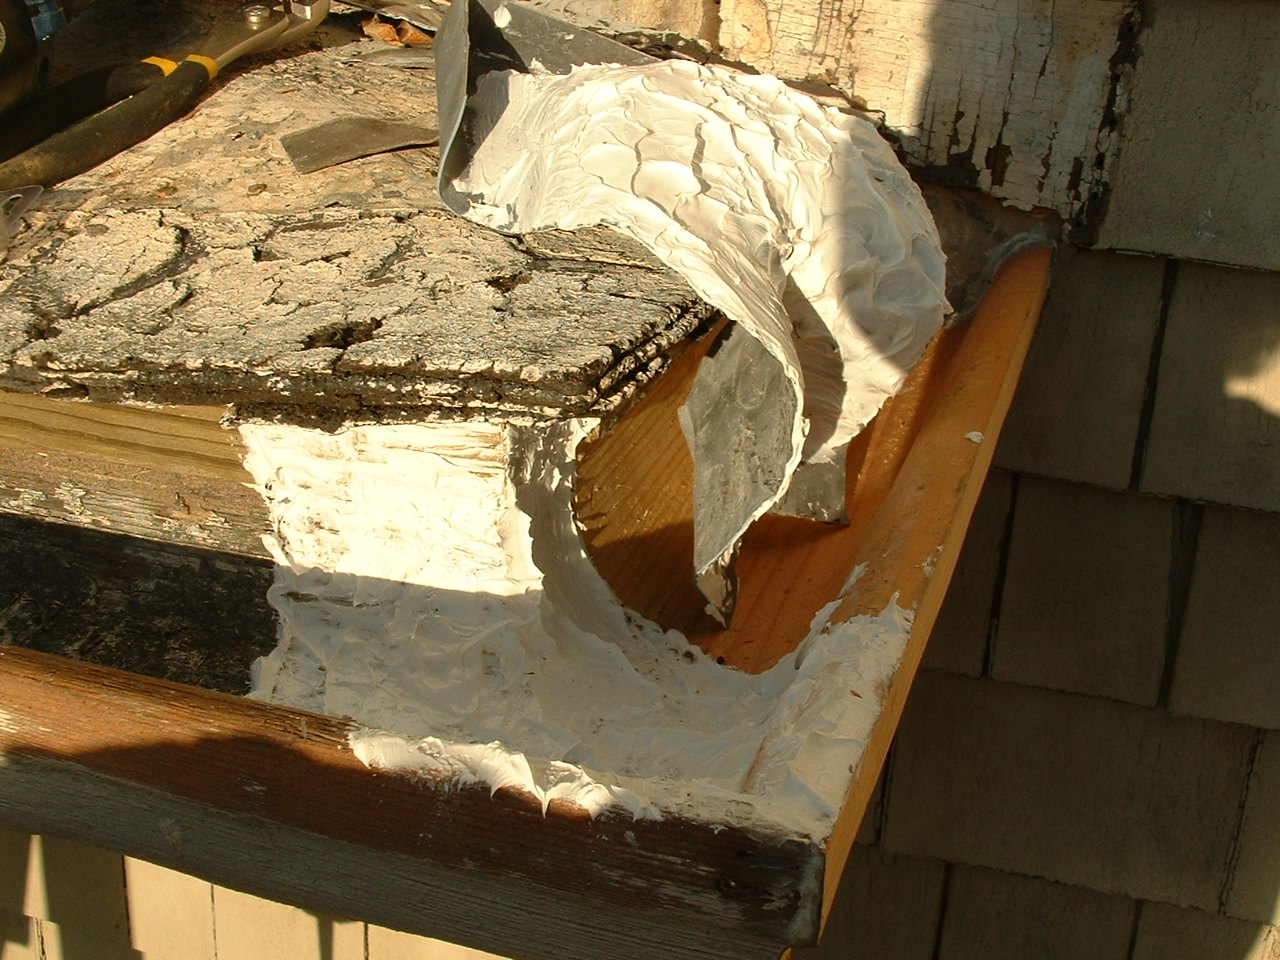
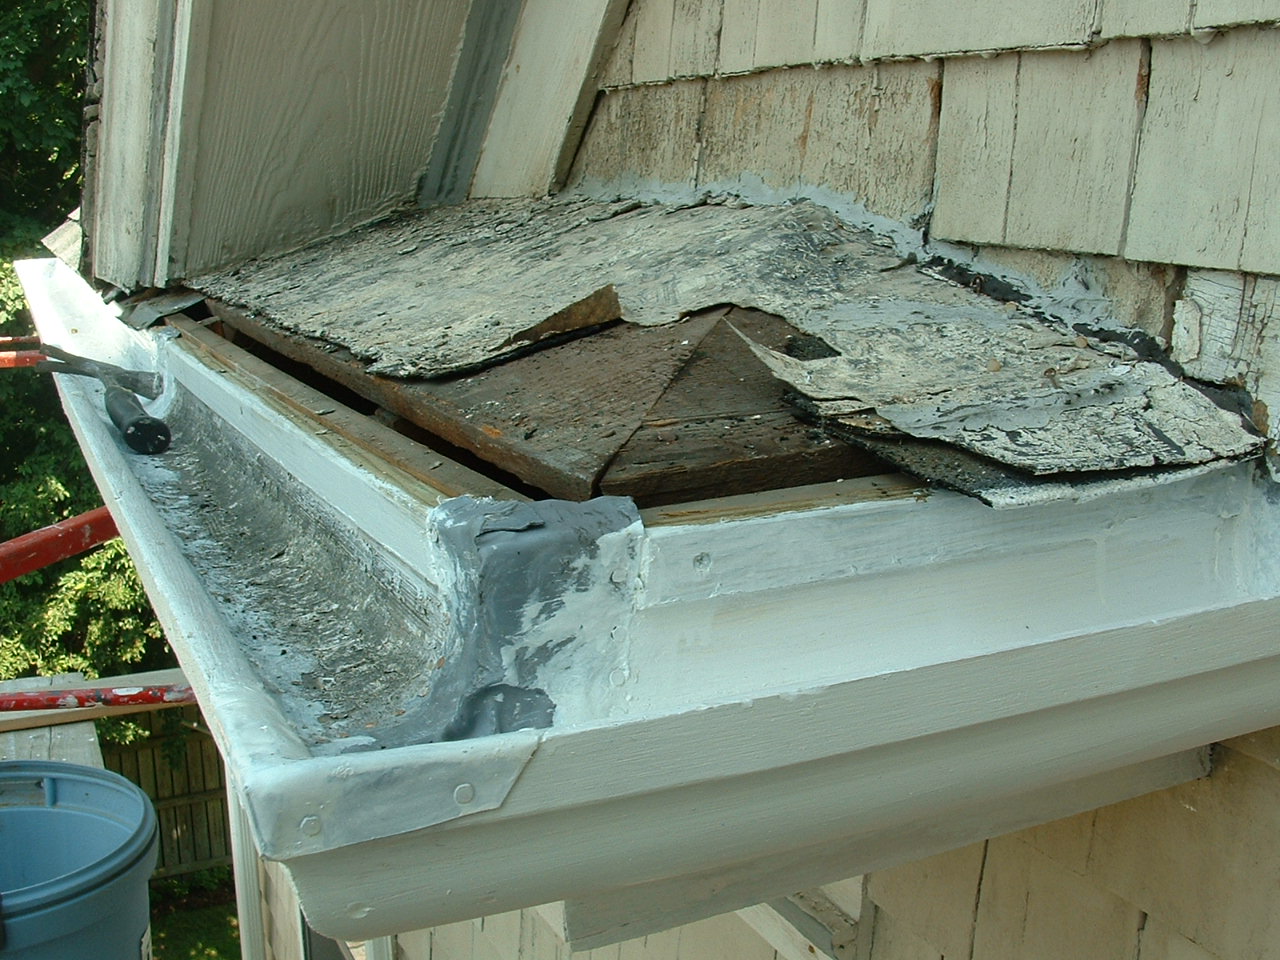
This gutter's return is split right through. I am going to remove this gutter and replace the badly checked section with 9' of the salvaged 11' piece from the front of the house (re-using the 5' piece that is here in front of the return) and the remaing 2' piece to replace the rotted end of the north gutter. |
|
|
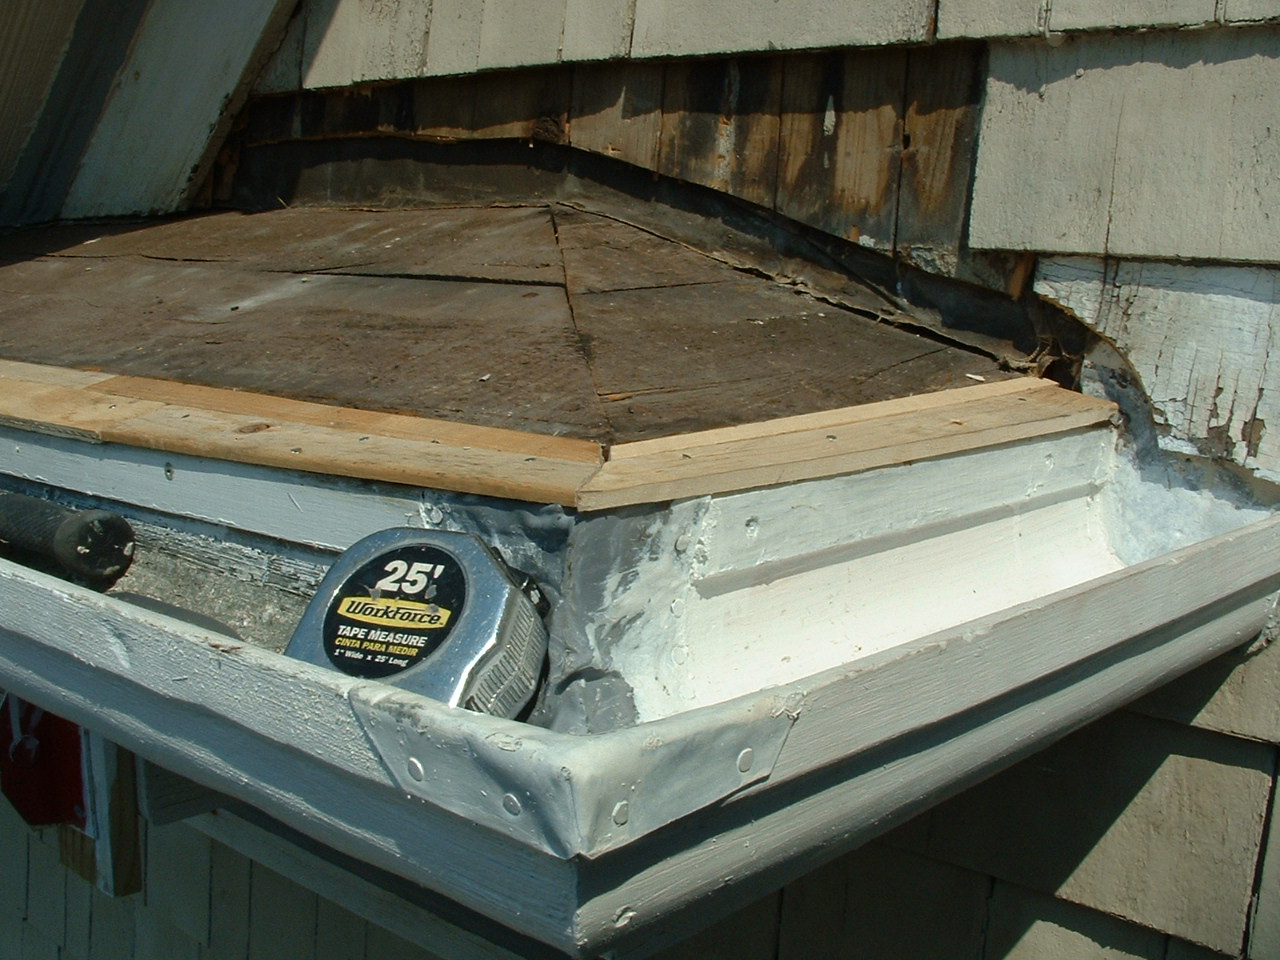
There is an 18" piece left over from the newly purchased gutter for the front that is just big enough to replace this badly split small return peice. |
|
|
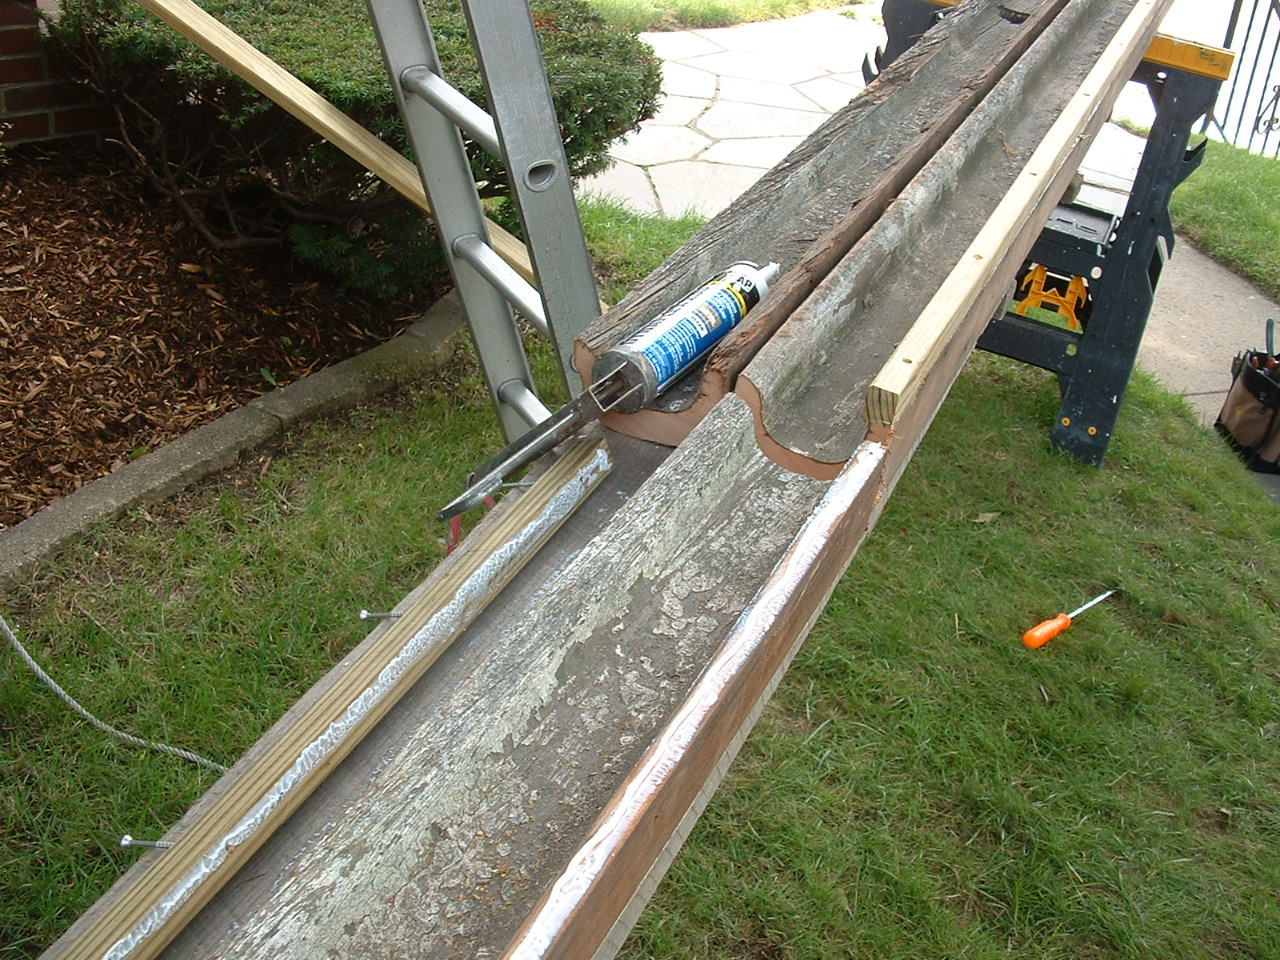
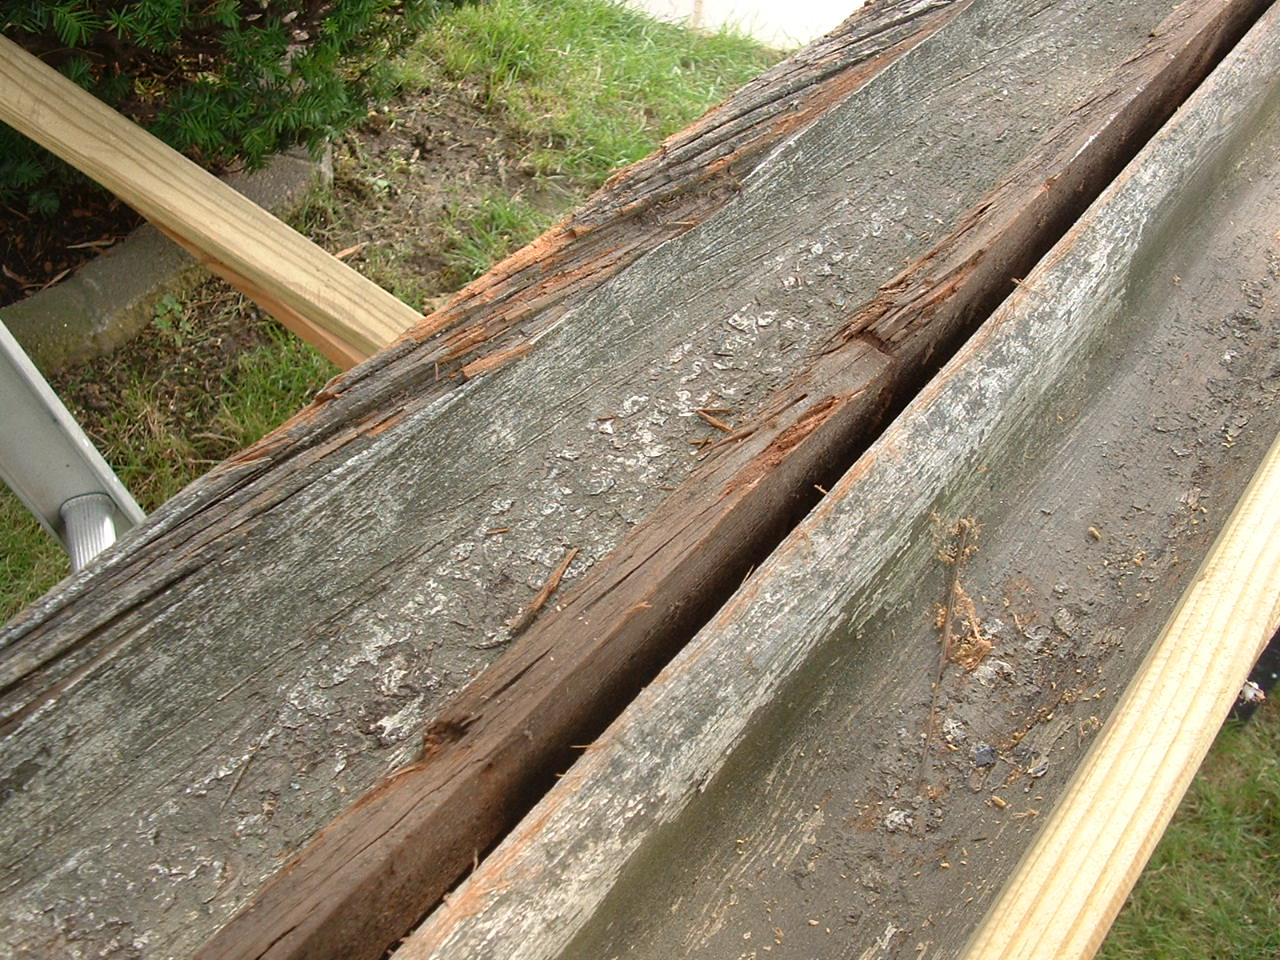
Split a long way - right through to the bottom. |
|
|
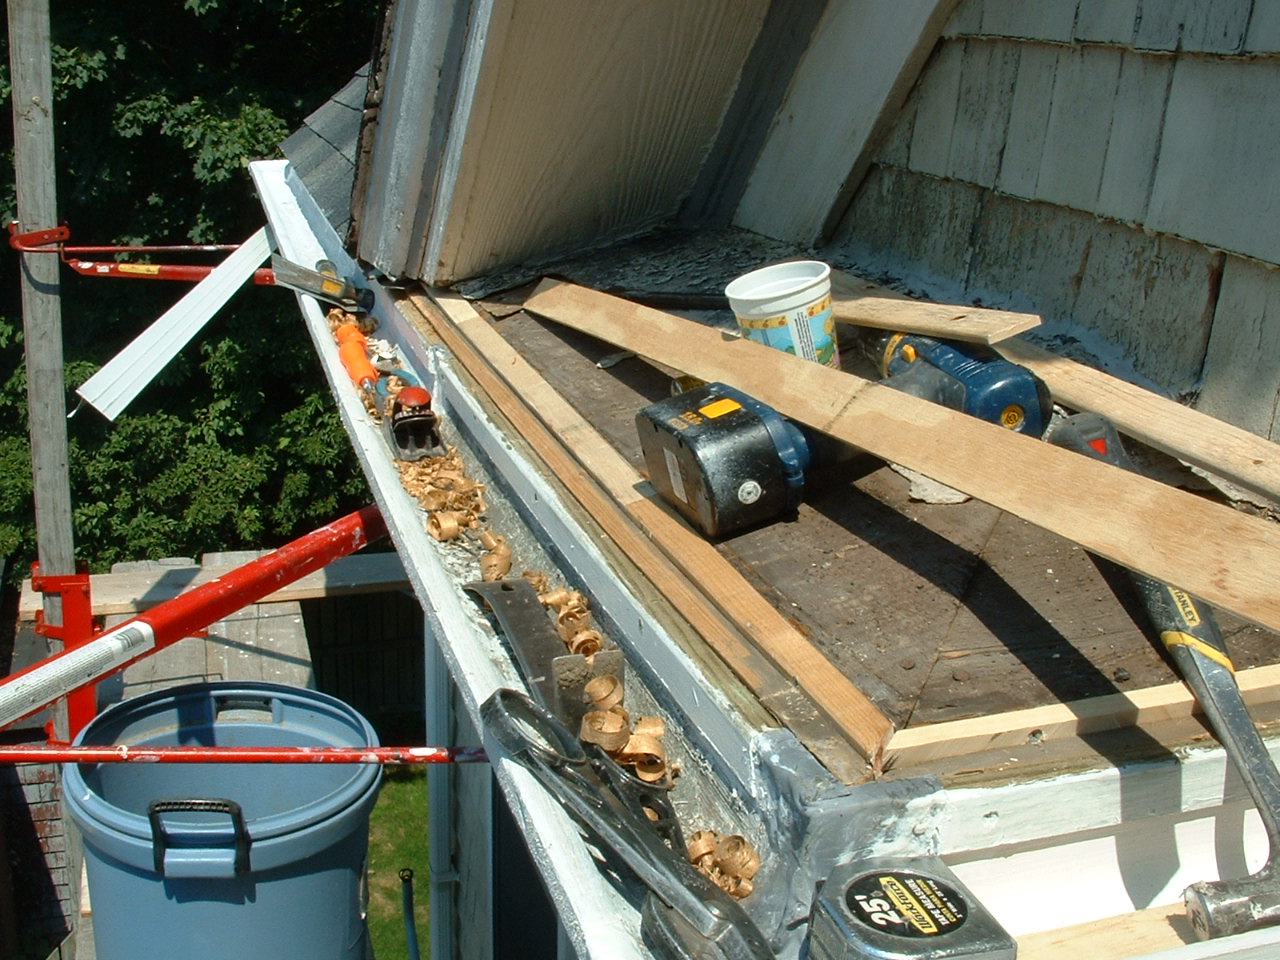
With the gutter completely removed I attached a high back of pressure treated (PT) wood to replace the original rabbited cap board that cannot be reused . This cap board does not seal out water from getting behind the gutter when it overflows, but the applied PT board will. |
|
|
The evidence of prior painting inside the gutter makes perfect sense and I will follow this practice. The inside lip of the gutter is prone to devestasting checking, as is evidenced in this photo. The raw wood needs to be sealed from the elements. Paint is not just applied for looks, it is also applied for protection and therefore many times needs to be where it is sometimes not seen. |
|
|
Here is a close up of appling the back. Note that the adhesive caulk is not completely covering both surfaces. That is why I press it in place and pull it off to inspect for full coverage before final assembly. Note the huge disparity in the growth rings of the new growth backer board and the old growth gutter! New growth is not as dense and rots and splits much quicker without protection from the elements. |
|
|
Here the 4 gutter pieces are installed with 2 splices and 2 miter joints (tight and sealed prior to leading). |
|
|
Forming the lead for the return miter. |
|
|
|
The elastomeric adhesive caulk applied with complete coverage |
|
|
This leaded joint is now complete. The above process was applied to all leaded joints on this job. |
|
|
Here's the leaded splice joining the 11' and 5' sections. |
|
|
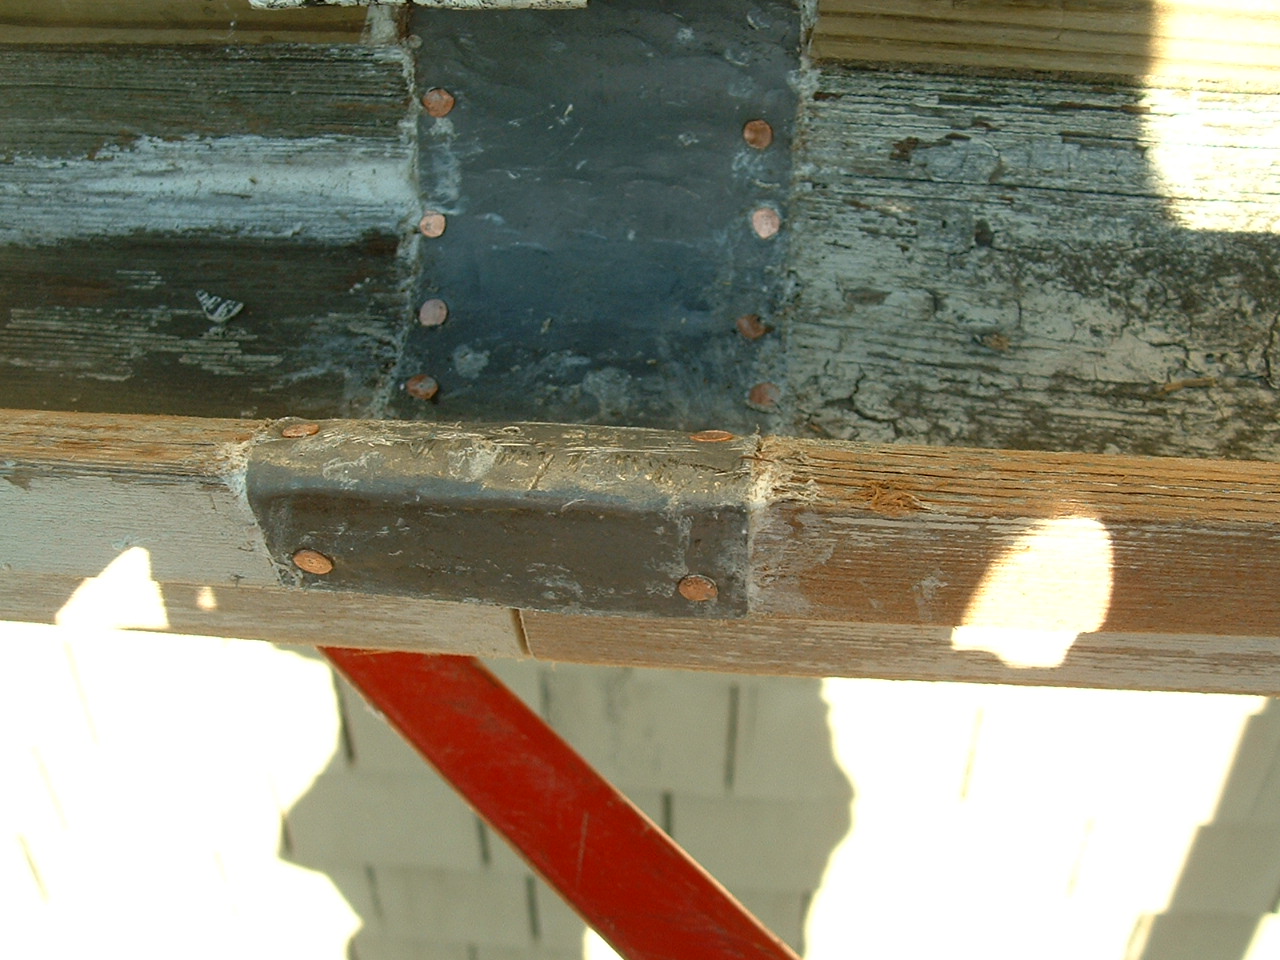
The NW miter joint completed. |
|
|
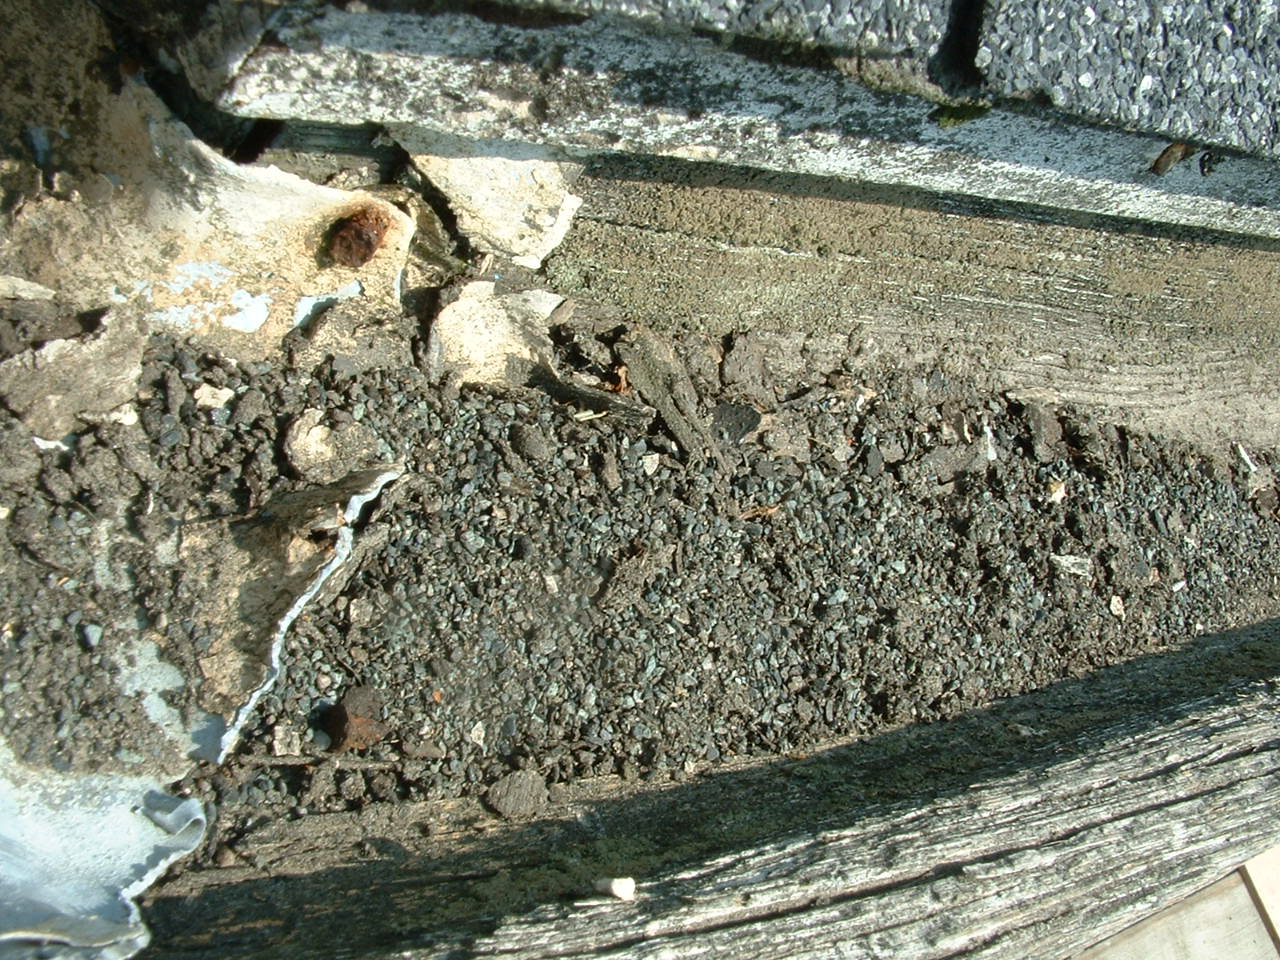
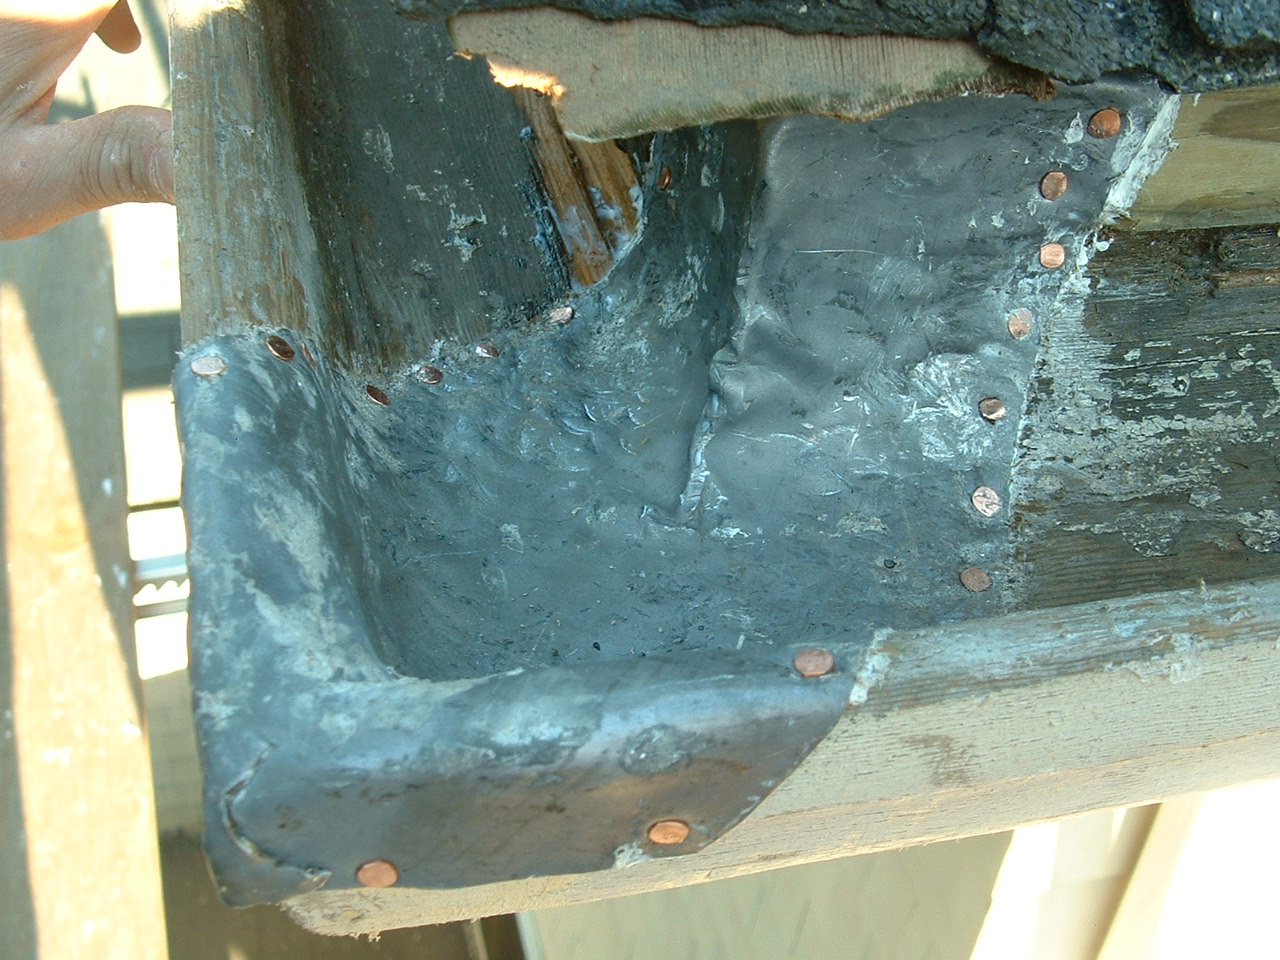
Here is the north gutter miter repair splice leaded. Unfortunetely there was a check that trapped water in this 2' repair piece. I scratched out all the soft wood so it would not hold water to continue the rotting process. This peice will still have a very long service life. |
|
|
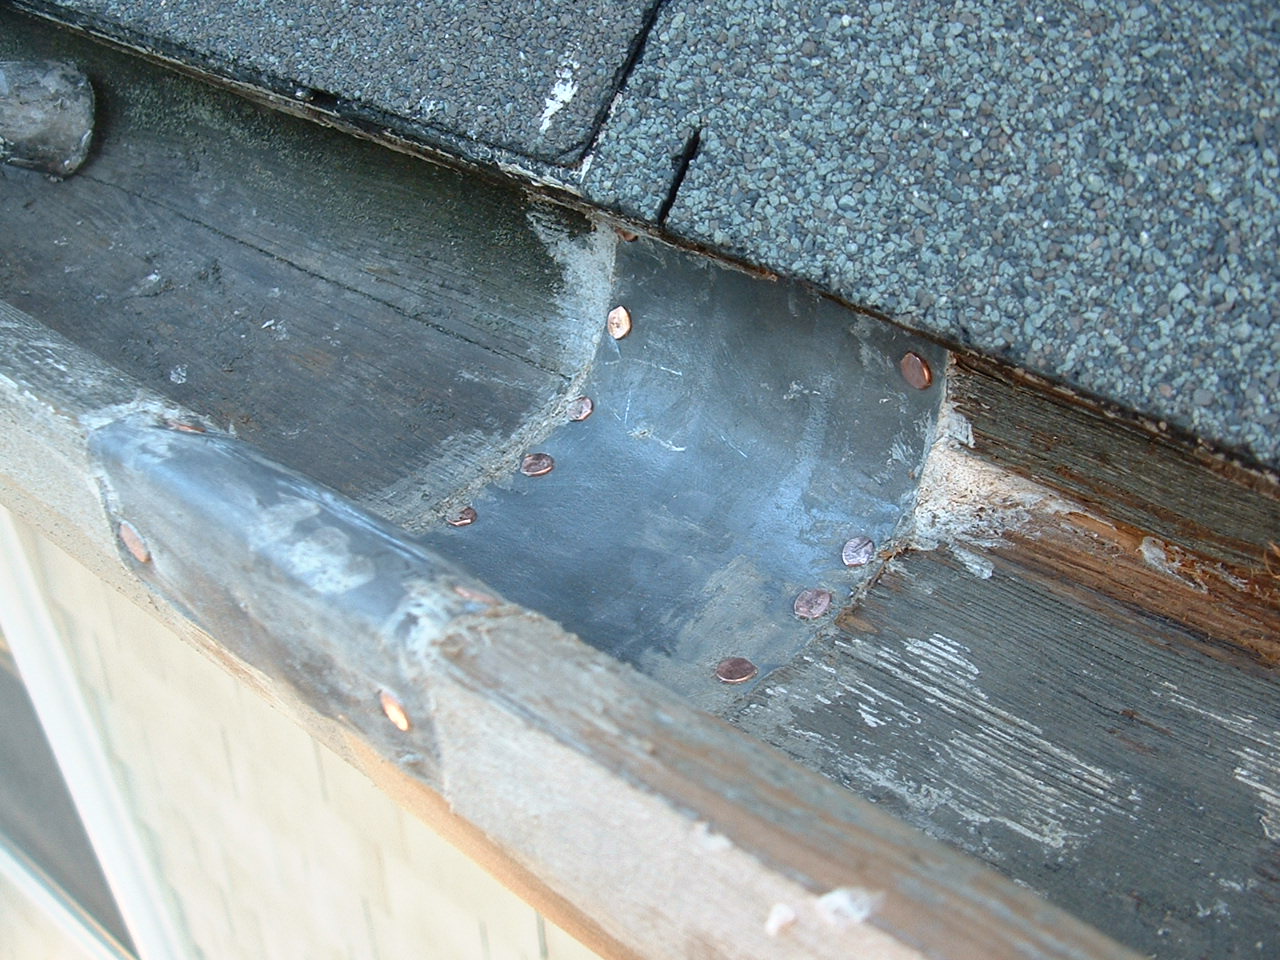
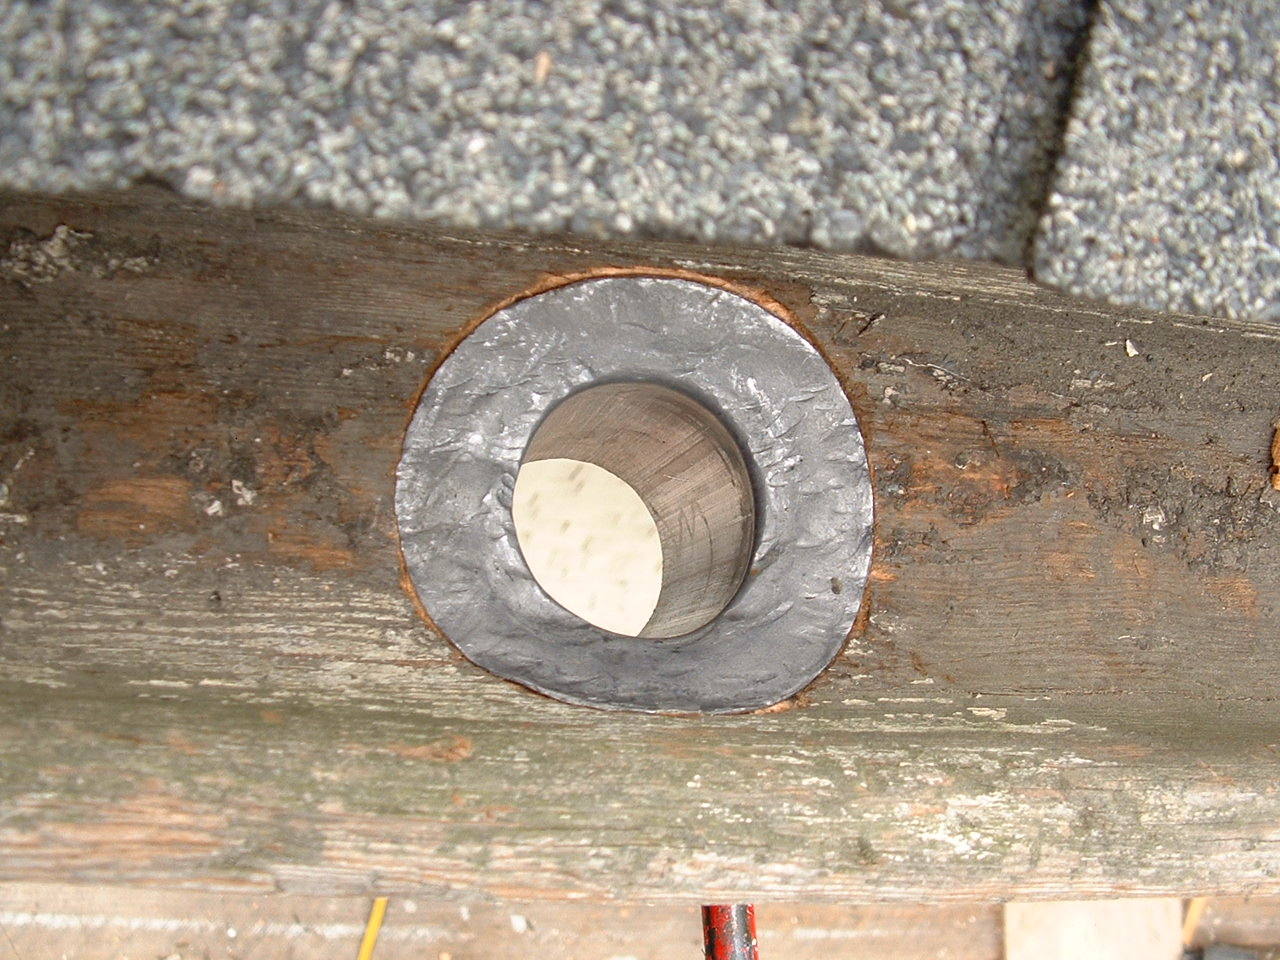
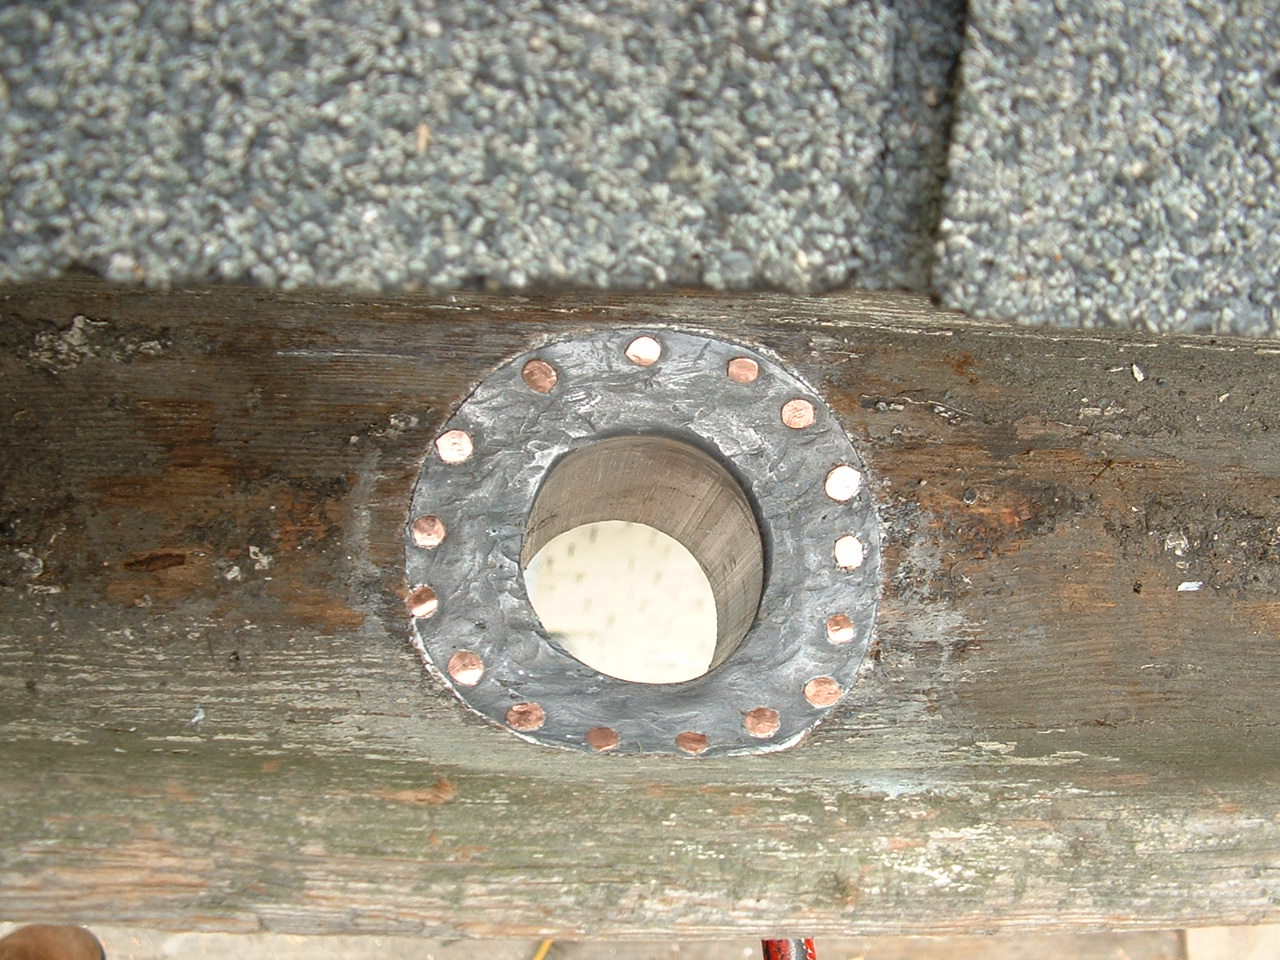
This leader outlet is critical to the longevety of this repair simply because its the only drain point for this 18' section of west gutter and all of the 36' north gutter! |
|
|
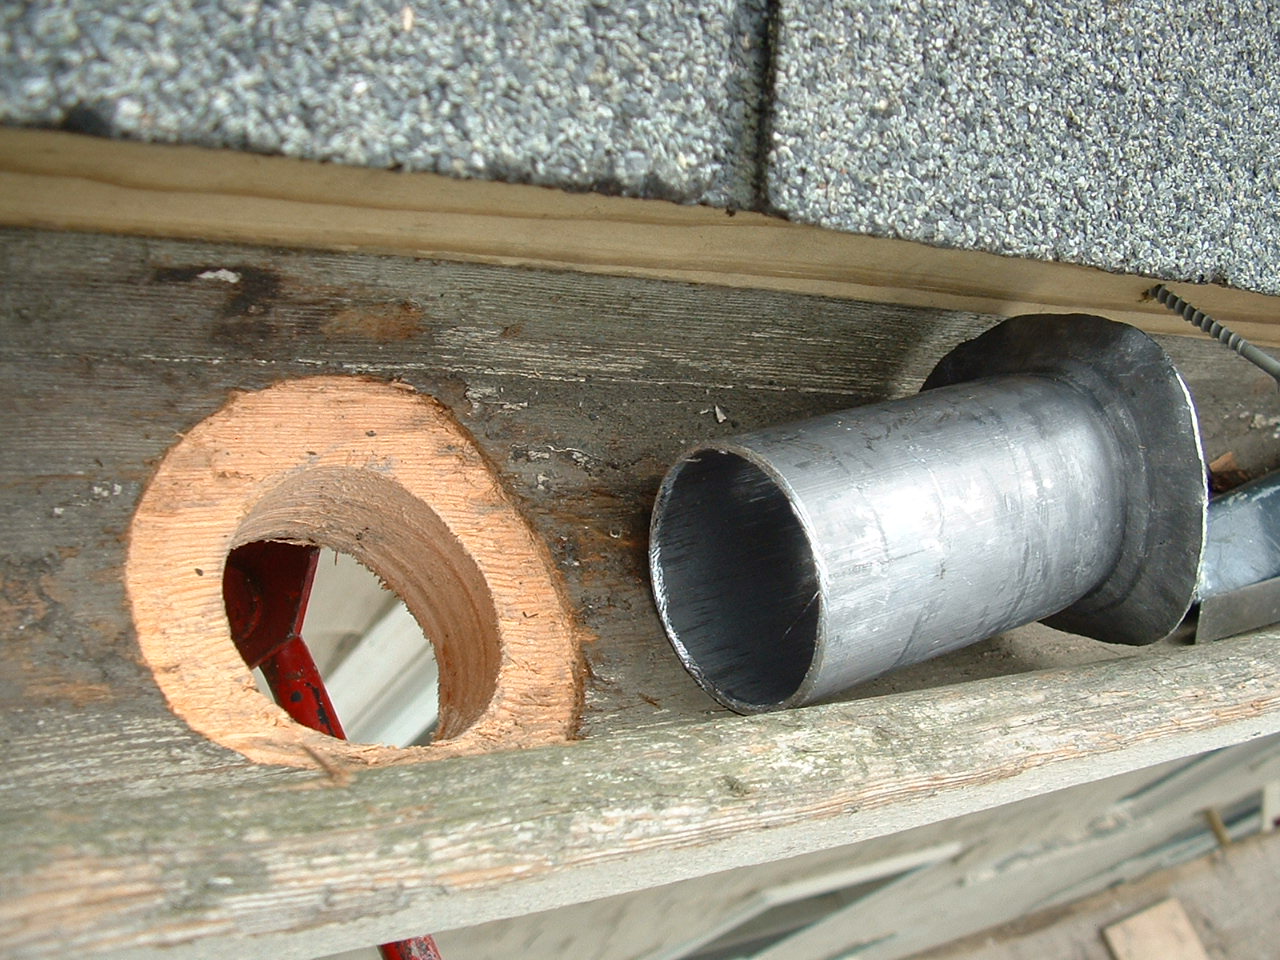
The gutter is mortised for this new, larger 2" leader outlet. |
|
|
|
|
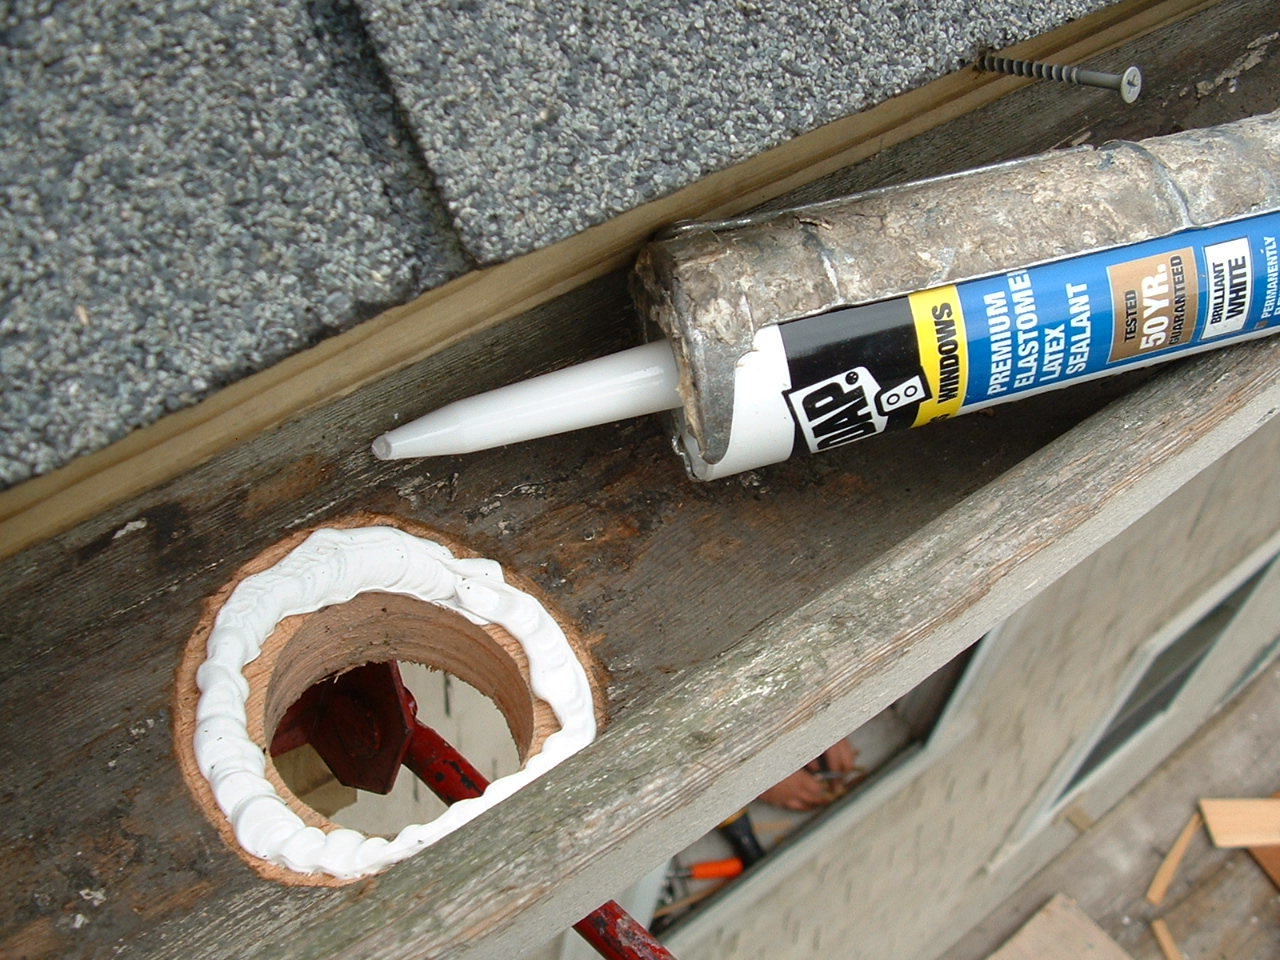
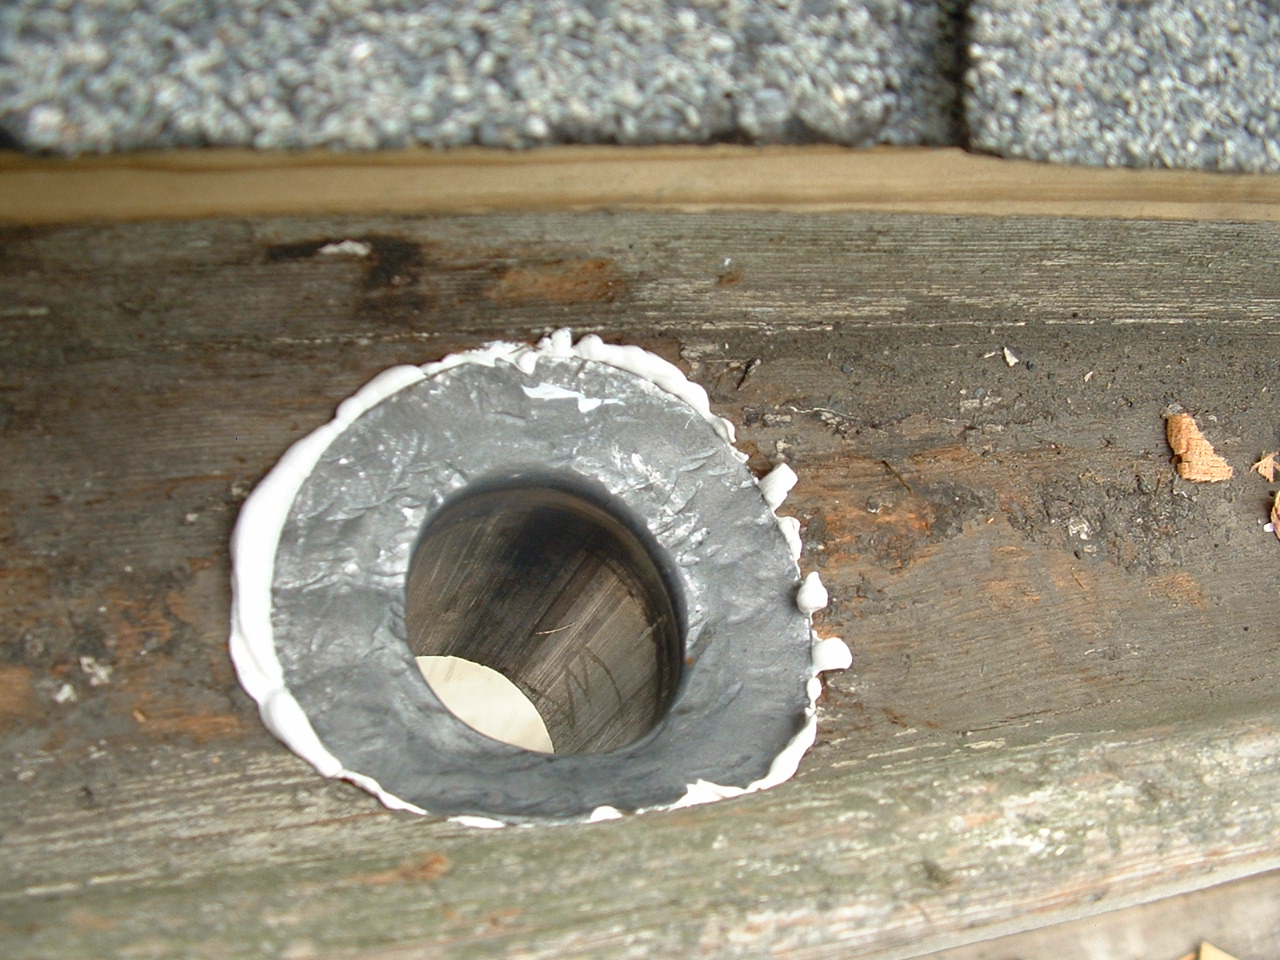
leader outlet installation is complete. |
|
|
This black mold has to go. |
|
|
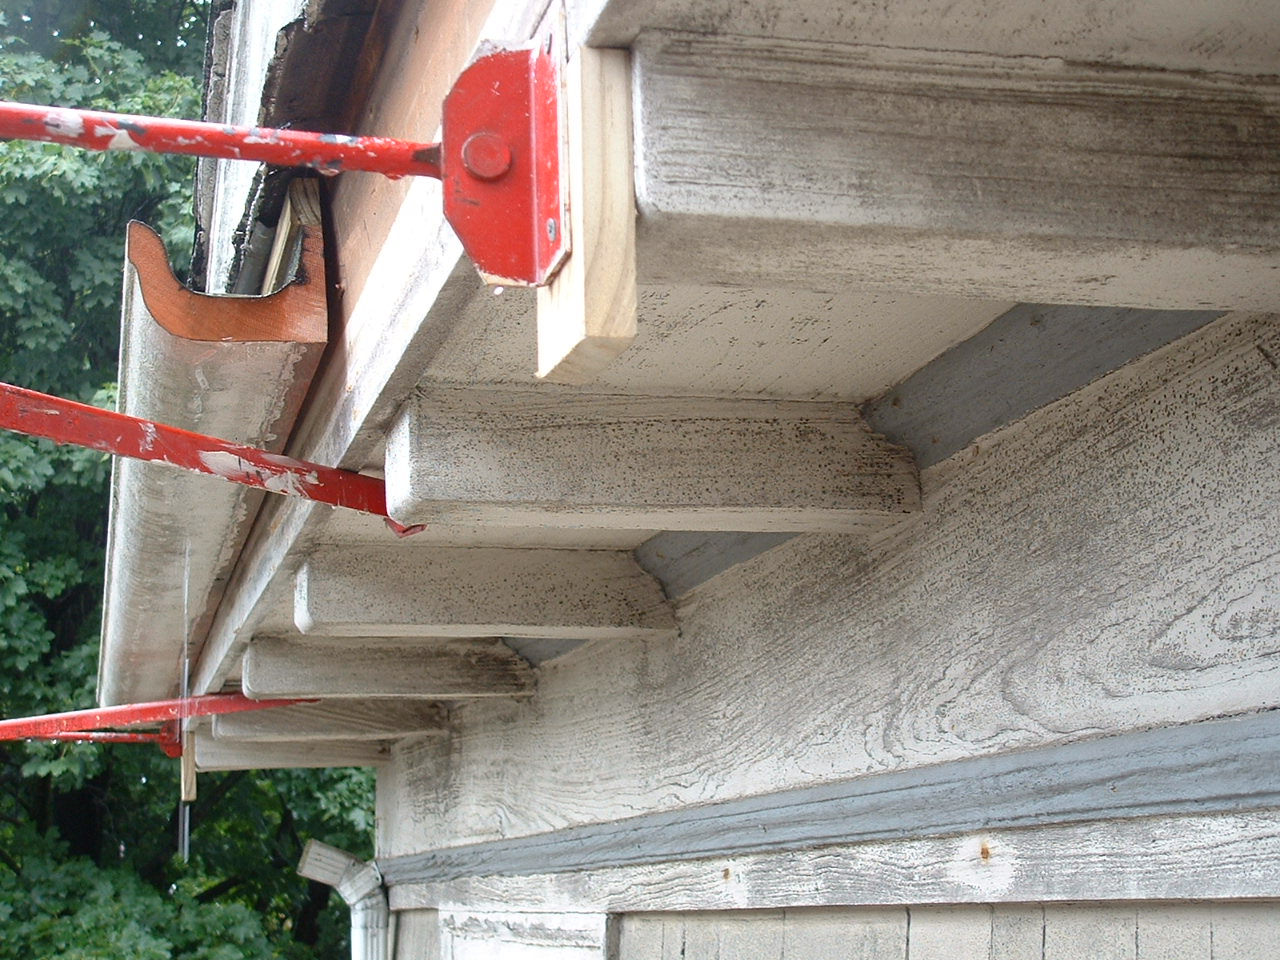
After powerwashing with bleach, the gutter, facia and new bed molding were sanded, fastners set and filled, seams caulked, and then everything was primed and then finished coated with Benjamin Moore oil based paint (with penetrol oil added for superior adhesion). |
|
|
|
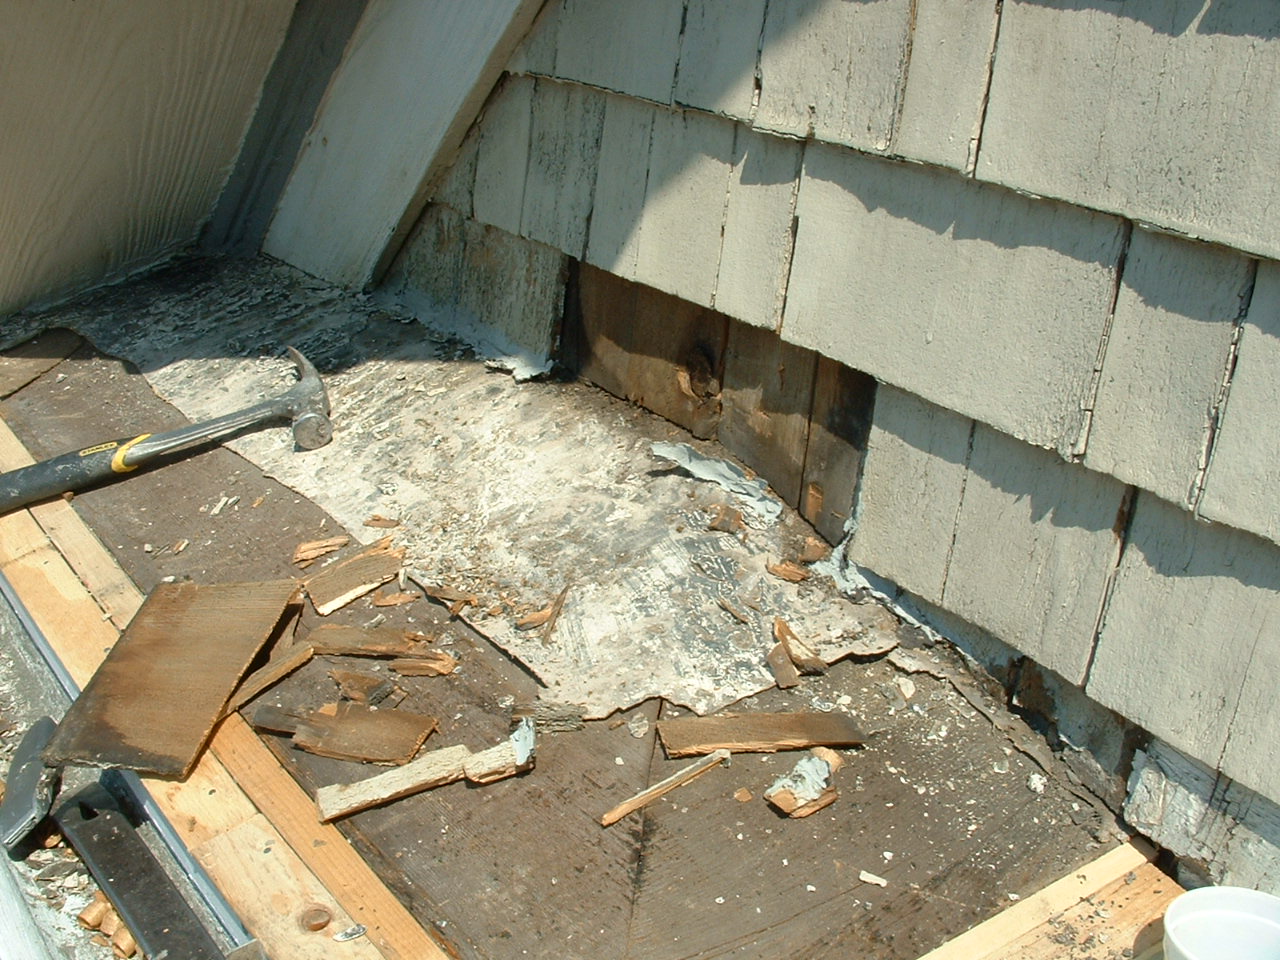
Except for this return roofing. |
|
|
This asphalt roofing is in bad shape. |
|
|
In a prior repair someone slipped asphalt roll roffing under the original oil cloth membrane. |
|
|
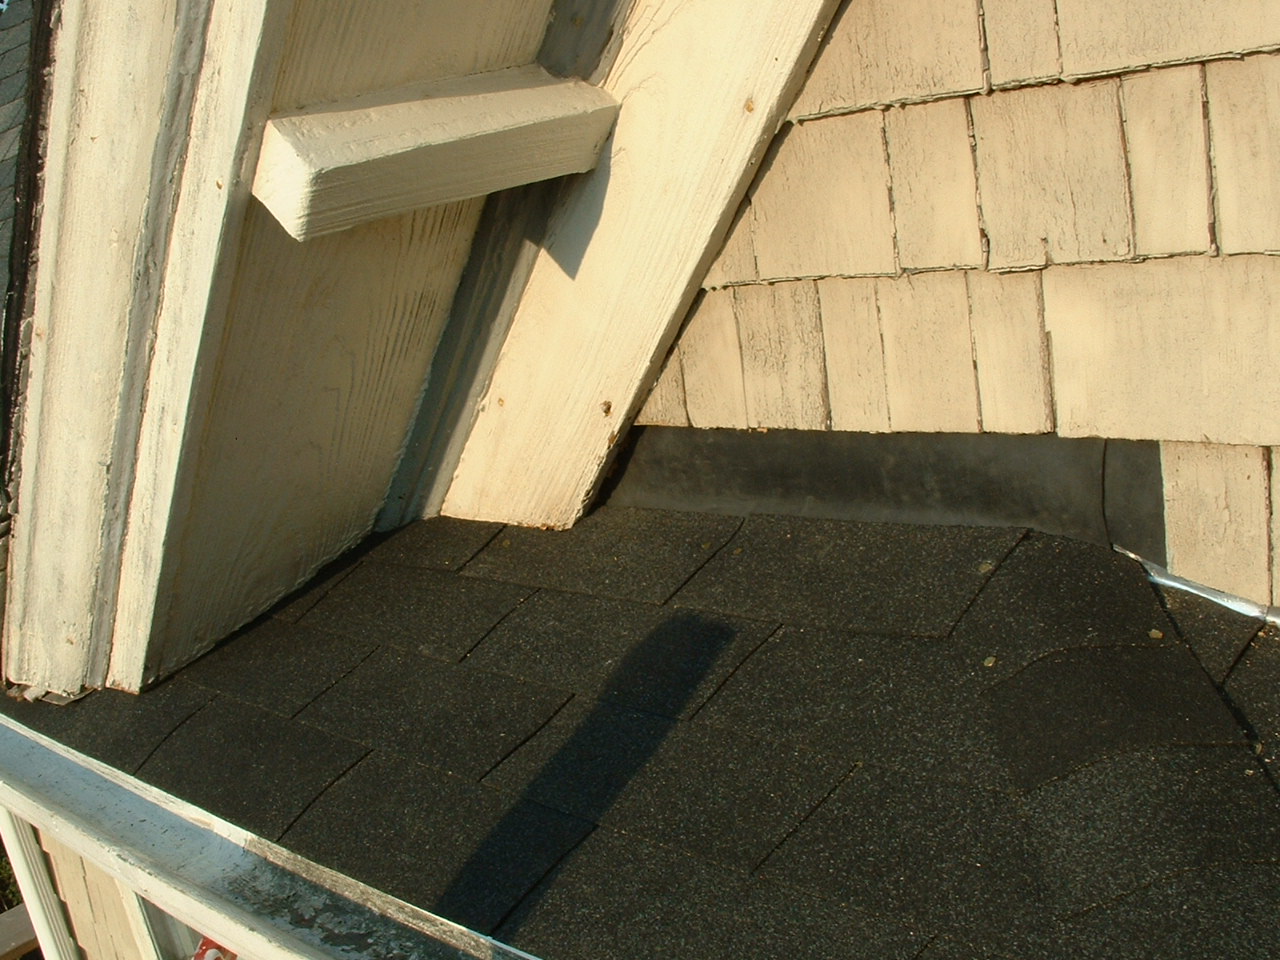
The original oil cloth membrane failed where there was no supporting sheathing just as the asphalt repair has failed. |
|
|
This oil cloth relies on paint or tar to keep out water. |
|
|
Filling in the missing sheathing is the right thing to do. |
|
|
3/8" plywood will smooth over the irregularity of the facia board and the back of the gutter while as well as providing necessary support for the roofing to overhang the gutter providing a drip. |
|
|
The sheathing repair is complete. |
|
|
Now to deal with the flashing. Frist sidewall shingles will have to be removed. |
|
|
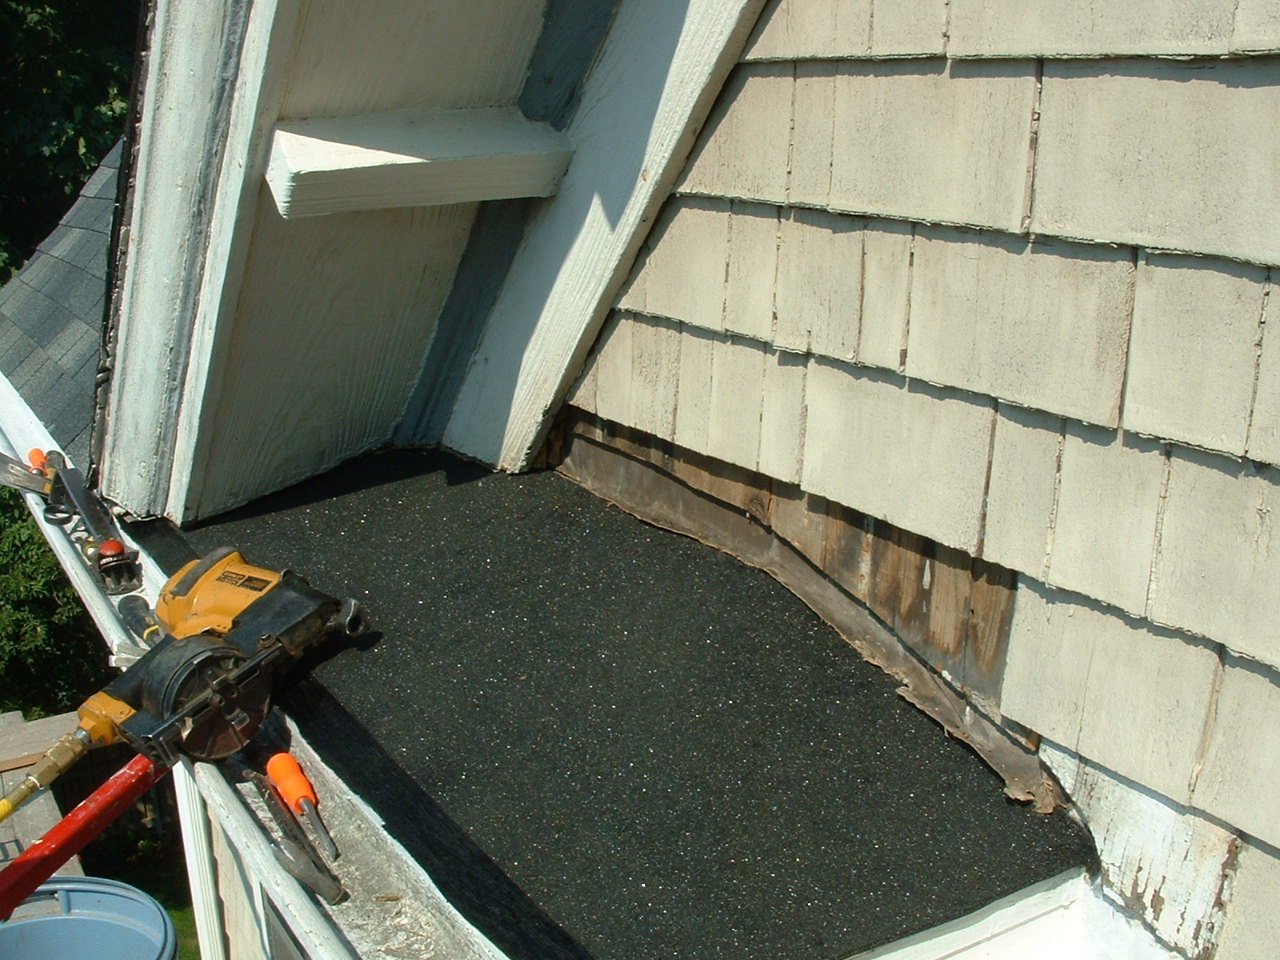
Clean and ready for todays roofing membrane called "weathersheild" or "water and ice" |
|
|
Here one can see the old oil cloth roofing was also the flashing |
|
|
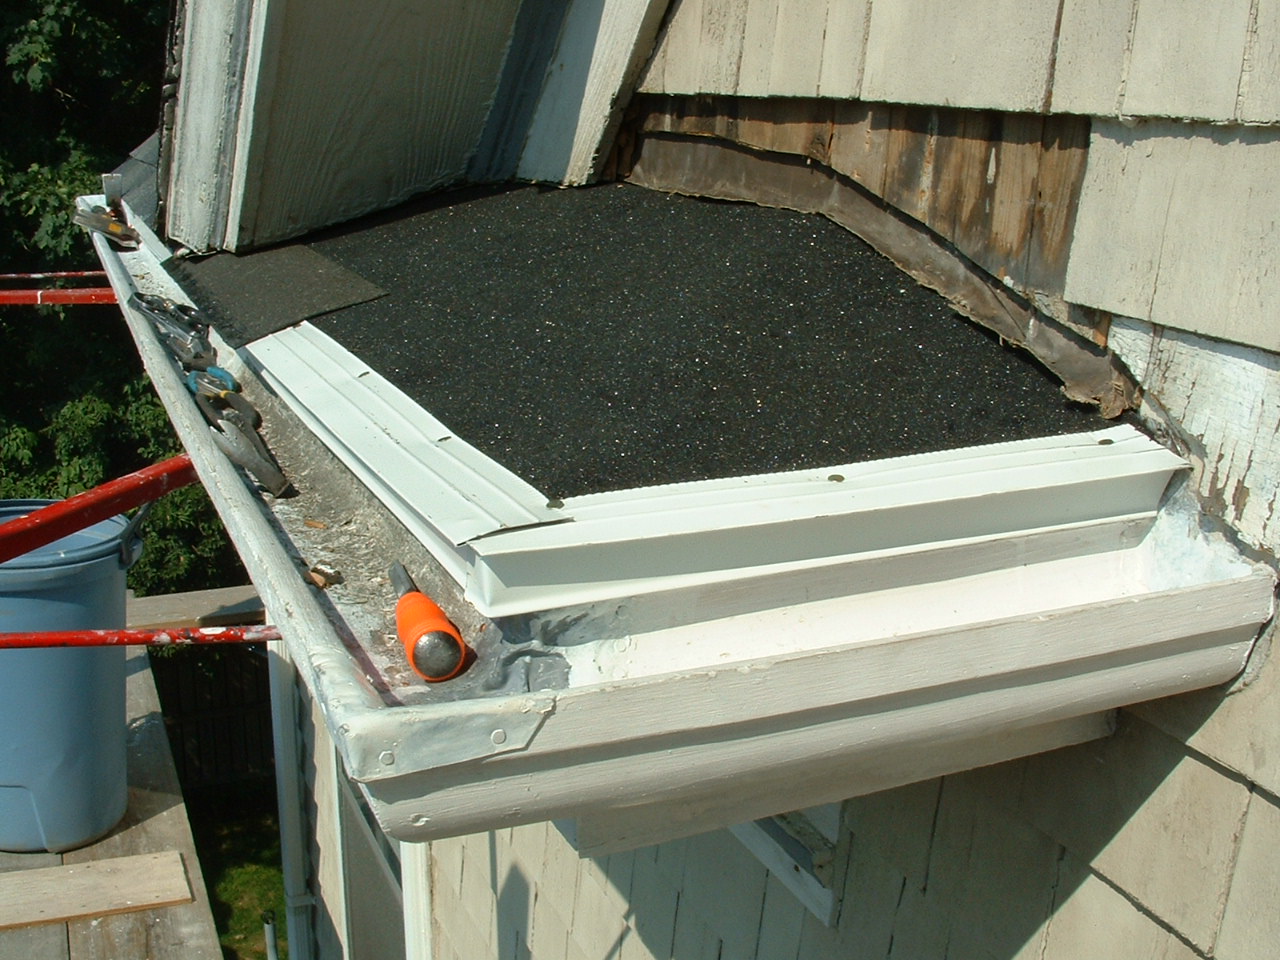
The weathersheild is installed. Any nails driven through it will self seal. |
|
|
The nailed metal drip edge will prevent any wind lift and provide strong surface to bond the asphalt roofing too. The asphalt starter strip in this photo seals to the dripedge and the shingles over it with daytime heating. |
|
|
|
Metal step-flashing was used to turn the water out where the pitched part of the roof intersects with the side wall. For the non-pitched part rubber was flashed behind the wooden shingles. |
|
|
These are 25yr roofing shingles. |
|
|
|
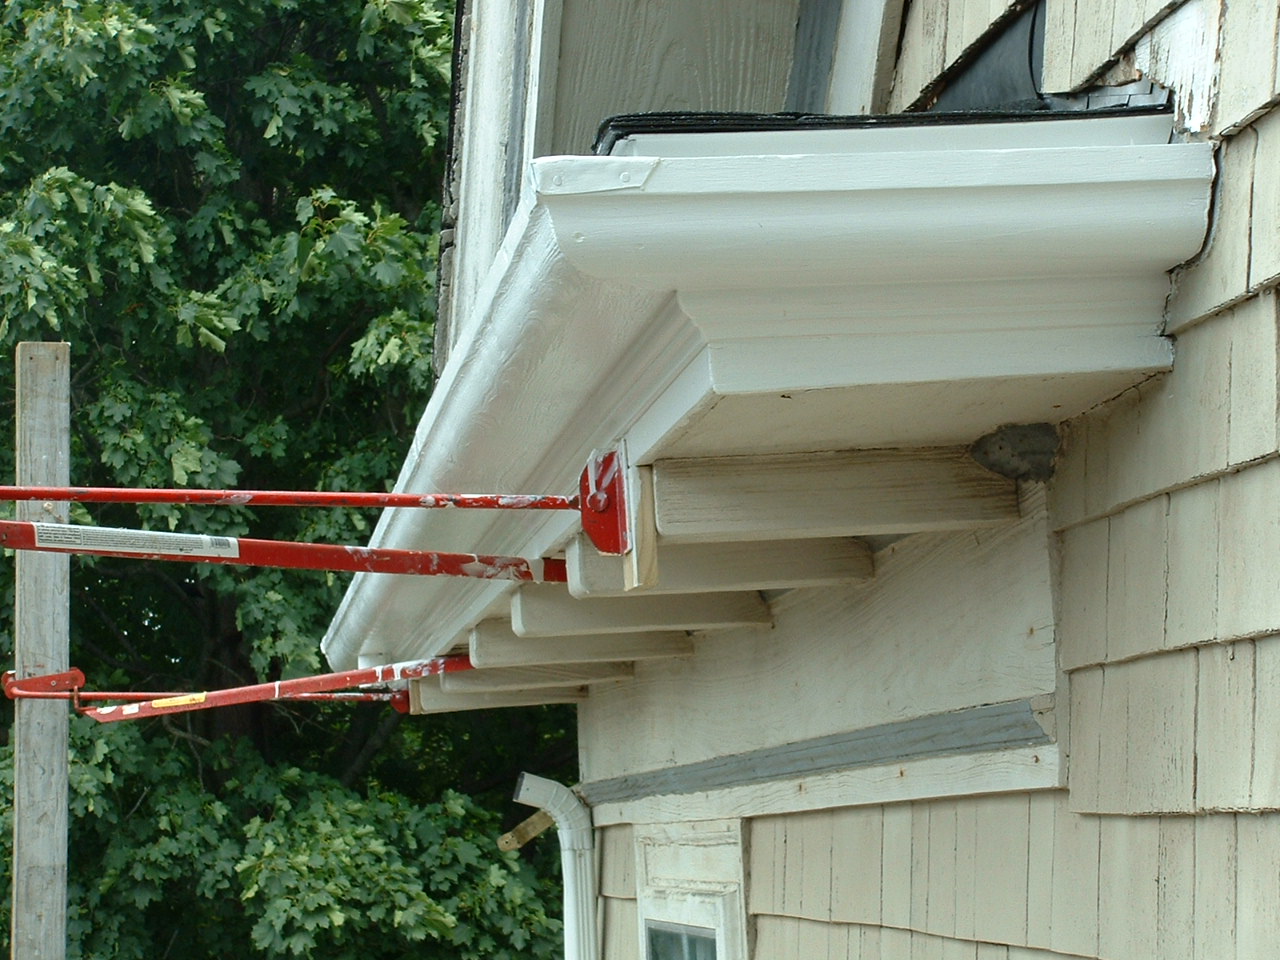
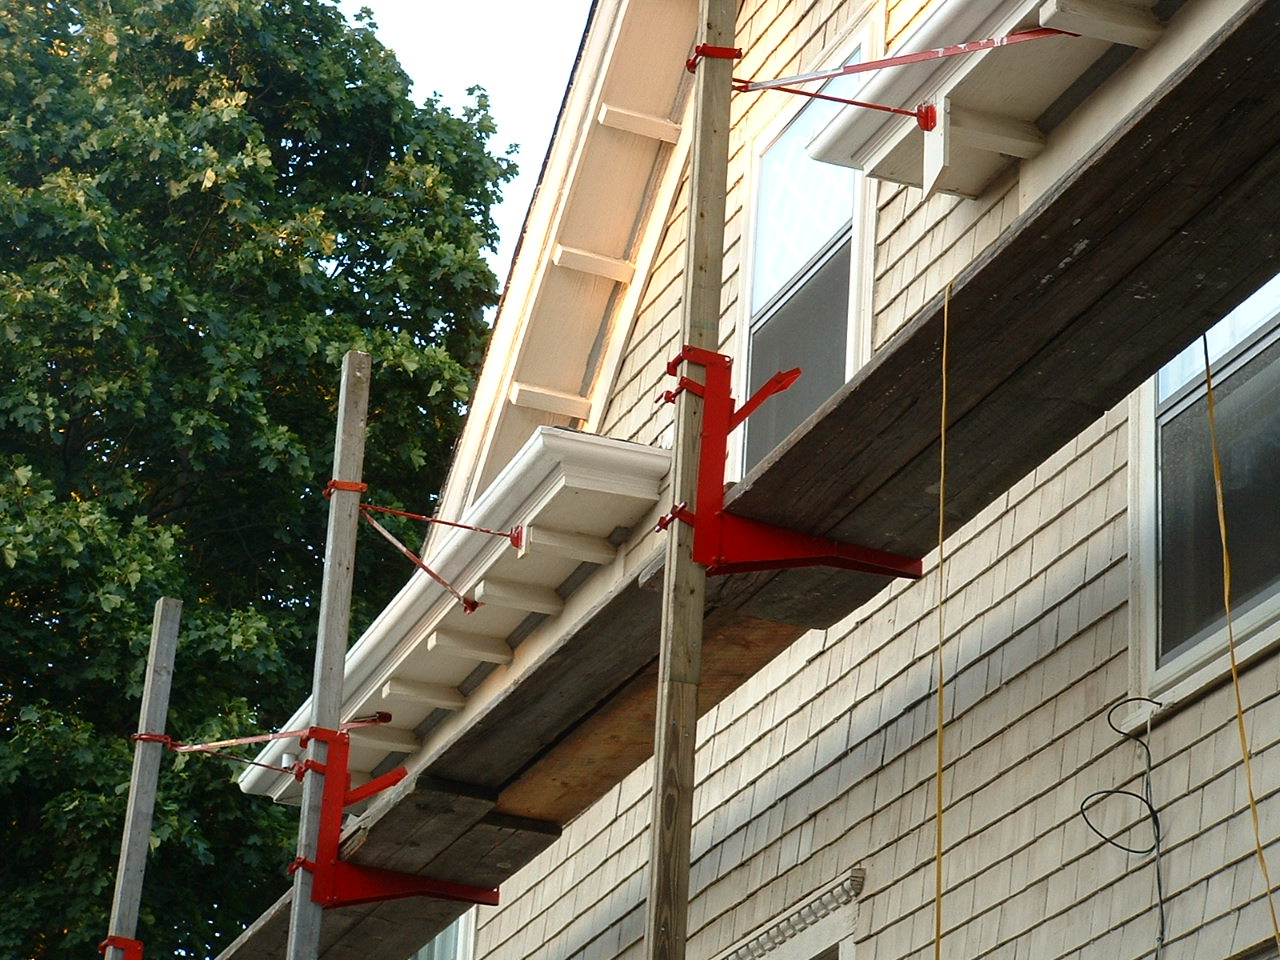
After a final coat of finish paint the stagging came down. The old discolored dowpiping elbows were replaced with new and assembled with short screws instead of rivets for easy cleaning. (If there is a such thing for something this high up) |
|
|
Here's a shot during a rainstorm out the north 3rd floor window of the water rushing around the NW corner to drain down the leader outlet on the west side. |
|
 There are 50 reduced sized photos along with descriptions to view as you scroll down this page. I recommend clicking on any of these photos to see the close up details of the original photos, using your back button to return to this page.