

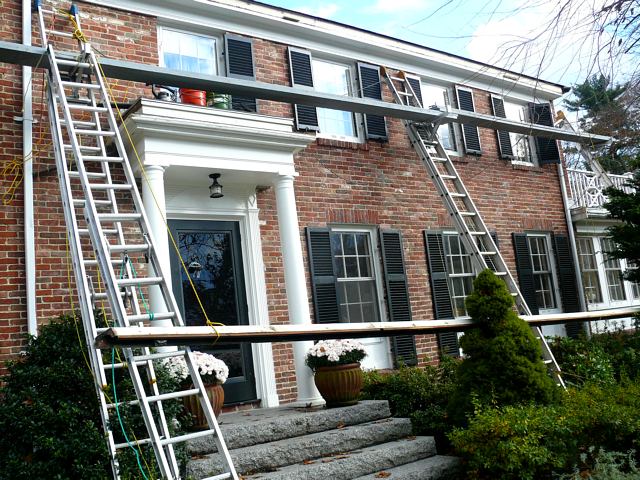
| - 01 - These wood gutters are in good shape but were improperly installed some 20yrs ago. For a quality job its best they be removed. It took me less than an hour to have them on saw horses. |

| - 02 - The first order of business is to remove the built up linseed oil deposits and the failed paint. |
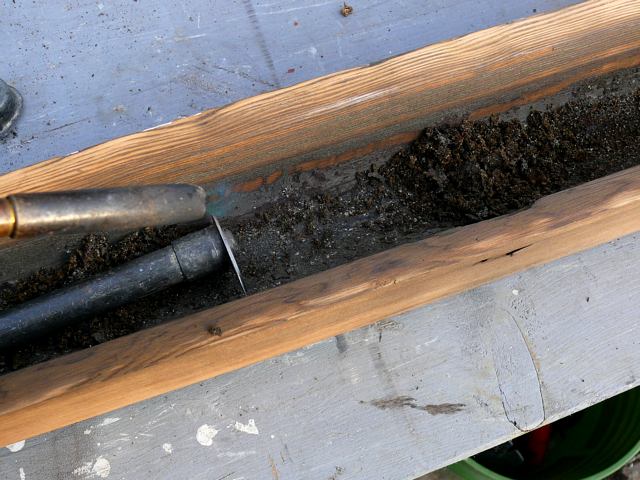
| - 03 - Heat softens the hardened linseed oil deposits for easy scraping with the tear drop scrapper. This is also the best way to remove the paint. Every layer comes off at once with ease. This is also the best way to deal with lead paint as there are no jumping paint chips. The paint scraps off to the bare wood in large soft masses that rapidly harden into hard brittle clumps. I vacuum my work bench every foot or so I remove the paint. The risk of a catastrophic building fire is reduced to zero by removing the gutters :-) |

| - 04 - From junk to brand new with just a little bit of smart labor. A belt-sander quickly takes care of all the flat surfaces. For the contoured surfaces I rip up some of the cloth backed 40grit sanding belts to hand sand with. Hint: paint adheres strongly to sanded surfaces but not so much to the factory glass smooth planed surfaces. ie the paint "keys" into the (microscopic) ruff surface. This is the key to a lasting paint job. The problem is all wood (except shingles) comes planed and is super smooth , especially clapboards. |
| - 05 - Dusting is very important for any coating to adhere well. So I scrub a rag back and forth with the leaf blower up against my shoulder blowing straight down until I see no more dust coming off my rag. These gutters painted quickly as I use two hands. The 3" roller floods the wood and then the brush works it in while removing the roller nap texture. This primer coat is Zinnzer's oil-based cover stain. For the top coats I used Benjamin Moore's Soft Gloss 100% acrylic latex paint. The technical data sheet says to "Apply paint generously" and this is important to achieving a durable paint film. |
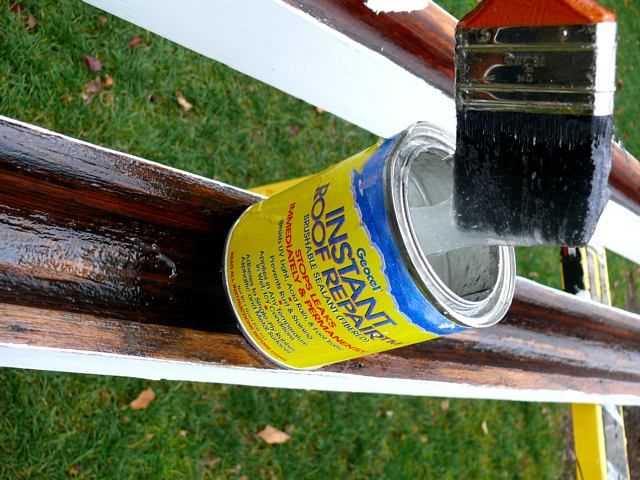
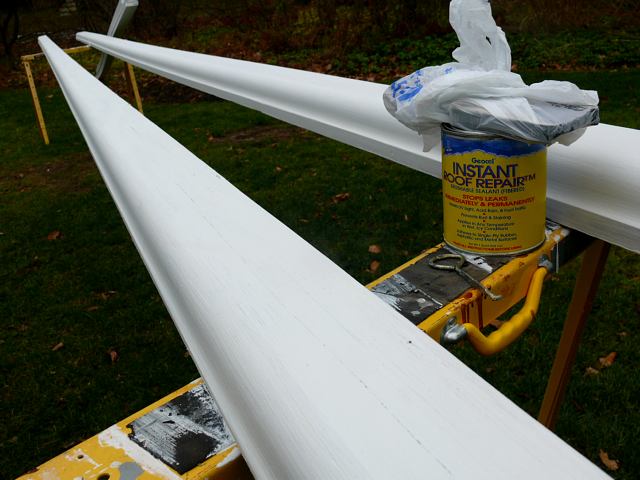
| - 06 - Now to apply a second coat of Geocel's brushable liquid rubber sealant to the inside of the gutter. No more applying linseed oil every year. This product by Geocelusa.com boasts guaranteed adhesion, its highly flexible, and uv resistant. Its a brushable liquid rubber that's easy to work with. Speaking of easy, doing all this on the ground really speeds up the job |
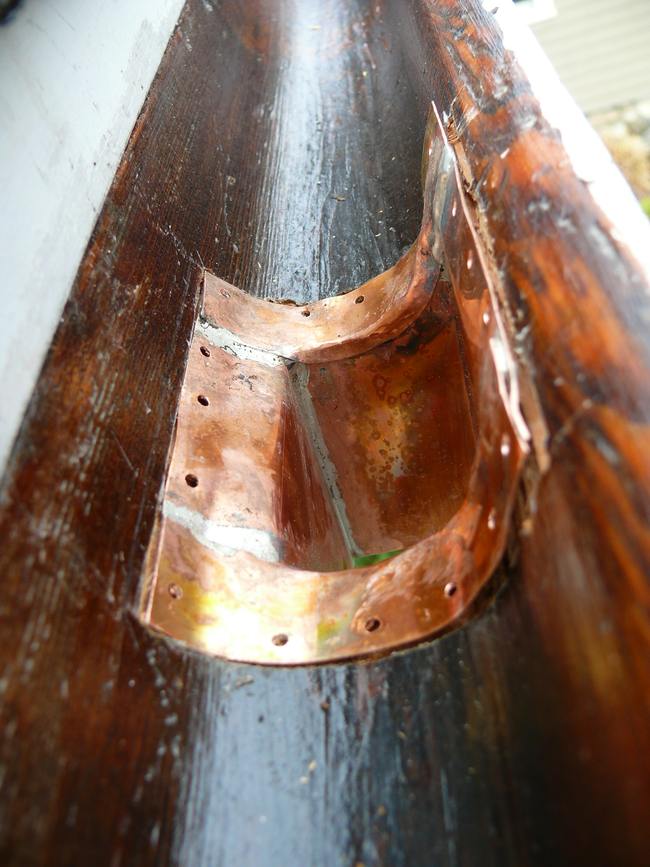
| - 07 - A 2"x3" rectangular leader has twice the open area of the largest commercially available 2" round lead leader. I custom made these copper leaders so as to fit the curvature of the gutter perfectly. Notice the flange is properly morticed flush with the inside of the gutter. Also note how this leader is designed to ride up the front of the gutter. The reasoning being debris collecting at the bottom of the gutter cannot completely block this drain. |
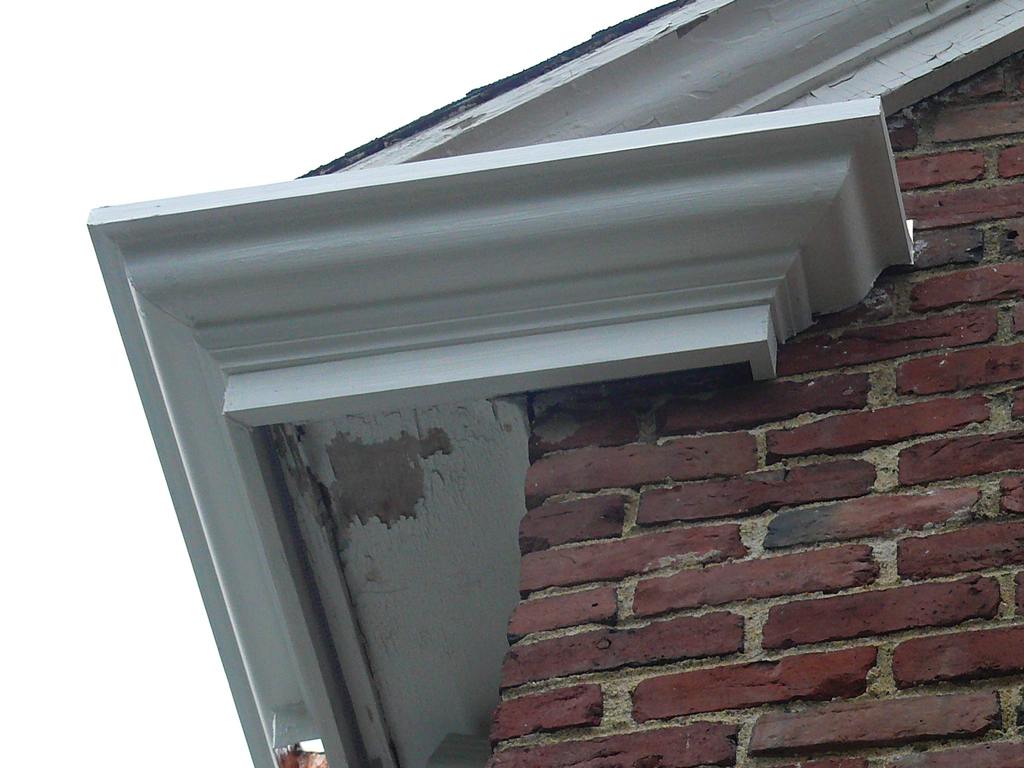
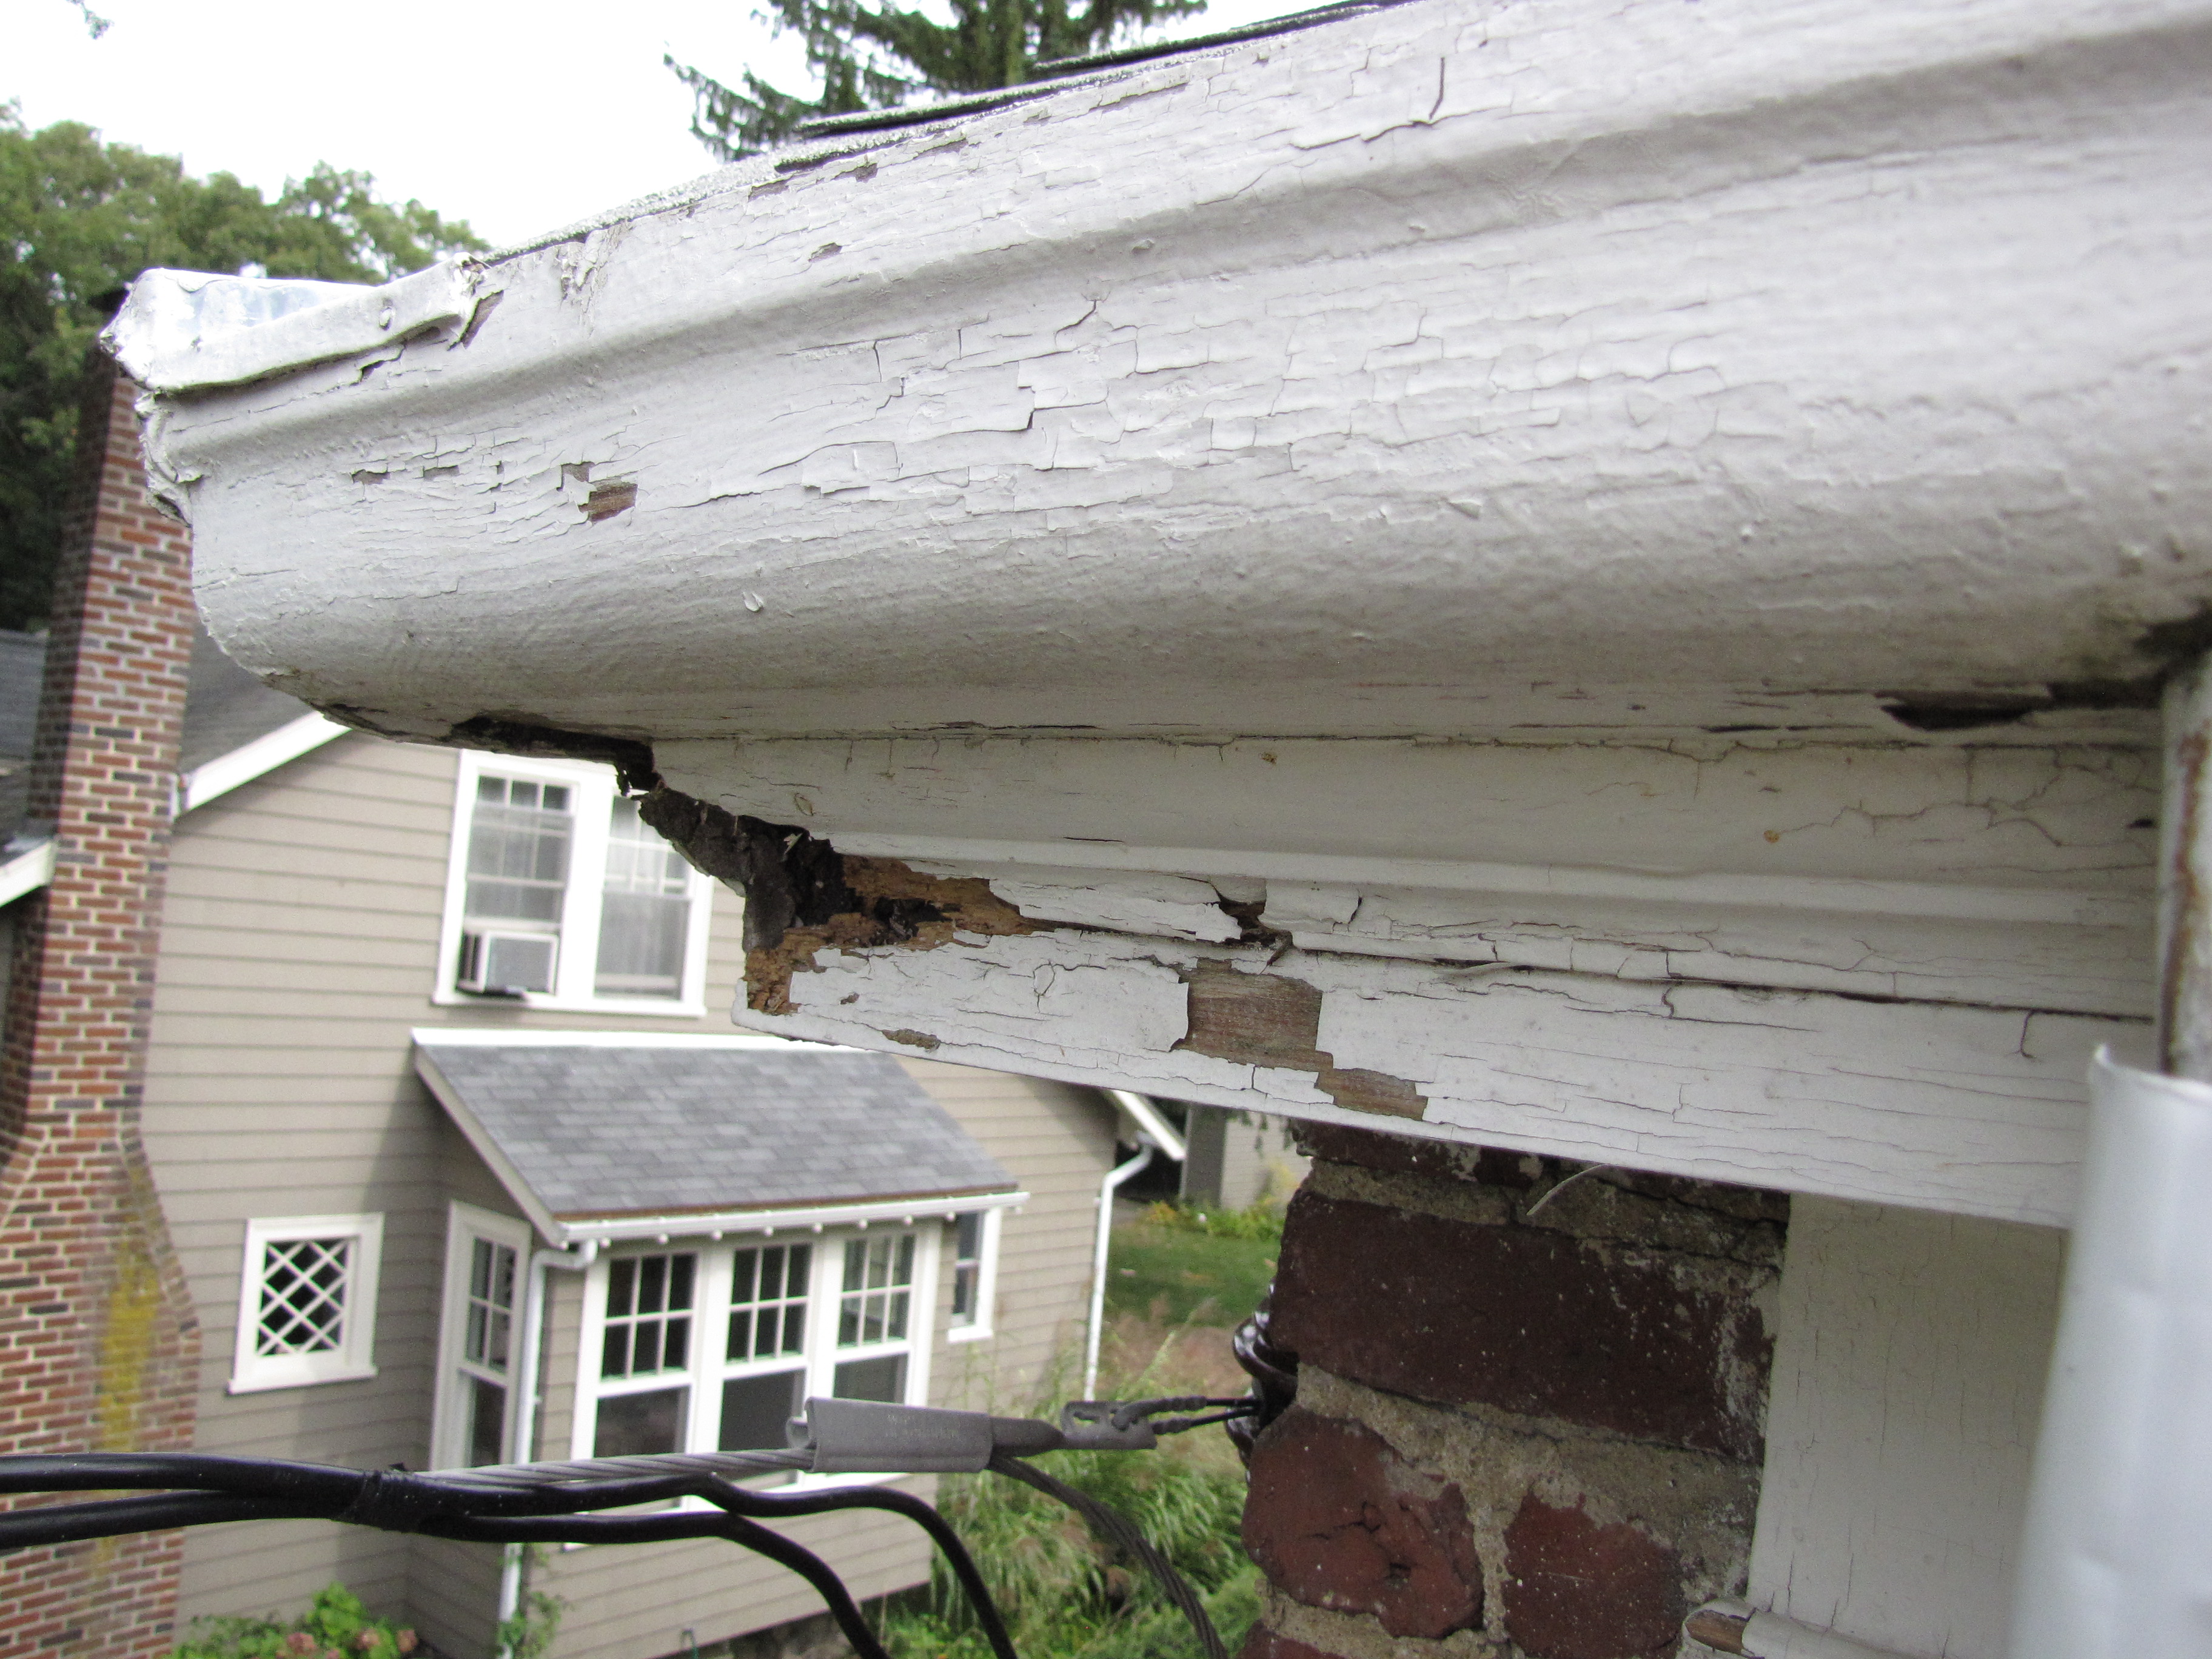
| - 08 - Returns sure are beautiful. Notice the paint failure on the soffit. This is because the gutters were over pitched and incessantly overflowed at the return miters. I rectified this by 1), reducing the pitch to no more than the proper 1/4 inch per 10 feet, and 2), by adding a custom milled wood drip at the front of the wood gutter, effectively forcing any future overflows to drip clear and not follow the face of the cornice. The surface tension of water caused overflows to follow the outside face of the gutter allowing it to reach the bed molding and the fascia/soffit below. It was this reason that the critters were able to chew through the wet soft wood in the photo below and the reason I was sought after to remedy this problem. |
| - 09 - 99 percent of today's contractors would say these gutters are old and rotted and recommend aluminum replacement. (The condition of the paint alone makes it sound believable). They'd say this for two reasons, 1: they have no clue or desire to work with wood, and 2: Aluminum gutters are inexpensive running about $2/ft including hangers and downspouts and the labor of installation needs little skill and is quick and easy. Hence the contractor quoting the price will make a hefty profit on top of the labor and material. So history or aesthetics be dammed, profit is whats important. Chances are I could refurbish the original gutters for the same price quoted to have them replaced for an inferior product. The only difference would be that I would make no profit, only my labor, and history would be preserved. |
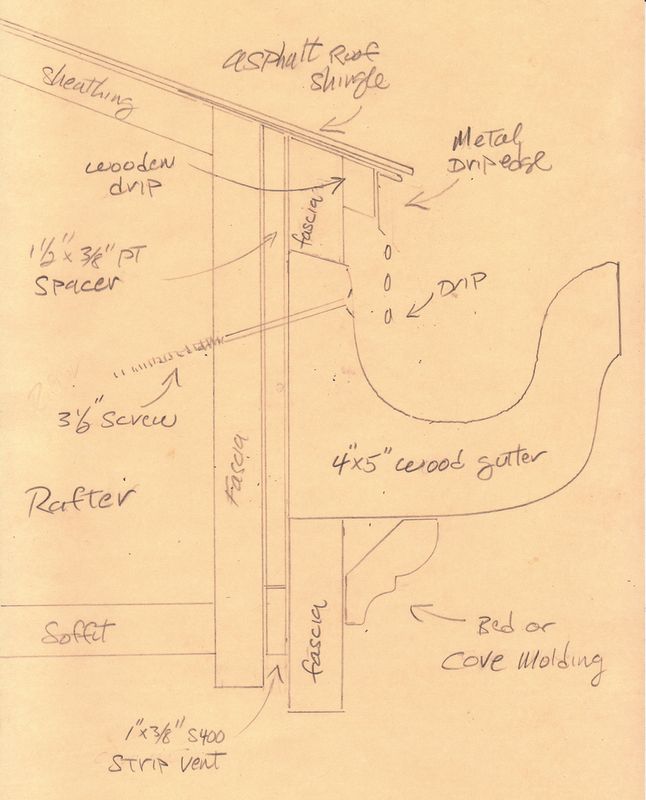
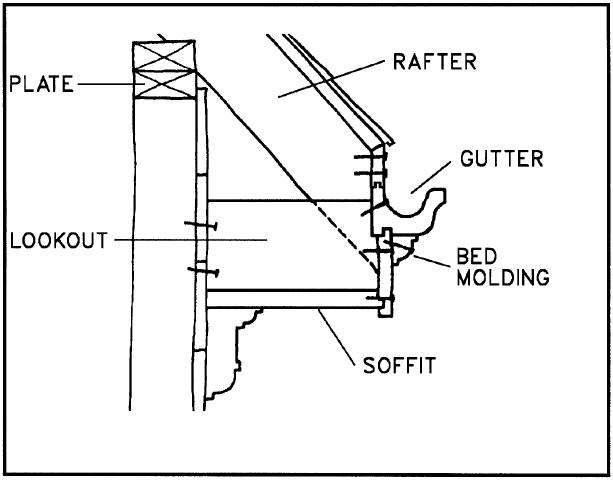
| - 10 - This to-scale, cross sectional drawing, shows what I did on this house. This house had a 1x8" fascia (most older homes have 1x10"). The modified S-400 strip venting from Cor-A-Vent can be seen in the 2nd photo above this one. I take the staples out of the vent and separate the strip lengthwise in thirds to get the just less than 3/8" thickness. Since I also wanted to vent under the roof sheathing I drilled about dozen 1/2" holes at the top of the 1x8" fascia just under the sheathing in every rafter bay. Be sure to pre-drill and countersink the the 3½" gutter fasteners to avoid splitting the straight grain. |
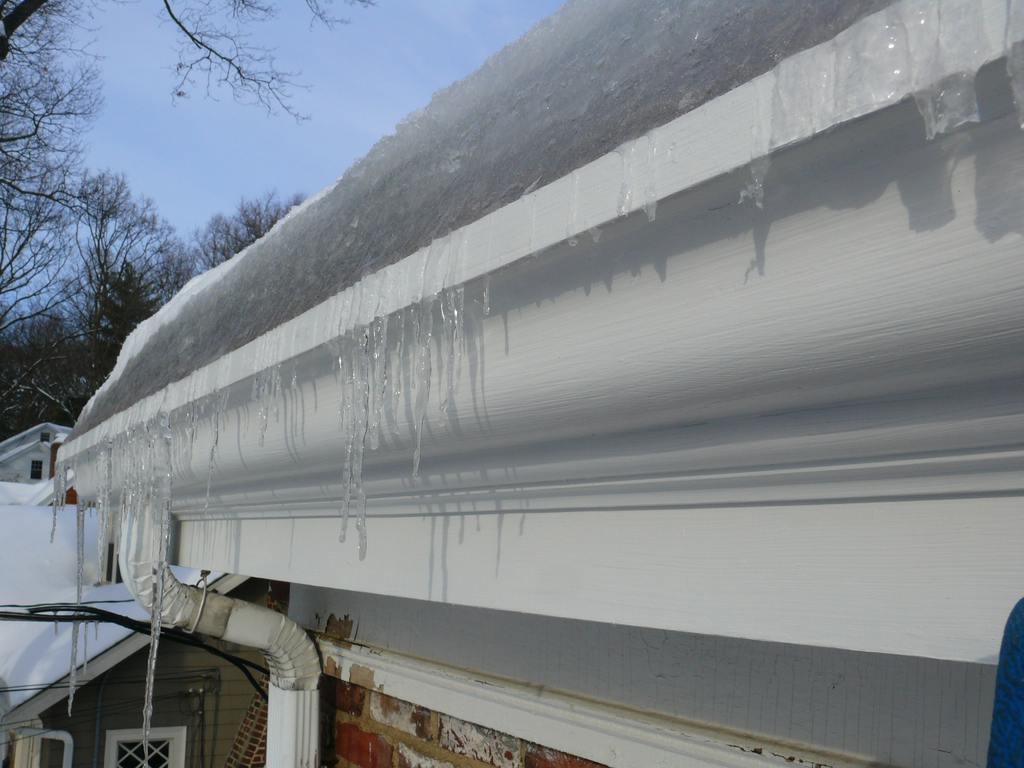
| - 11 - The drip in action! The dripping icicles are like watching water drip in slow motion. The water falls clear from this custom nosing I attached effectively forcing the water to drip and not follow the face of the gutter. This added nosing also gave the gutter the "ogee" profile look, an added bonus! Notice the all the crack lines in the hard brittle oil paint on the freeze board. Today's paints are rubber like and stretch with the movement of wood. The new paint work here will never crack or chalk like its oil counterpart. |

| - 12 - That's me Frank Harding clearing the ice dam nightmare we all experienced in the winter of 2011. The reason this ice dam is forming is because heat is finding it way into the attic (used for storage). The attic thermometer read 48 degrees, when it was 20 outside. |
| - 13 - This is how they did it in the old days, the gutter attached directly to the rafters. It was not placed on top of the fascia board as is the standard practice today. |
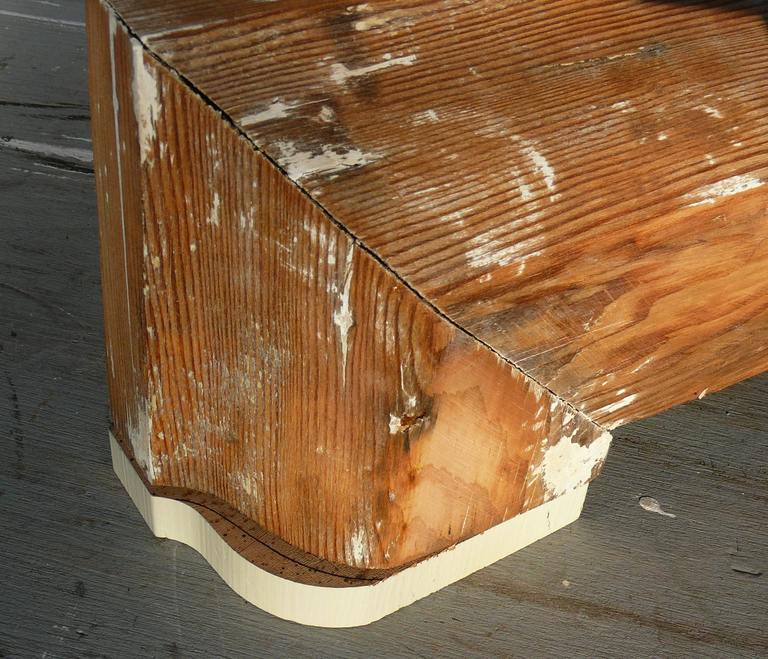
| - 14 - Here is an original wood gutter return that survived the replacement of the wood gutters some 20yrs ago. Its profile is a true "ogee", a shape that is recogisible today on all crown moldings. The white slice of wood gutter it is sitting on for comparison is the profile available today, known as the Boston, or Bostonion profile. Notice how the wood "drip" nosing (photo-08) added to the Boston profile gutter transforms this profile into a "ogee" look. |
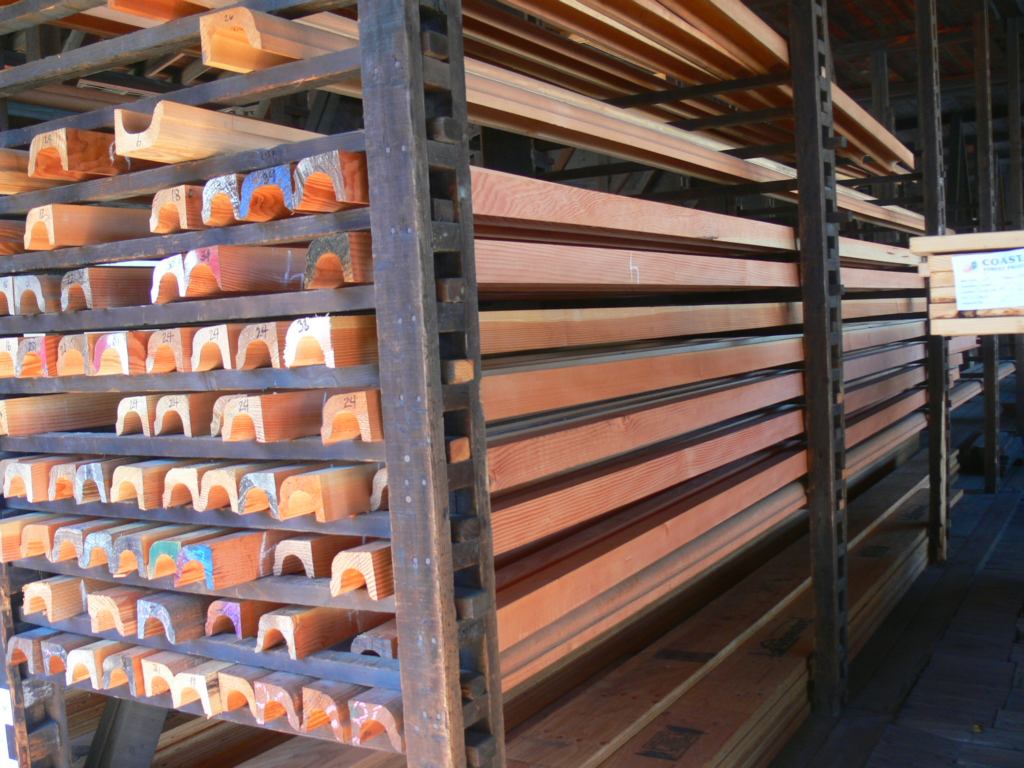
| - 15 - Rather than pay the markup by ordering a gutter at a local lumber yard, I go straight to the source to hand pick the best available. |

| - 16 - The owners were so pleased with my attention to detail on solving their wooden gutter problems they engaged me to design and build this colonial styled Nantucket dormer. The main molding of this cornice is a continuous wood gutter. The leaders are two over sized 3"x4" copper outlets that were placed inconspicuously at the back of the dormers where they empty onto the main roof. This eliminated the need for cluttering and possibly clogging downspouts. Behind aesthetics, the value of wood gutters are that they are self clearing on very windy days. Aluminum gutters are deeper, obstructed with numerous fat hangers, and have hard inside corners. These features combine to prevent natural clearing. Wood gutters on the other hand are unobstructed, relatively shallow, and milled with a smooth inside gentle curve. As long as wood gutters are properly installed with little to no pitch they will be self clearing. Excessive pitch slurries tree litter to the low point where it collects and subsequently dries out in a large mass. It would than take hurricane force winds (or a leaf blower) to lift out such a mass. On this building the owner swore they never cleaned their gutters. They never cleaned them because they never had had to. All I found in them was asphalt roofing granules. |