

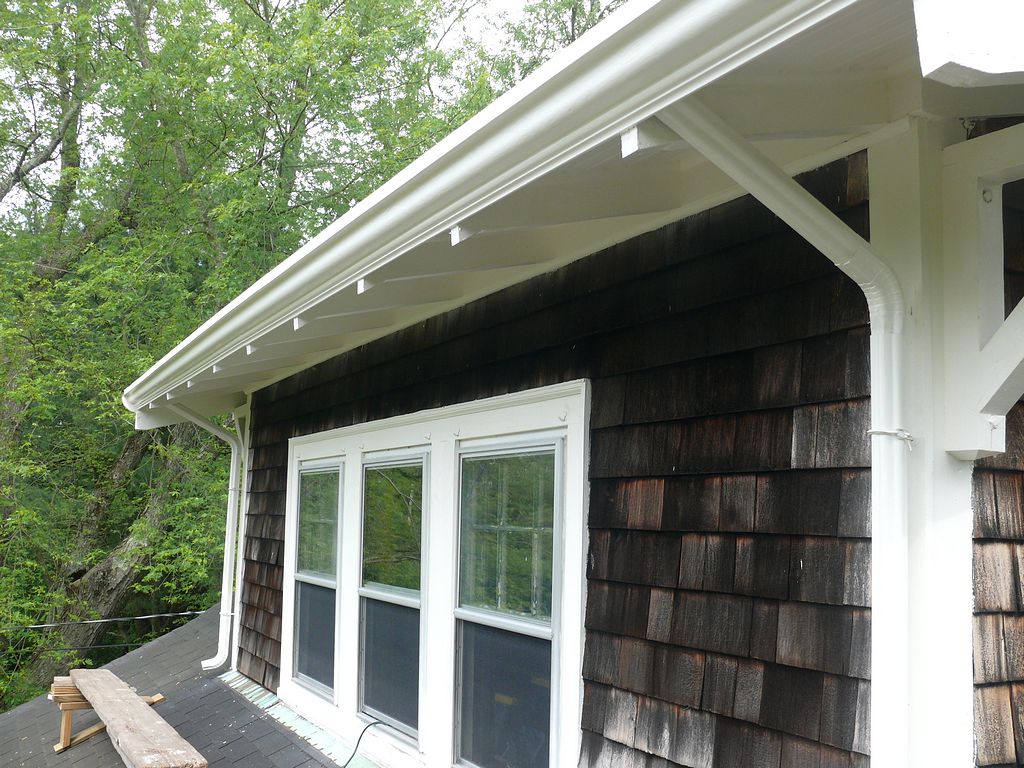
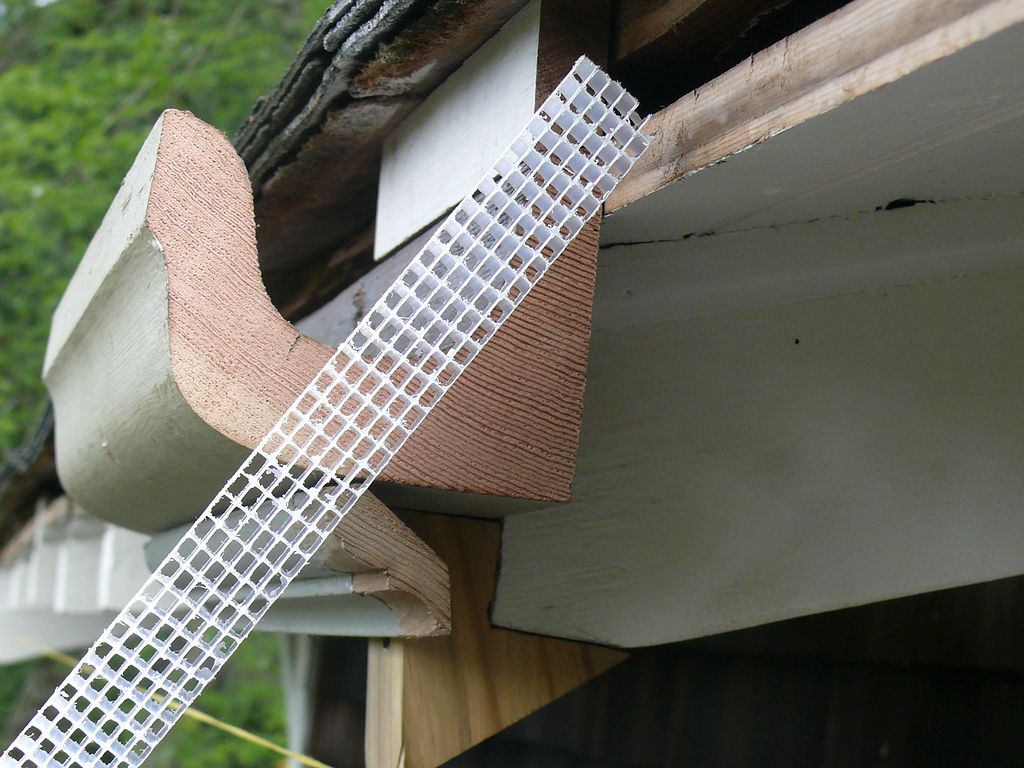
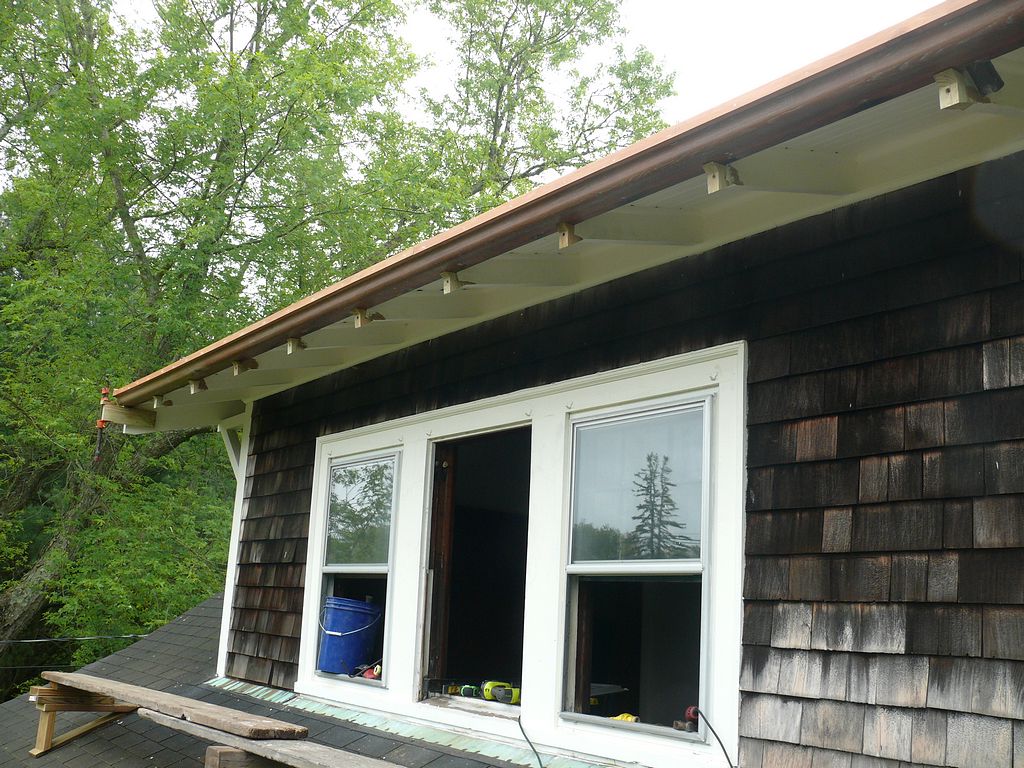
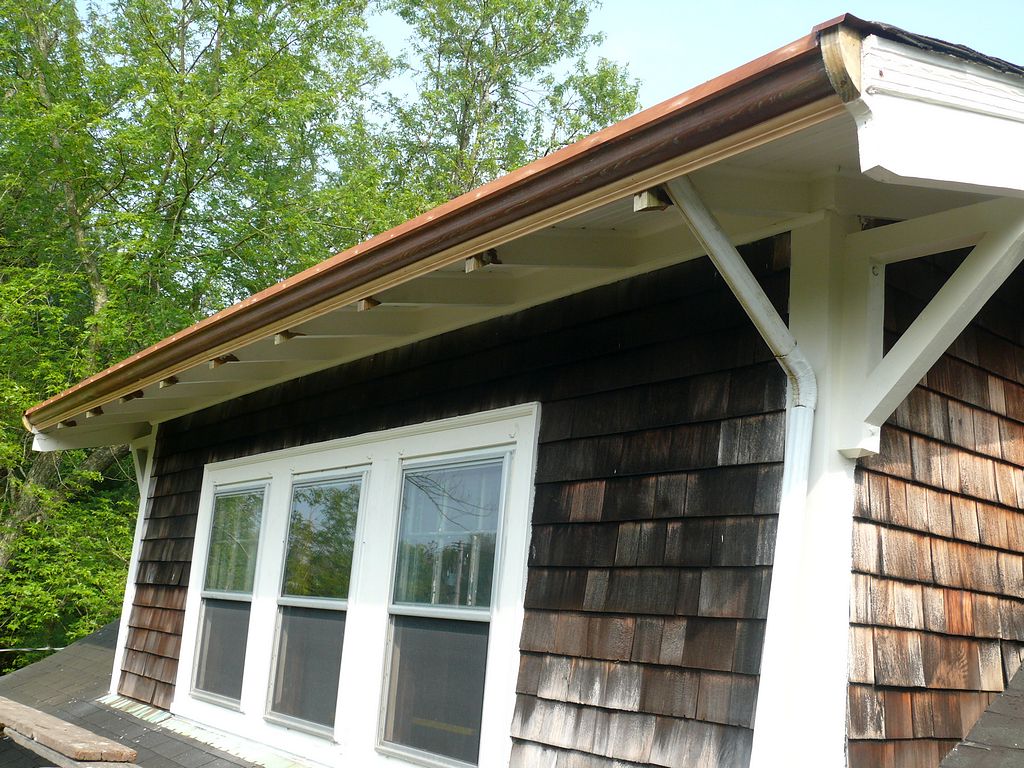
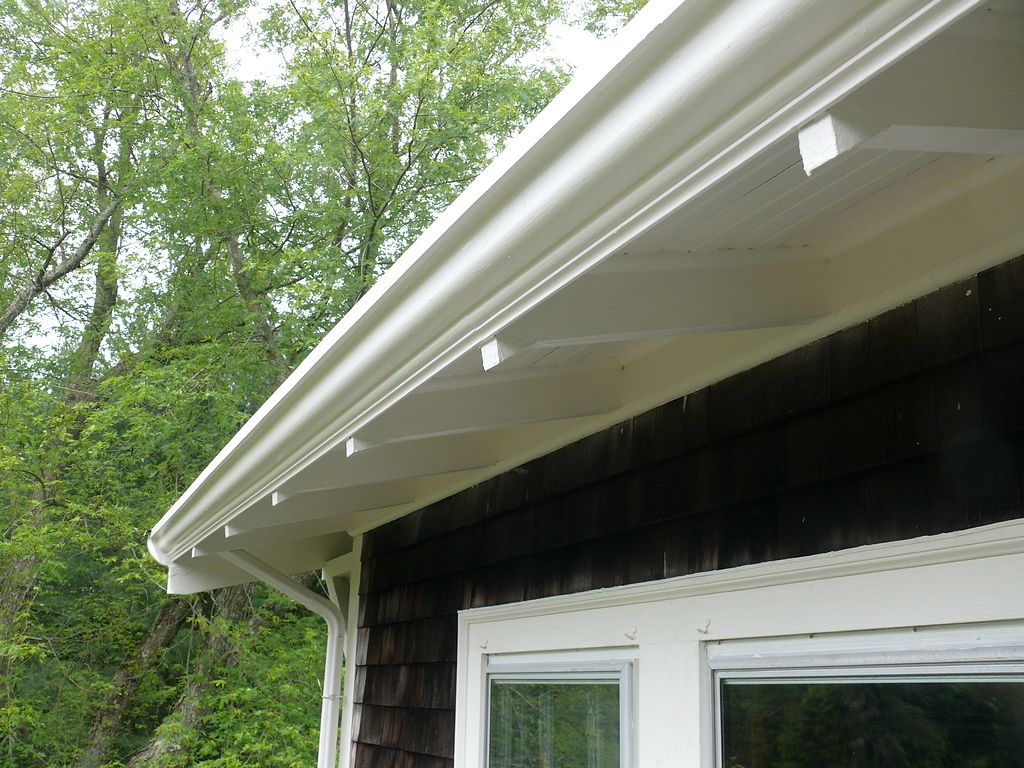
| - 01 - Let's start with a finish shot of the wood gutter installed and then explain all that went into acheiving this result. |
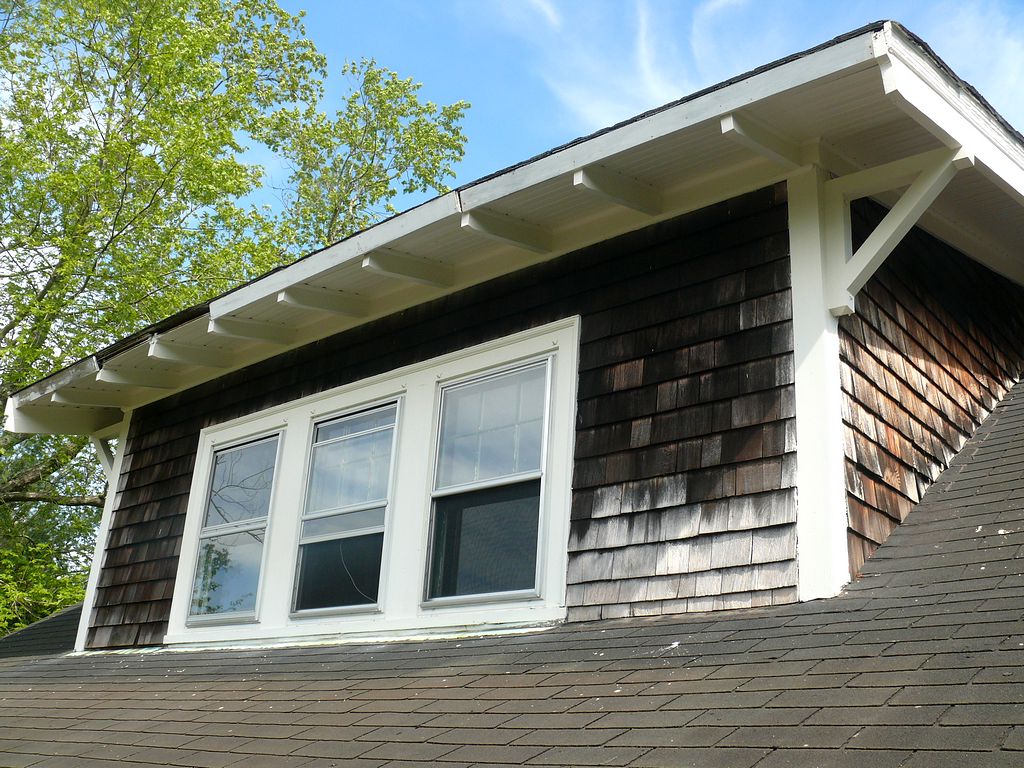
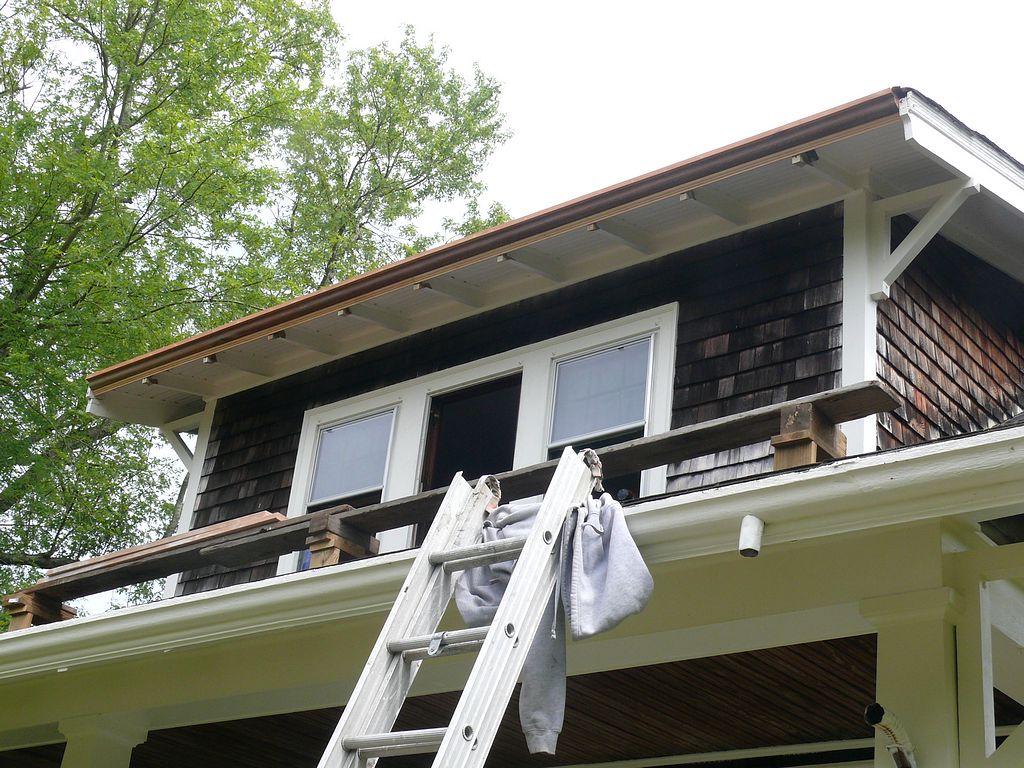
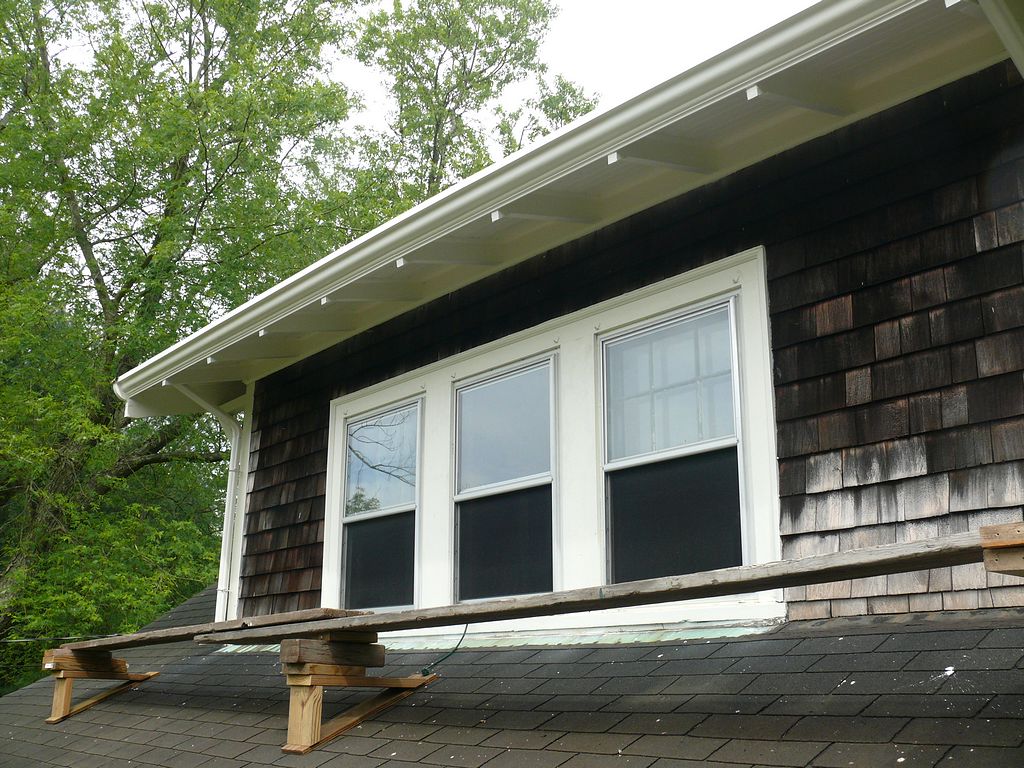
| - 02 - The eave on this 93 year old dormer is in bad need of attention. Although the dormers on this house never had gutters now is is good time to install them to control the roof run off. |
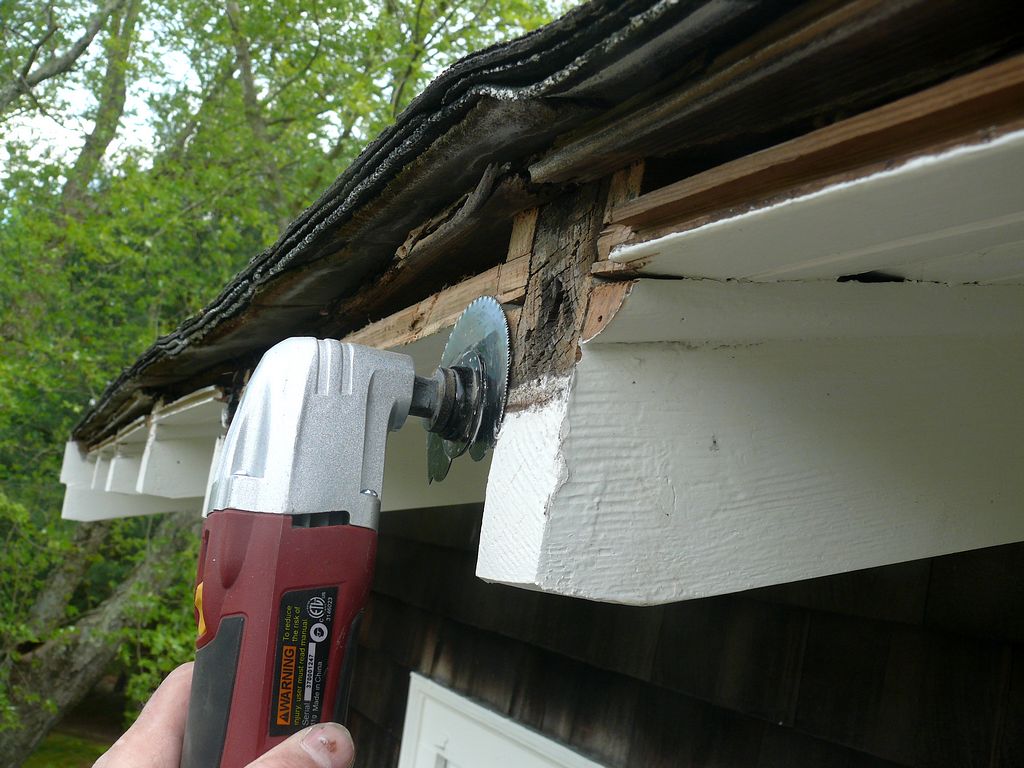
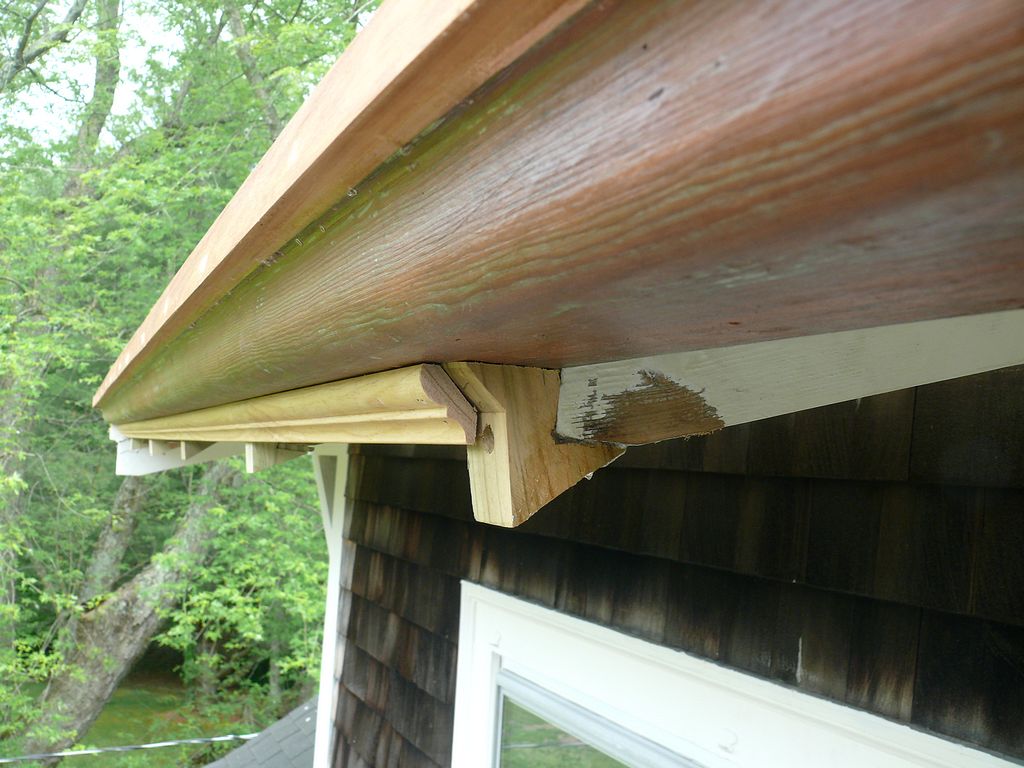
| - 03 - The first order of business is to get everything above the exposed rafter tails flushed up. |
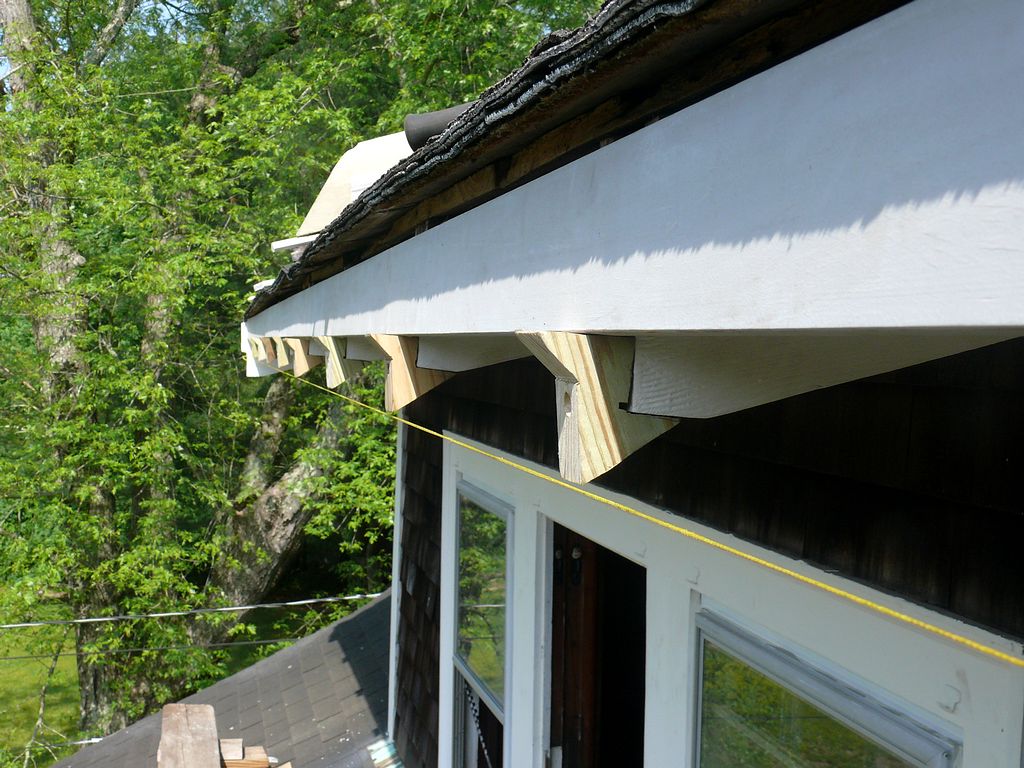
| - 04 - The next order of business is to work from a level stretched masons line. A cornice should be nice and straight, no matter what the rafters are doing! Now since these were only 2x8" rafters I had a problem if I wanted to see rafter tails exposed below the bed molding (which is a striking detail on this style house). The level cut on the bottom of the rafters gave me this idea that I could make a custom extension "block" that would not only lock into the rafter and provide support for the gutter but also give the necessary nailer for the bed molding as well as leaving an exposed rafter tail. The other benefit of this "block" was that it pushed the bed molding forward effectively hiding the the flat bottom of the wooden gutter. This detail of "recessing" the wood gutter into the cornice gives the illusion that the wood gutter is simply a molding and not a gutter. This is how all wood gutters were installed 100 years ago, recessed into the eave and attached directly to the rafter tails, (not on top of a fascia board). |

| - 05 - Venting is so important today for many reasons. One is that asphalt roof shingle warranties are void if the roof deck is not properly vented. The best venting is a combination of soffit and ridge venting that allows cooler outside air to be taken in at the lower eave and exhausted at the higher ridge (hot air rises). I'm going to remove the leading decorative soffit bead board, rip off 1" in thickness and re-install them. Then I can brad nail the S-400 "Cor-A-vent" to the edge of the soffit. If the roof leaks at some point (age, ice dam, wind damage, etc) leak water will have an and exit through this vent and wood members will be able to air dry. Venting serves many purposes: keeping the attic temp lower in summer, keeping the attic temp low enough in winter to prevent ice damming, and to remove unwanted moisture that can cause mold and plywood delamination. |
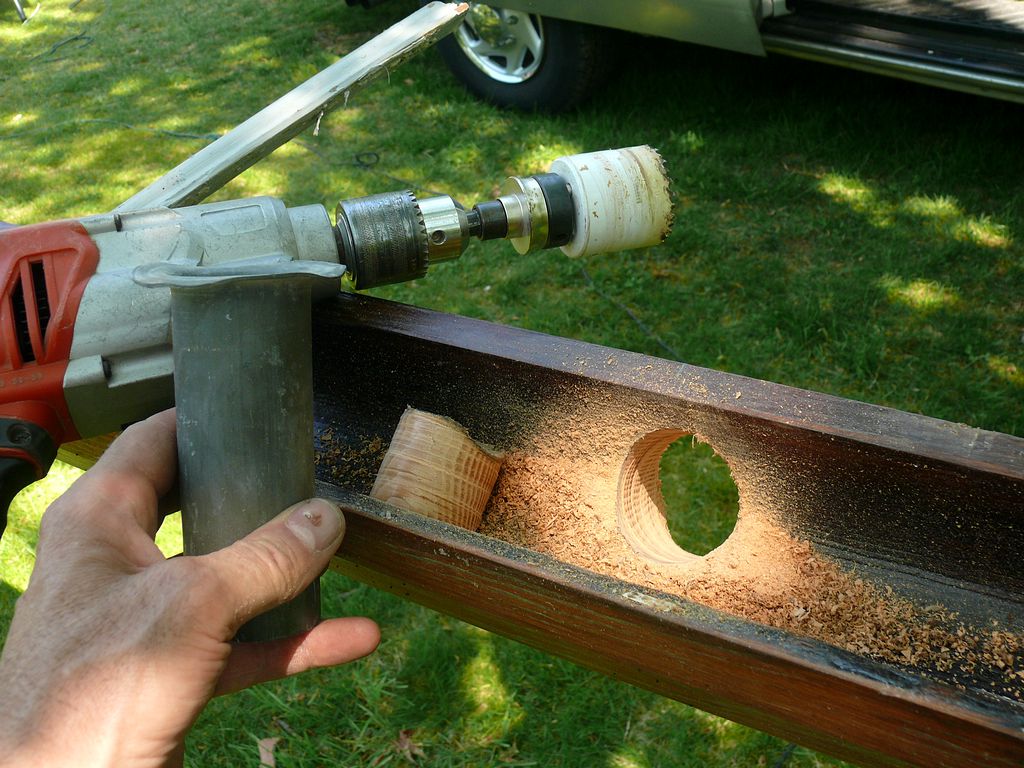
| - 06 - This is the only plastic an old house can like (besides plastic waste plumbing). Please resist all contractors recommending plastic siding, plastic boards, or plastic windows on an old house. If you like these products buy a new house. Older homes are irreplaceable and once original details are lost they are gone forever. Many older homes with exposed rafters the sheathing doubles as the soffit in the open overhang. This makes venting harder. In this house however they added a bead board soffit dropped 1". This gives a 1" air space between the soffit and the sheathing so I was able to run a long 3/4" drill bit through this channel to connect this airflow into the attic. Roofing nails can not penetrate the soffit and ruin its decorative look, a smart idea. |
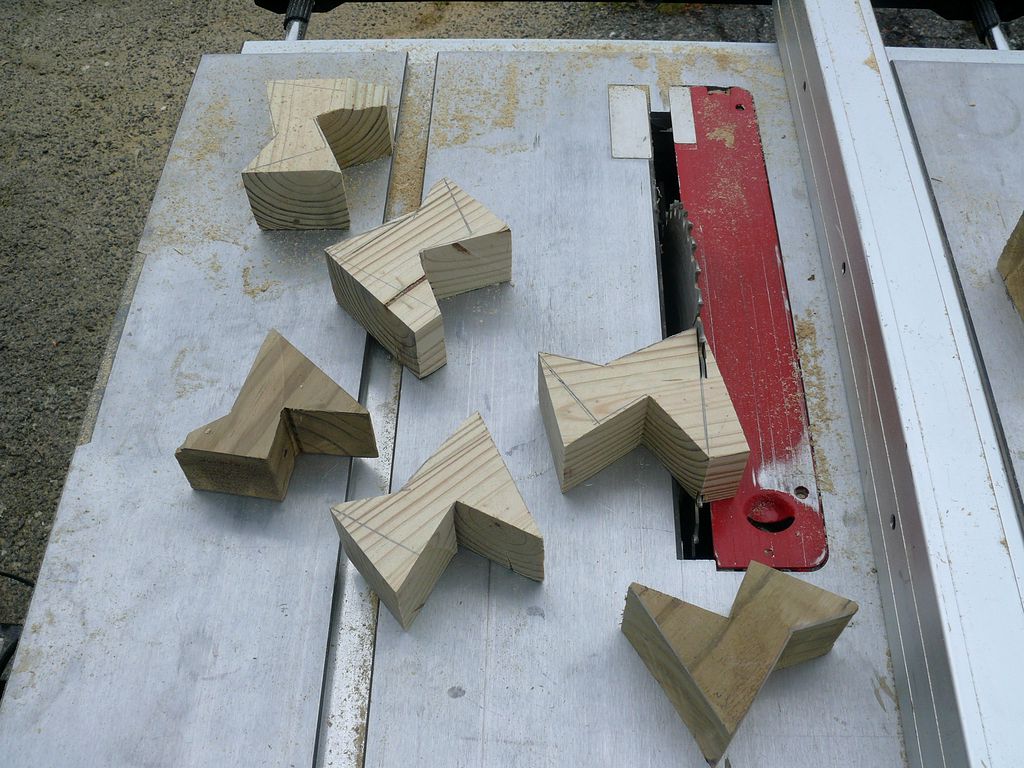
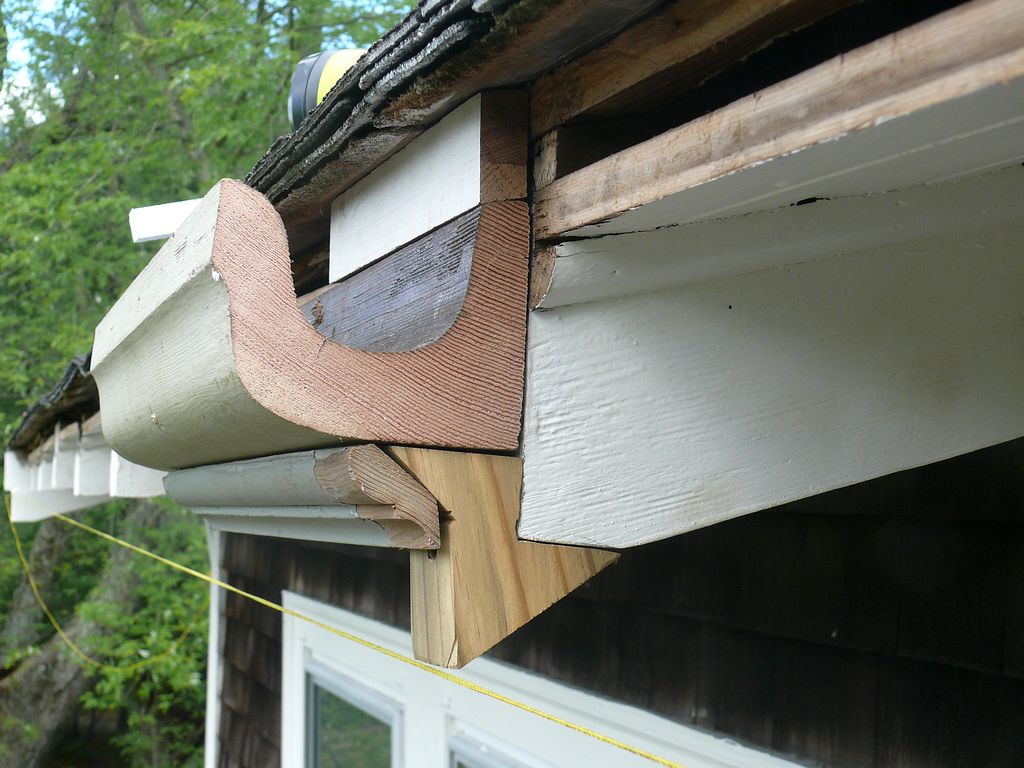
| - 07 - Making these blocks is tricking business as its easy to loose fingers on a table saw when working with such small pieces. No other tool will get the job done. Pay attention to the grain as the grain needs to be straight where the fastener goes through to lock the block up to the rafter end. Grain running the opposite way will split off very easily. Since framing was thicker in years gone by I had to use 4x4's as stock to match the 1 3/4" and even 2" rafter width. I used pressure treated lumber as it will never rot. And I made sure I used dry wood that had already shrunk and checked. To make matters even more complicated, due to the rafters not being on the same plane, some had to be individually made. Luckily for me most were identical. |
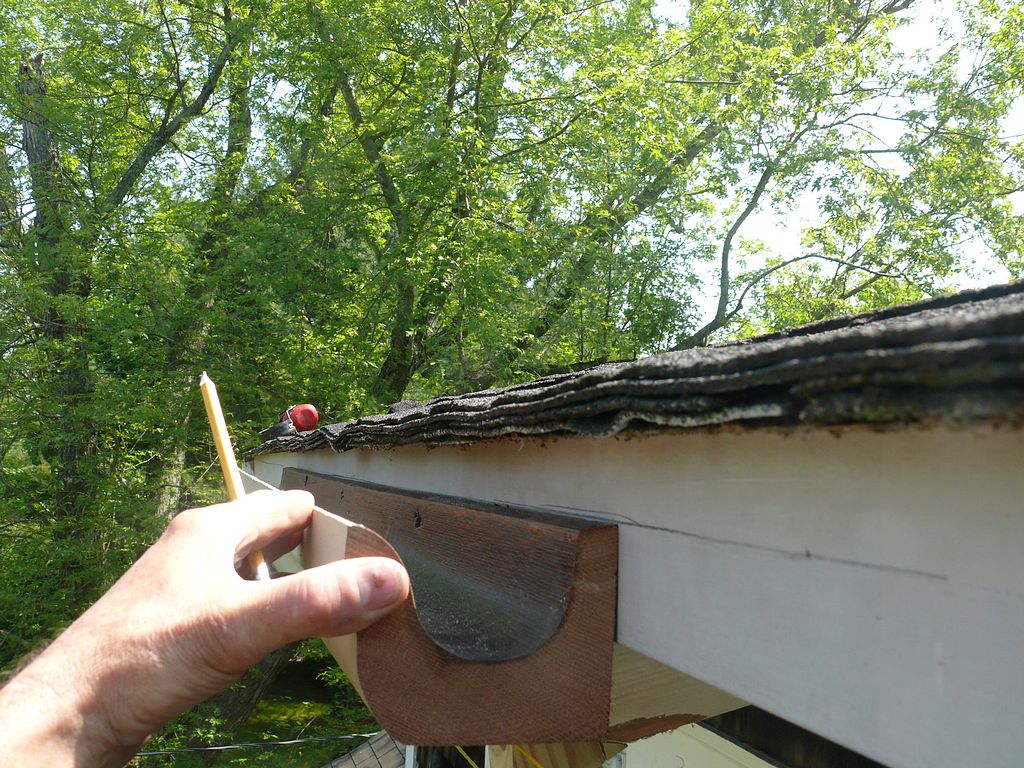
| - 08 - Your looking at a 20' pre-primed finger jointed red cedar 1x4" trim board. Red cedar is highly rot resistant, very stable, and takes paint well. This board only cost $22. Notice how nice and straight it is as it sits on the "blocks". What I intend to do now is push this board up against the curving roof and hold there with wedges so I can scribe the piece I need to cap the back of the gutter as you'll see below. |
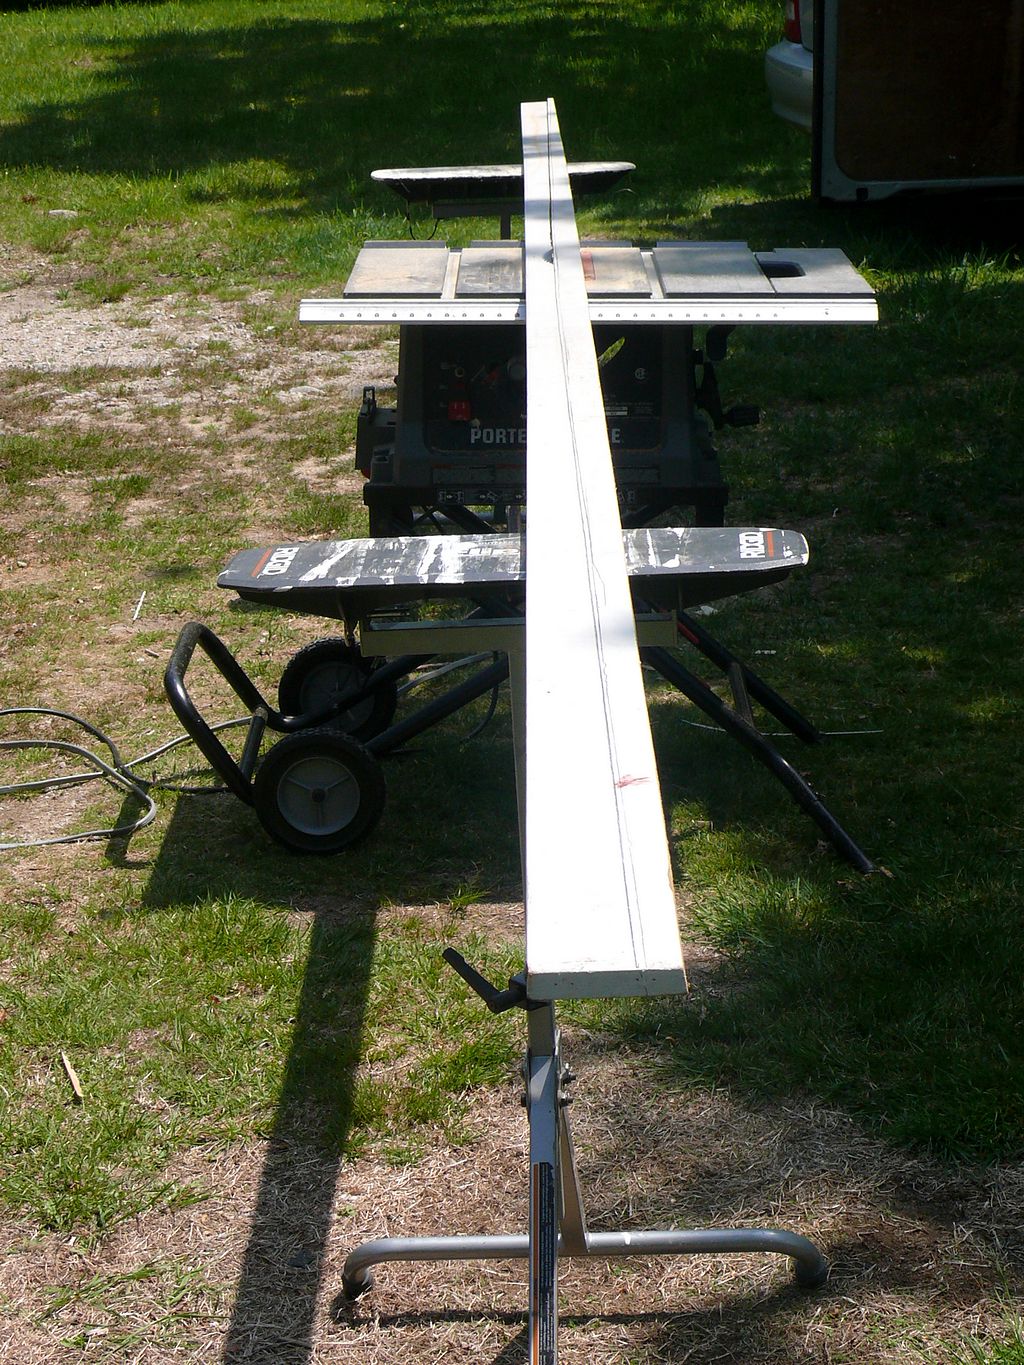
| - 10 - Had I bent the gutter to the roof line it would have lost its water carrying capacity and overflowed often at the low ends. (You can never fill a pitched gutter with water). This is why paint failure and rot occurs, constant overflowing at low ends. Notice I have the saw blade at 10º to match the angle on the back of the wood gutter. The only way to make this cut is freehanding it through the saw. These Ridgid® flip top out-feed stands are a must have when working with long lengths |
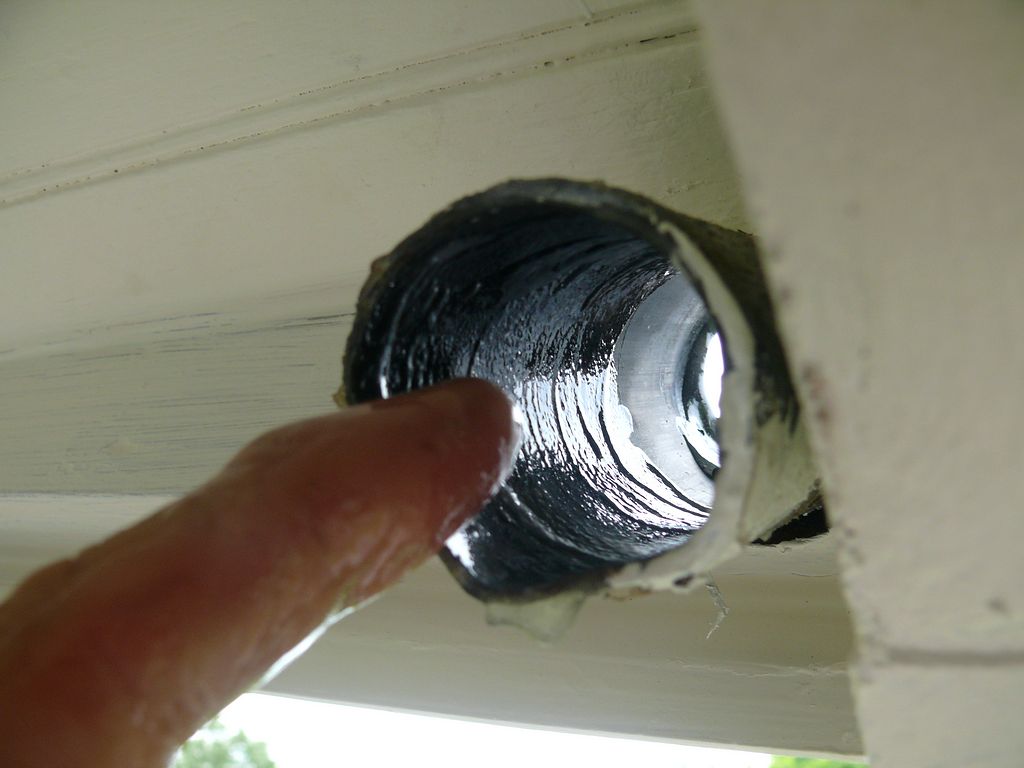
| - 11 - Now its time to do everything I can to prep the wood gutter while its on the ground. First the lead leader outlets will be installed. |
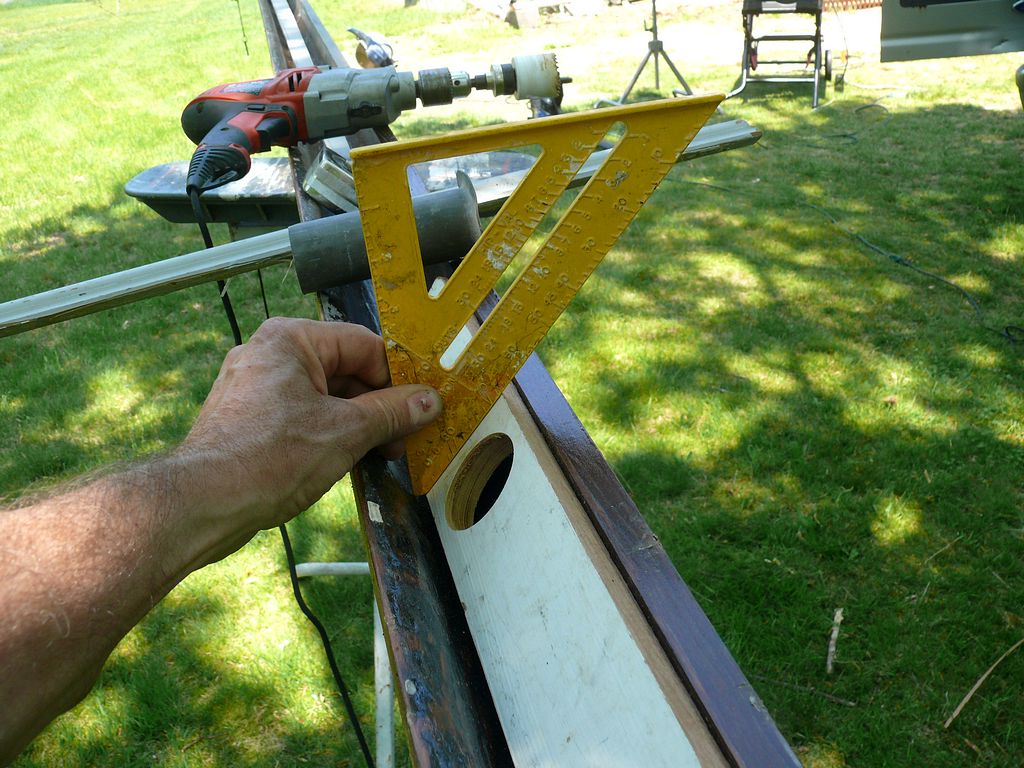
| - 12 - A leader exiting at the bottom only is just asking to be covered up by tree litter. Exiting out the back at a 45º allows for drainage above debris laying in the gutter waiting for a windy day to blow them out. (Sorry, aluminum gutters can never be cleared by gusty winds, unlike wooden gutters). |
| - 13 - Lead is soft and malleable. I like to use a rounded dowel to help hammer it into shape. |
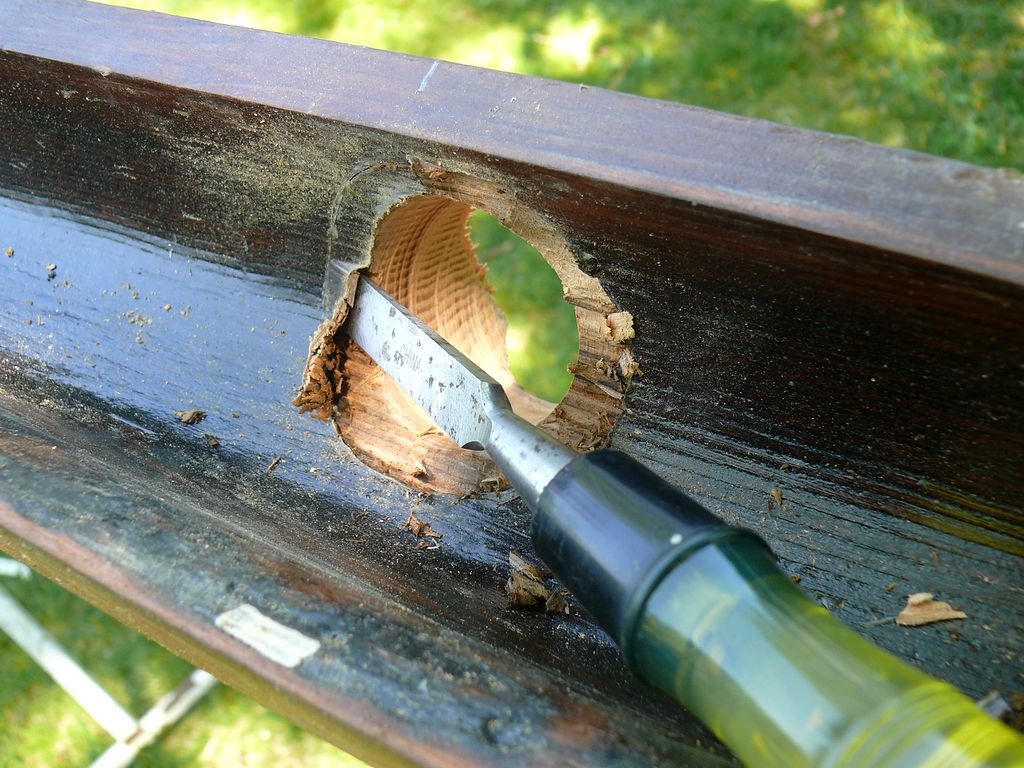
| - 14 - Score around the lip with a sharp utility knife, then use the chisel to remove the wood. |
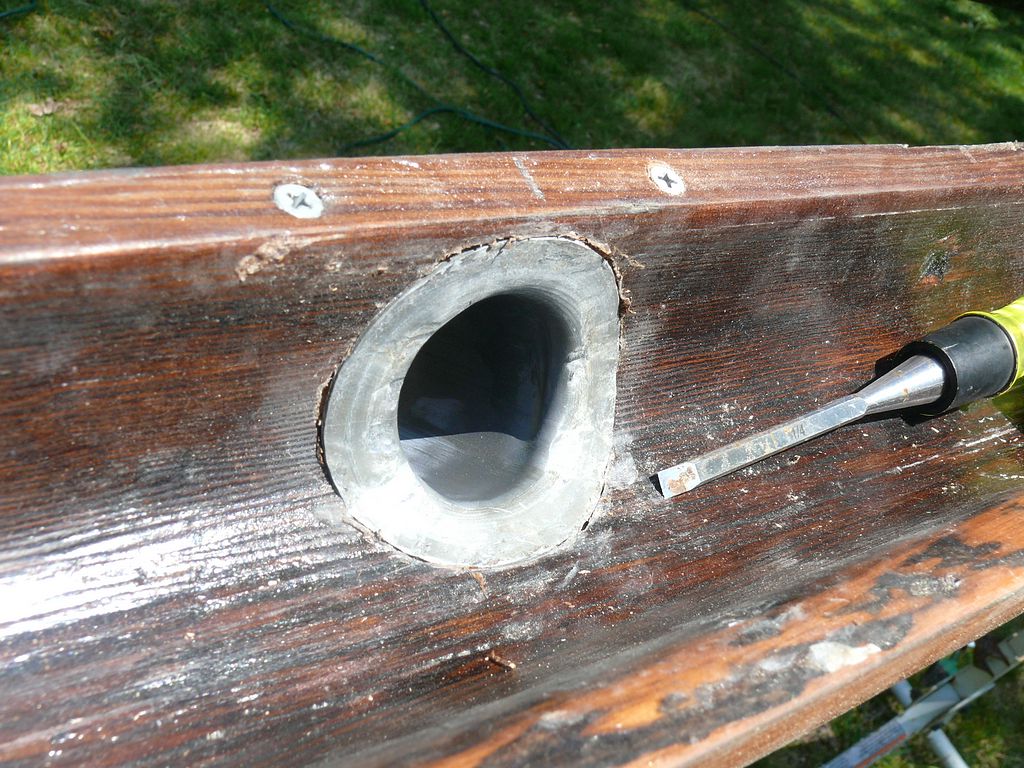
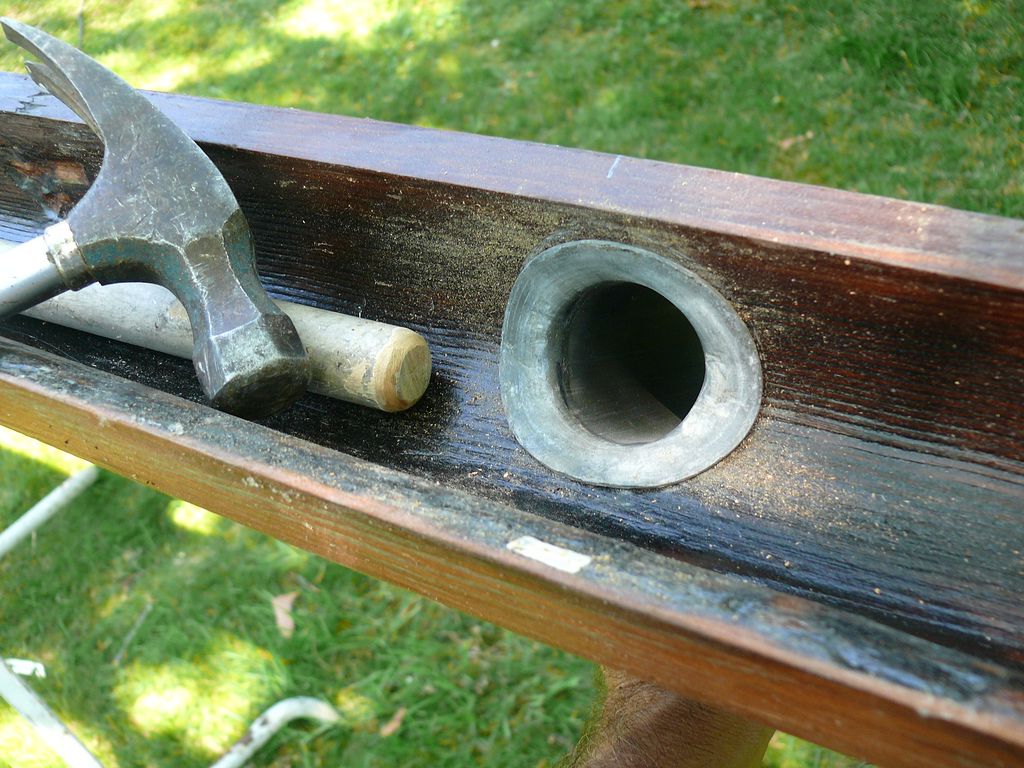
| - 15 - This leader is now dry fit to insure that it will be flush with the inside of the gutter before its final installation. |
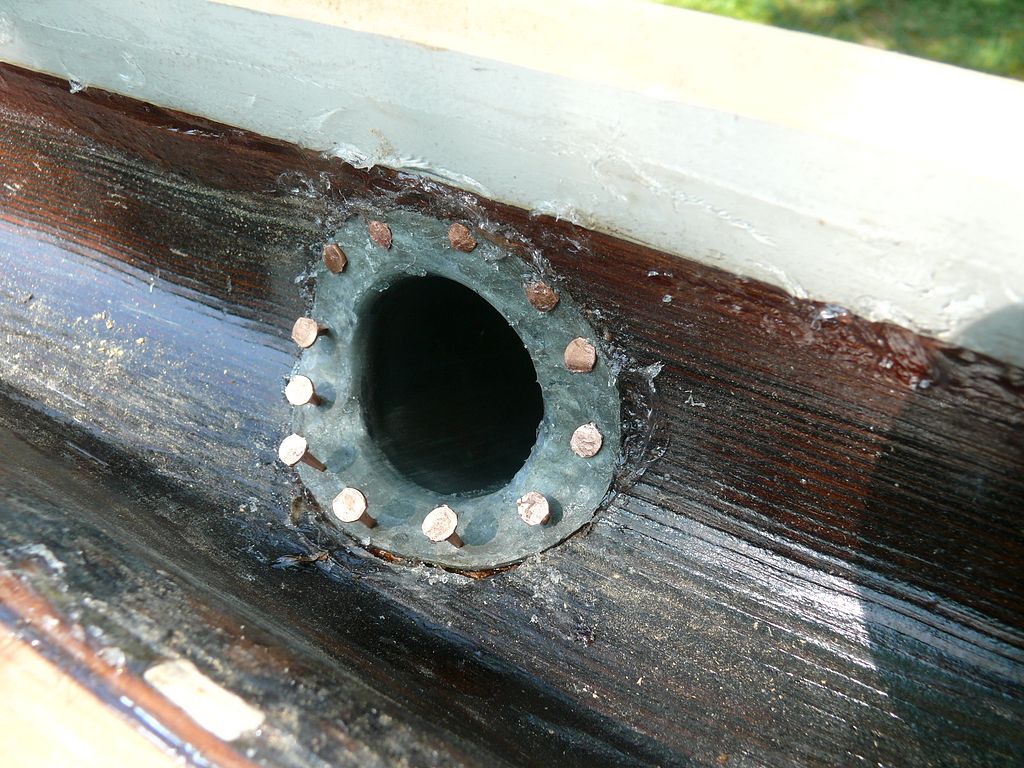
| - 16 - Smear tripolymer sealant on all the raw wood exposed by the hole saw and the exterior of the lead leader before installing it with 3/4" copper cut tacks. Notice the scribed upper fascia board has also been installed in a bed of tripolymer sealant. |

| - 17 - Now for the custom milled wood dripedge. This will not only add to the aesthetic look of the gutter but it will keep rain from dirtying everything betow it. Water will drip from the leading edge keeping the profile of the gutter forever dry, even if the gutter overflows. It too was completely sealed with Geocel's 2315LRF brushable liquid rubber and allowed to cure before installation. |
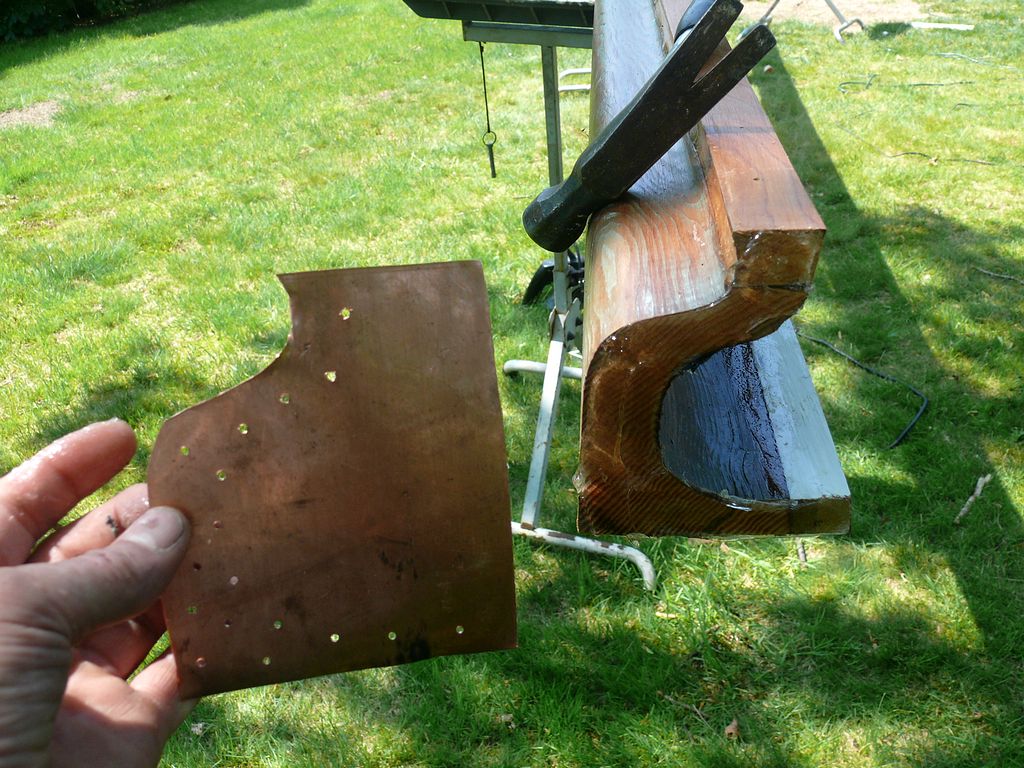
| - 18 - Endcaps were cut from sheet copper and pre-drilled for tacks. The end-grain of the gutter was slathered with tripolymer sealant before the end-cap was fastened. When the gutter's length expands and contracts this end cap will move with it. Nailing lead to the end rafter and gutter as is the common practice only results in torn lead as the wood's movement pulls it apart over time. |
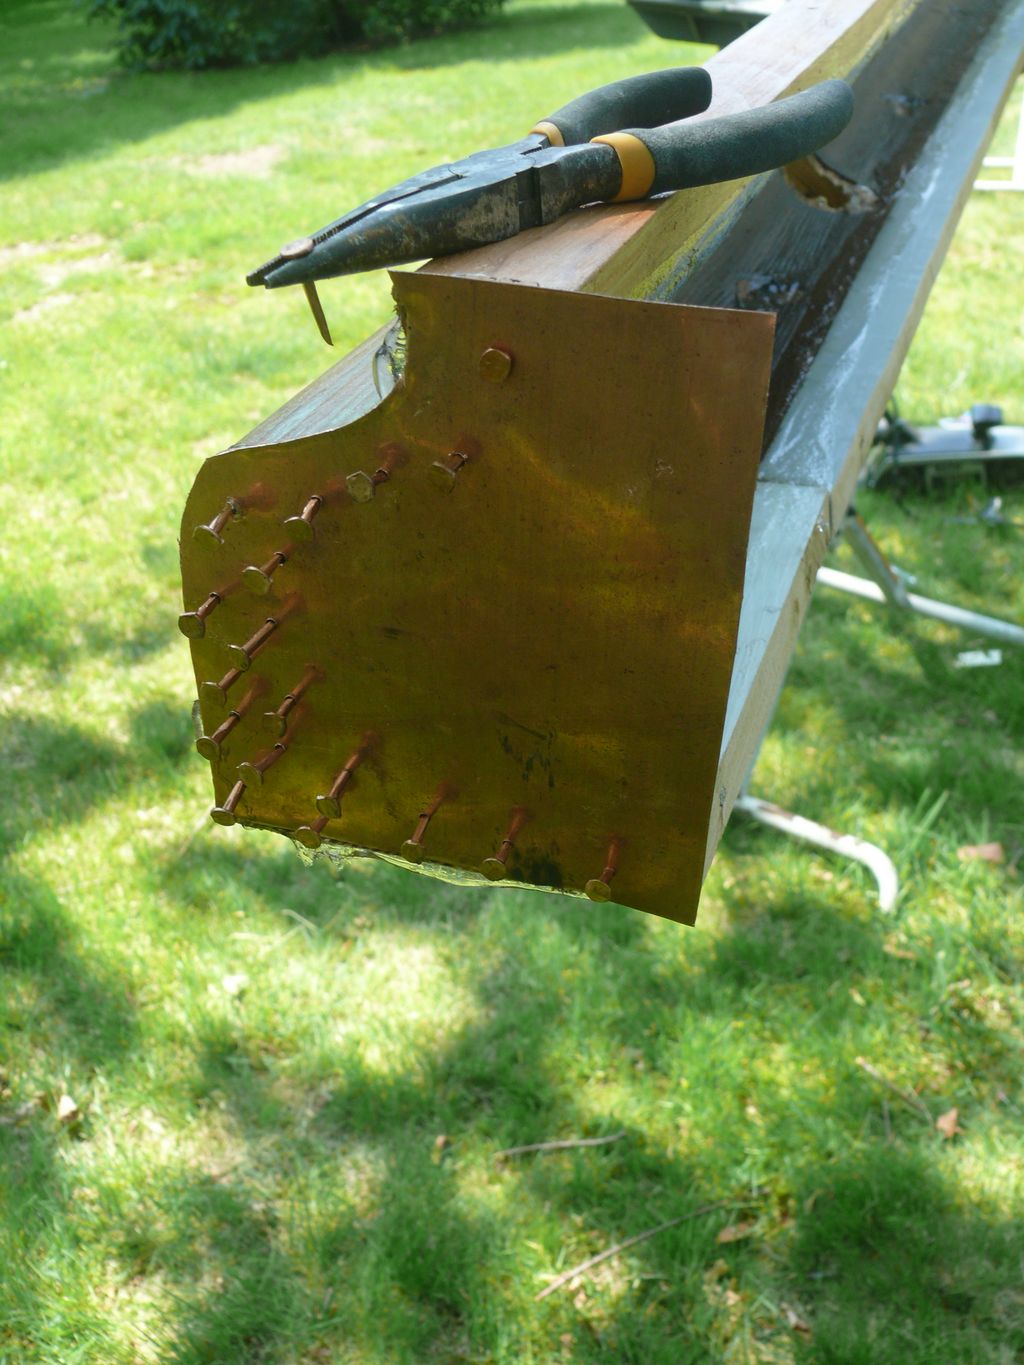
| - 19 - Not much to say here, just hammer in all the tacks. This end-cap will never leak. |

| - 20 - The backs of wood gutters are only ~1/4" higher than the front. Therefore they need an extension such as the one I've applied here. The only way water is going to leave this gutter is down the leader or over the front. This extension, or upper fascia board, serves two purposes: it seals the back of the gutter preventing back flows, and it supports the roofing edge. To accomplish both these tasks this board needs to be custom sized, straight to the gutter but tapered and or curved to the roof sheathing as I've done here. |
| - 21 - I just walked up the ladder with this this 20' wood gutter and rested it on the straight and level perch created by the custom rafter tail extensions. |
| - 22 - Now to fasten the gutter. Predrill all holes to avoid splitting the straight grain wood. To make it easy to run the big 4" screws home I didn't forget the lube. |
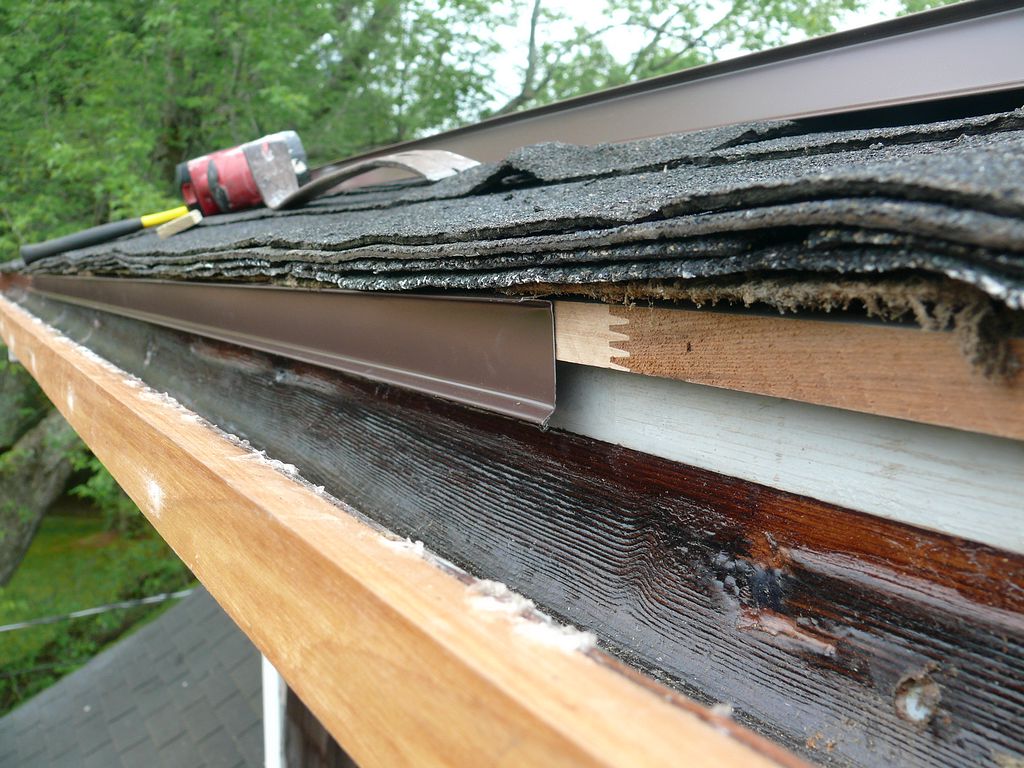
| - 23 - Now for the metal dripedge. For it to function properly it needs to be spaced away from the back of the gutter. That is why I added the 3/4" x 1" wood drip shown in the photo. |
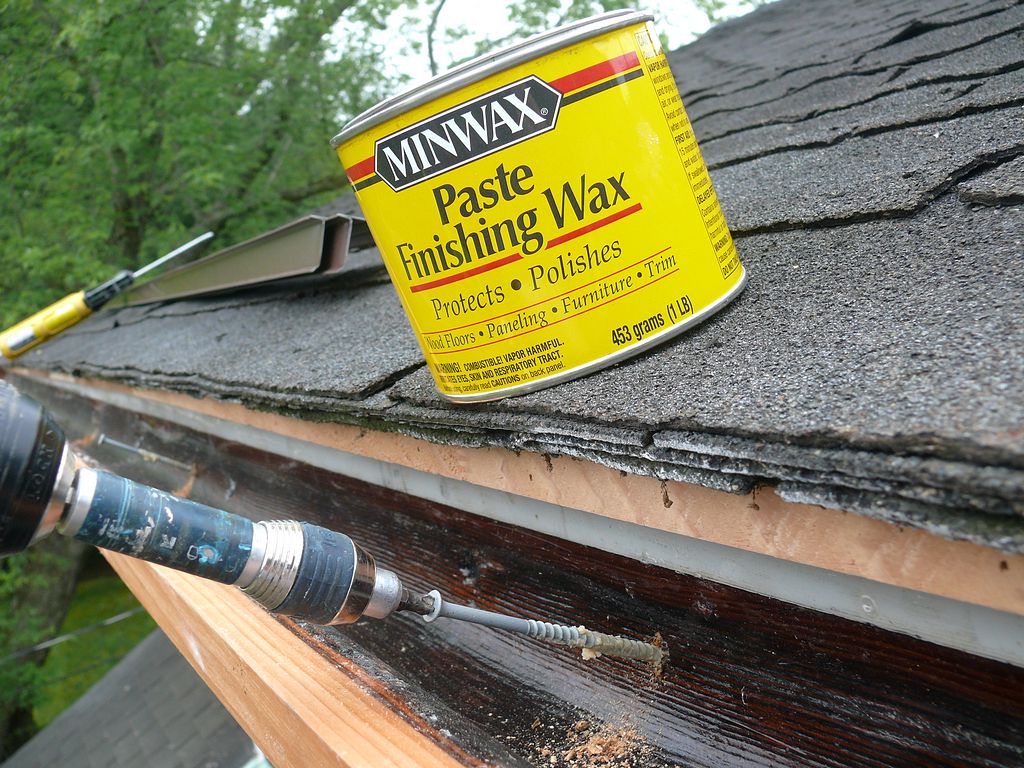
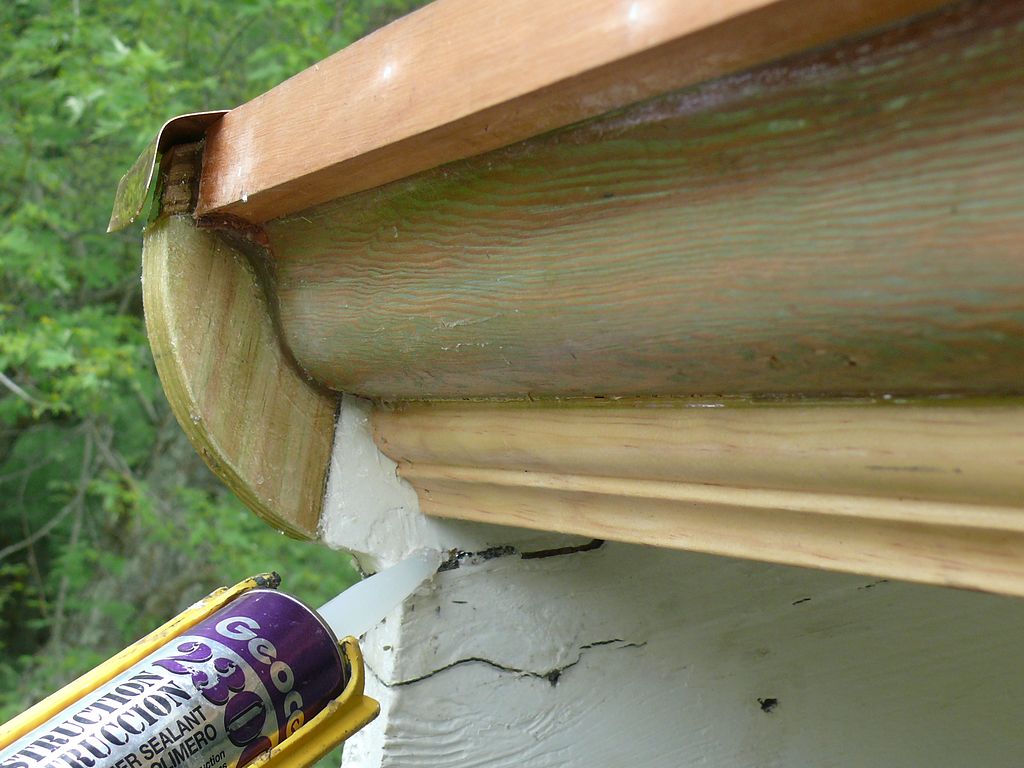
| - 24 - This bed molding was previously sealed with Geocel's 2315LRF brushable liquid rubber. This product is far superior to any primer. This wood will never get wet so when its painted it will last a lifetime. |
| - 25 - Paint is necessary to bring out the contours and shadow lines. Even the exposed rafter tails are nearly invisible without the light reflective property of paint. Notice how on the main house the front gutter was over pitched which covered up the last six or so rafter tails at both ends. Both of the ends of this gutter had rotted in the past and were repaired with splice repairs. Such a repair does not address the underlying cause as to why the ends rotted in the first place. (ie over pitching) |
| - 26 - All running seams and any joints or cracks need to be sealed with tripolymer sealant and allowed to cure before painting. Also, to keep water from running down the face of the end rafter tails a copper drip was installed. |
| - 27 - Now ready for paint, just have to wait for the tripolymer sealant to cure overnight. |
| - 28 - Everything was still wet from rain overnight so I threw a 5 gal bucket of water on the roof (that I had washed a paint brush in) to see the drip edge in action. Notice how the water curls around the roofing, contacts the dripedge and follows it. Good thing I spaced it away so the runoff would drip into the gutter and not run down its back. |
| - 29 - Down the drain it goes. 45's instead of 90's means any tree litter should easily pass through. Lots of people install the leader outlet at the very end. (to get the downpipe on the corner board). This is not a good practice. Leaders should be able to drain from both sides simultaneously. A gutter drains faster this way in a heavy rain. |
| - 30 - One last look before the glorification that paint provides begins. Notice how all the wood is encased in clear paintable rubber. Just try and remove this rubber, it's damm near impossible. |
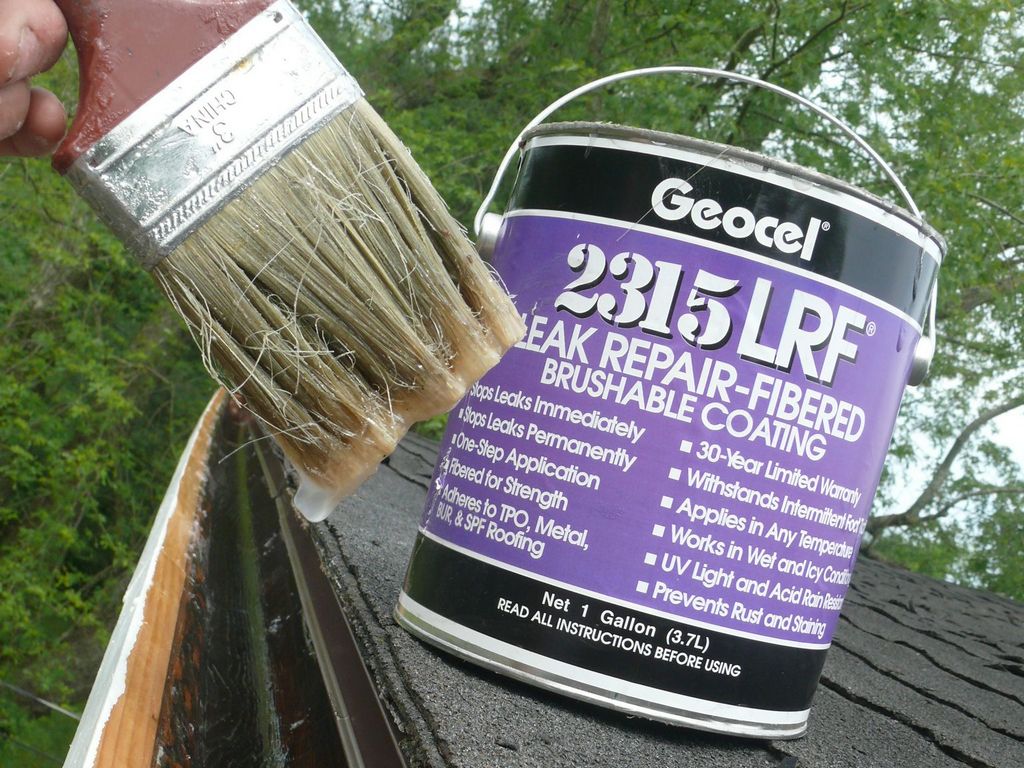
| - 31 - Before applying the 2nd coat of paint it's time to apply a third and final coat of Geocel's 2315LRF brushable liquid rubber to the inside of the gutter. This wooden gutter is now more maintenance free than its aluminum counterpart in that wood gutters are self clearing on windy days. |
| - 32 - I've found many corroded lead leaders in old buildings, most likely do to acid rain. That's why I like to coat the inside with Geocel's rubber. |

| - 33 - People may hate the hassle of painting but nothing looks better than painted woodwork. Today's super paints are basically a sheet of rubber when cured. The problem is, if the wood gets wet, the paint looses it's adhesion. Solve the wetting wood problem like I've done here, and paint failure is a thing of the past. |
| - 34 - What paint does to glorify a carpenter's work. Notice how uniform the exposed rafter tails are. That was no accident. The downpipes are looking sweet too. These 2" ID corrugated, galvanized downspouts were fashioned from what remained from the main gutters on this house. Only 3" are readily available today and since they are much less likely to clog 3" will be used on the main house. |
| - 35 - I sealed all the gaps in the beaded soffit boards too before painting to get rid of the black cracks. |
| - 36 - This house is all original. The wood windows need attention but replacement windows would ruin this house. The floors are all original, quatersawn fir, all one length - no joints. These floor boards have been protected under wall to wall rugs for decades. The interior has all its original stained and varnished woodwork, not 30 layers of paint. The exterior trim is all old growth fir. Can you believe the "kit" for this house cost $1,600 in 1920. This bungalow can also be described as a "House of Three's", so its most likely a Hazleton. |
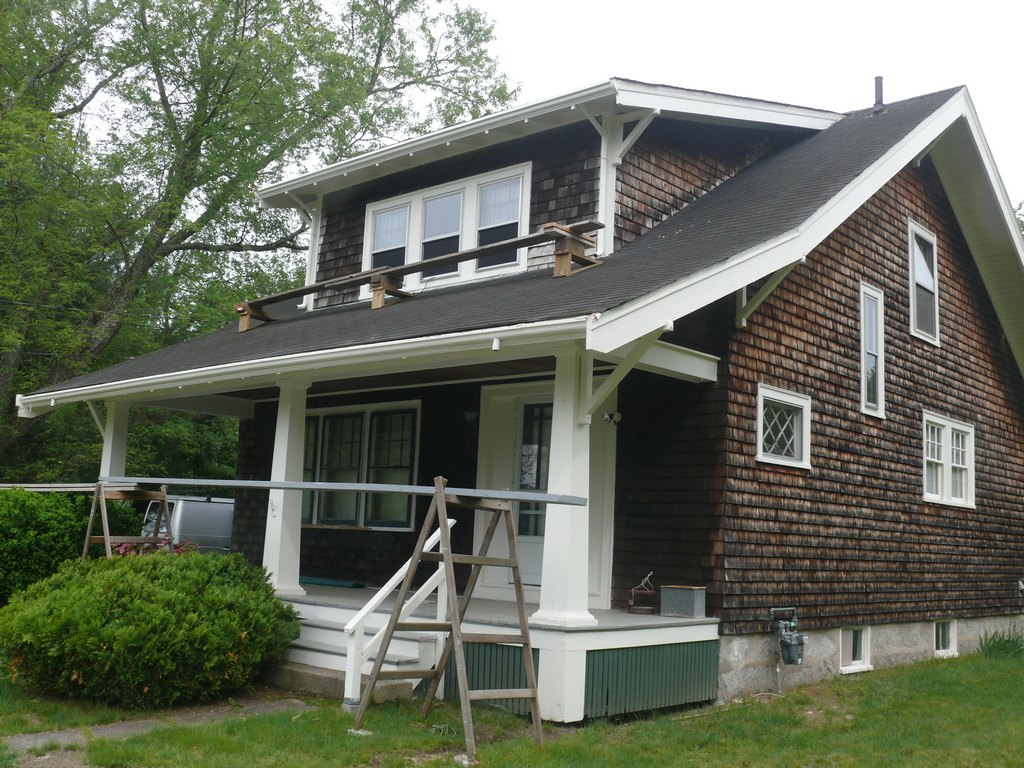
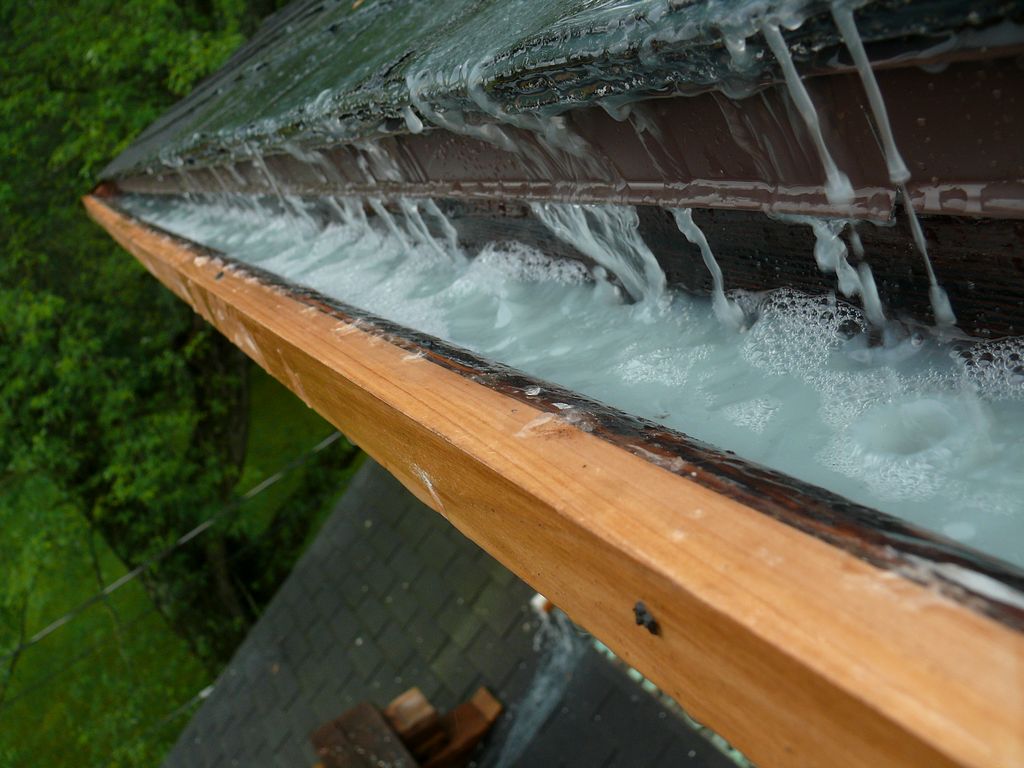
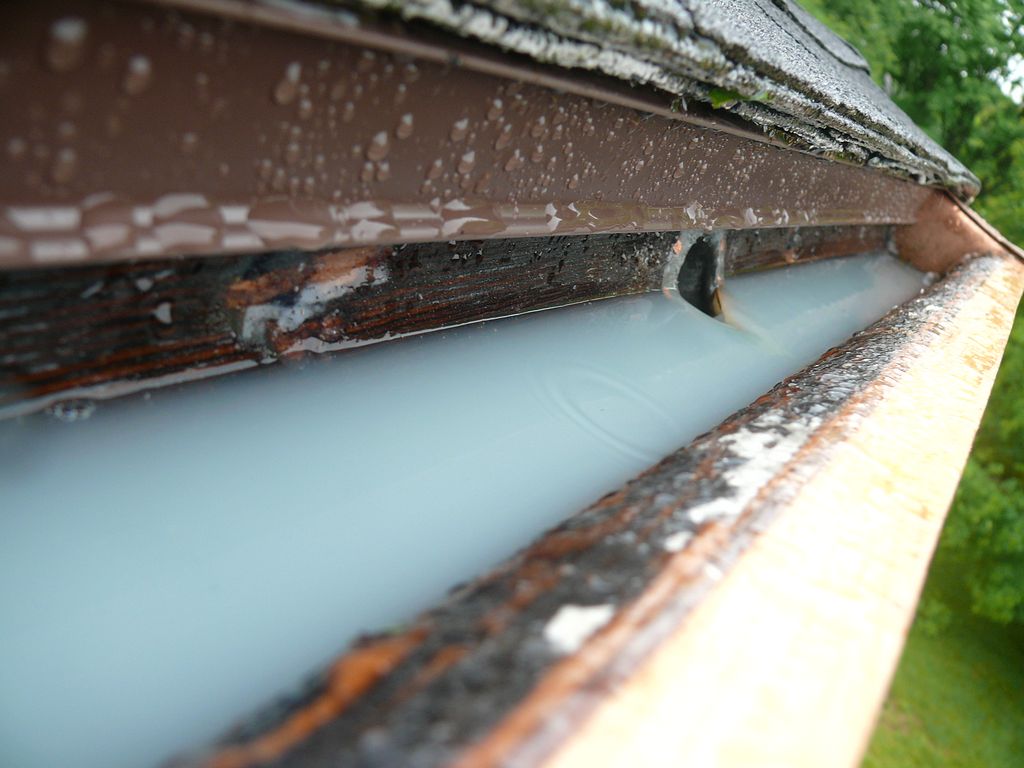
| - 37 - Next on the agenda is to refurbish the original 93 year old, old growth wood gutter on the main house. You can see the arch in this gutter and that is why it overflows at the ends in heavy rains. As a result of this incessant overflowing at the ends, repairs have been made in the past where the gutter ends were replaced. Luckily these appear in good condition but sad to say the large rafter ends are rotted behind the recent paint job. |